Sometimes we want to copy a SharePoint Site page to another SharePoint site, it can be for multiple purposes like testing, duplication and more. As we all know creating similar page will requires much time and why should we waste our time if we have the option to copy site page. In this article, we will learn how to copy site pages from one SharePoint site to another or in same site.
I am going to break this topic for better understanding. We have two options:
- We can copy the SharePoint site page to the same location for the duplication or testing purpose.
- We can also copy the same SharePoint site page to another SharePoint site within the tenant.
Contents
We will discuss all the methods to copy SharePoint Site page one by one:
- Duplicate SharePoint Site Page in same SharePoint site using Admin center.
- Copy SharePoint site page to another site using Power Automate flow.
- Copy SharePoint site page to another site using Windows PowerShell.
First, we will need to fulfil some requirements to make the copy.
- Global Administrator or SharePoint Administrator permissions.
- Source and destination sites must be within the same Microsoft 365 tenant.
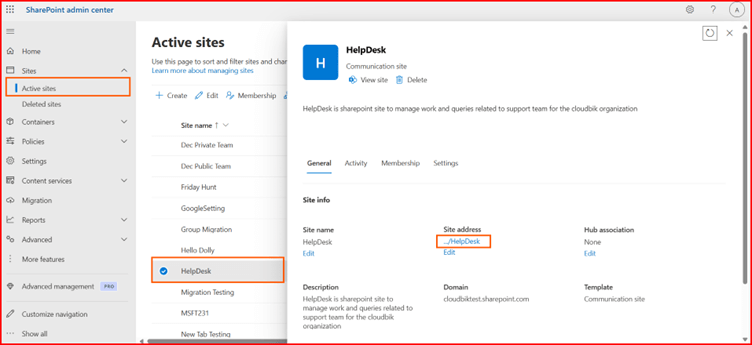
- Visit SharePoint admin center.
- Click on active sites and open the site whose page you want to copy.
- Now open your site pages, click on three dots next to your page and the click on the copy to button.
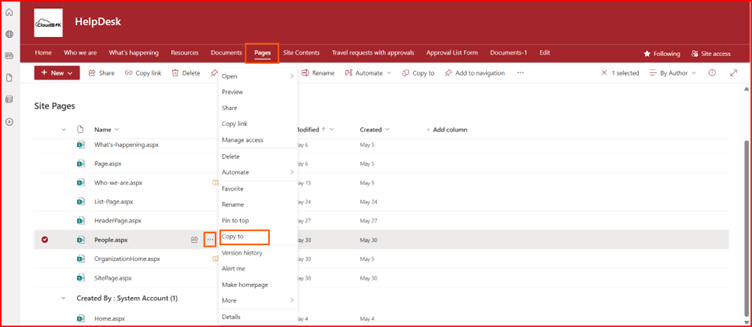
- In the pop-up window, click on the copy here. It will create a duplicate copy of your site page in the same site.
You can choose to copy multiple pages one by one.
Below are some perquisites for this process:
- Access to Power Automate (https://make.powerautomate.com).
- Permissions to access both source and destination SharePoint sites.
- Familiarity with Power Automate flows and SharePoint connectors.
- Open Microsoft Power Automate web application (https://make.powerautomate.com).
- Click on create and then choose Instant cloud flow. (You can also choose automated cloud flow, but the steps will be different)
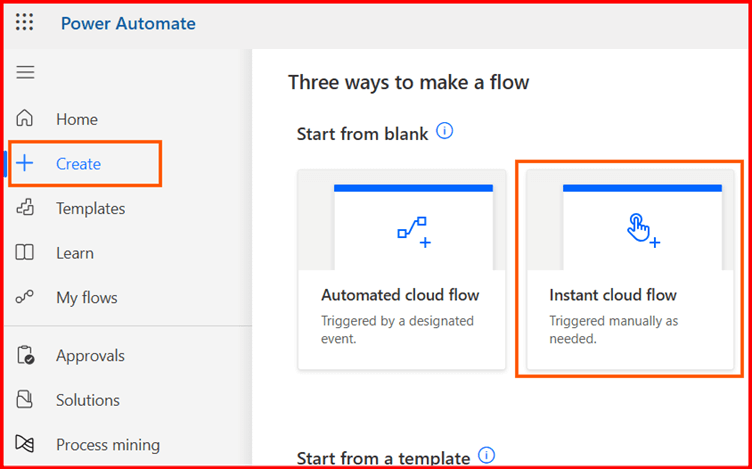
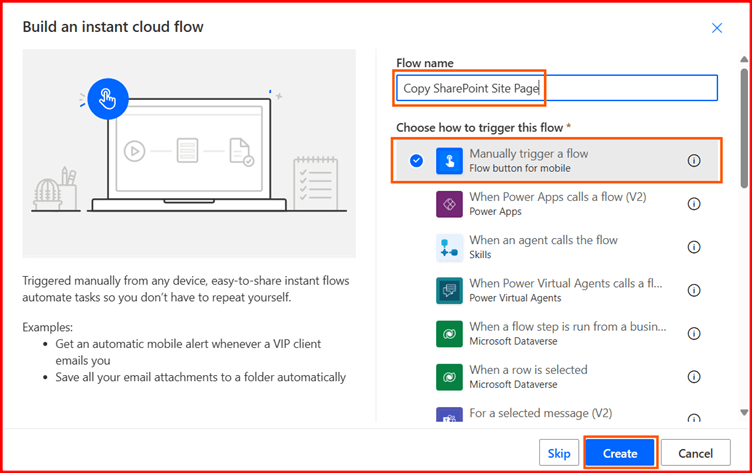
- Give flow a name, choose Manually trigger a flow and then click on Create.
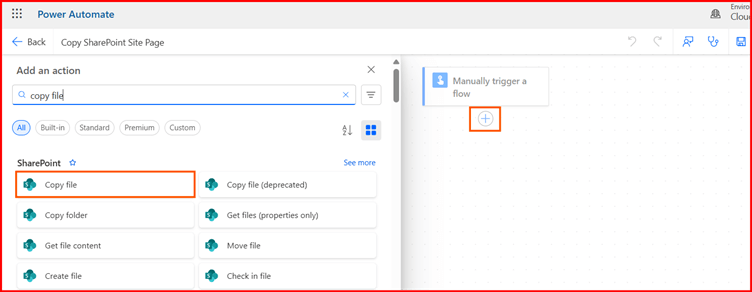
- Click on the plus button, search for the copy file and choose the same under SharePoint.
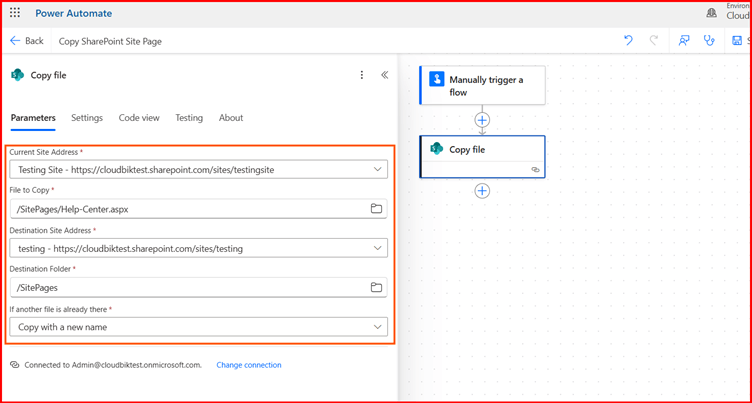
- Now fill all the details as below:
- Current Site Address
- File(page) to copy
- Destination Site Address
- Destination Folder
- If file is already there, then what you want to do.
- Once done, save the flow and then click on Test button to run it.
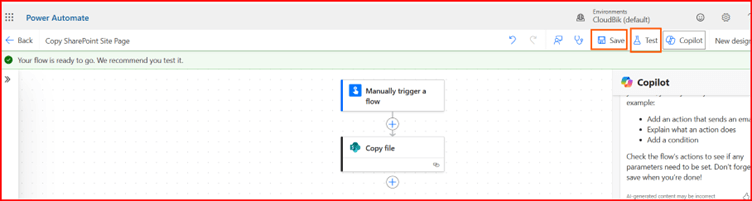
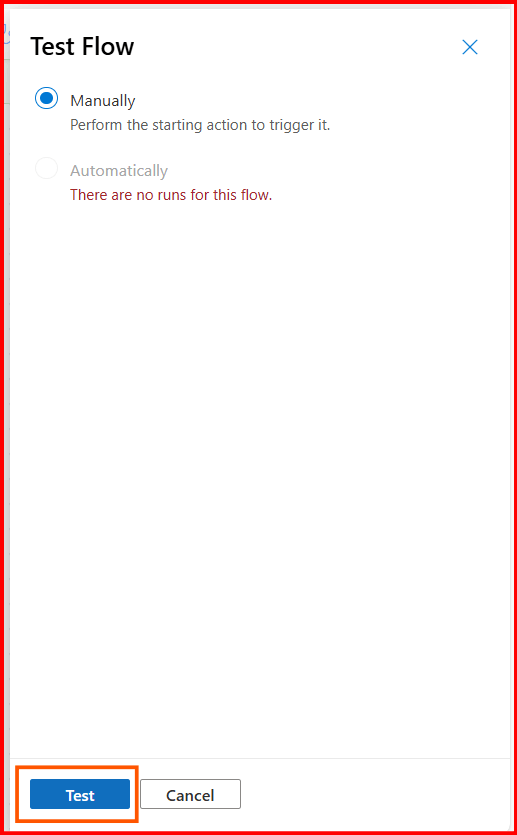
- In the pop-up window, choose manually and then click test.
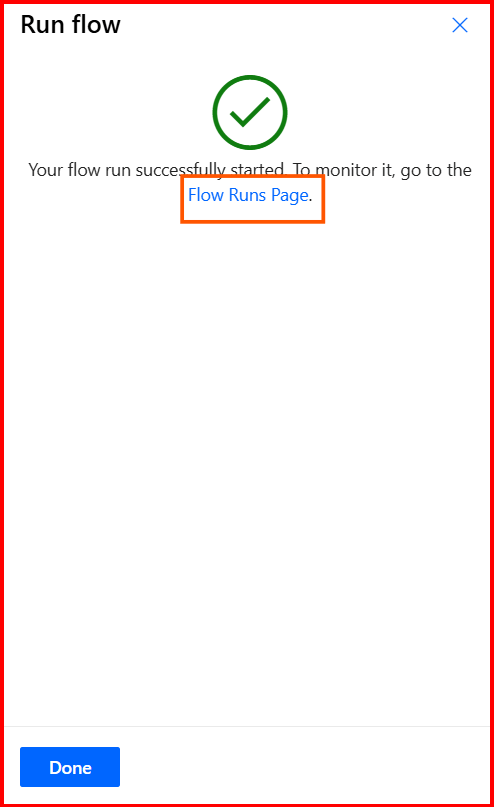
- In the next step, it will check for permissions, click continue and then click on the run flow. It will show you like “your flow run successfully started”. Here click on the Flow Runs page to see the status of the test.
- You can see below that the test has been succeeded, and our power automate flow is perfect.

Now, we will go ahead towards the PowerShell method.
PowerShell offers an automated and quick way to copy SharePoint site pages, ideal for handling multiple pages or sites.
Prerequisites
- PnP PowerShell module installed.
Install-Module -Name PnP.PowerShell -Force
- SharePoint Administrator or Site Collection Administrator permissions.
- Source and destination site URLs and admin credentials.
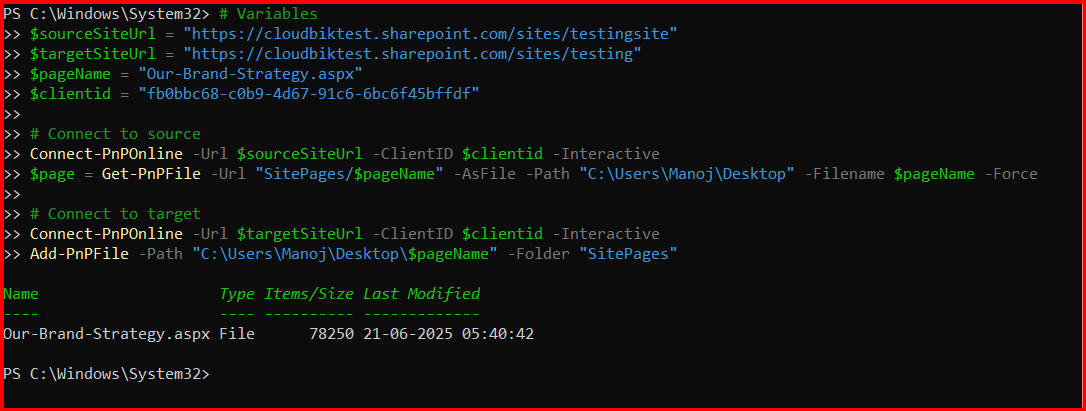
- Run Windows PowerShell 7 as administrator and install all the required modules.
- Register PnpEntraIdApp
Register-PnPEntraIDAppForInteractiveLogin -ApplicationName "PnP PowerShell" -SharePointDelegatePermissions "AllSites.FullControl" -Tenant cloudbiktest.onmicrosoft.com -Interactive
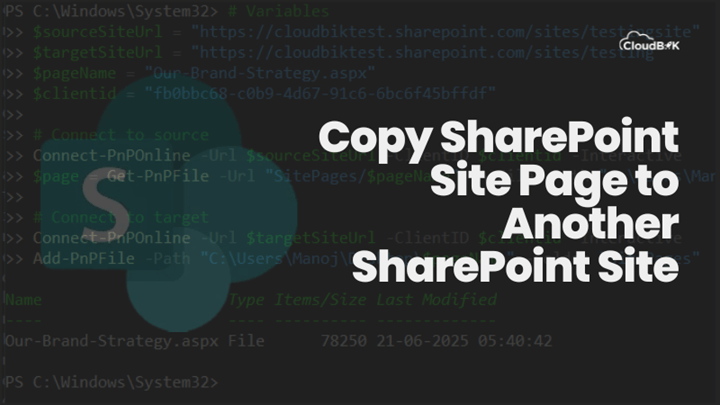
- Once done, run the below command after making the required changes in the command.
# Variables

$sourceSiteUrl = "https://cloudbiktest.sharepoint.com/sites/testingsite"

$targetSiteUrl = "https://cloudbiktest.sharepoint.com/sites/testing"

$pageName = "Our-Brand-Strategy.aspx"

$clientid = "fb0bbc68-c0b9-4d67-81c7-6bc6f45bffdf"


# Connect to source

Connect-PnPOnline -Url $sourceSiteUrl -ClientID $clientid -Interactive

$page = Get-PnPFile -Url "SitePages/$pageName" -AsFile -Path "C:\Users\Manoj\Desktop" -Filename $pageName -Force


# Connect to target

Connect-PnPOnline -Url $targetSiteUrl -ClientID $clientid -Interactive

Add-PnPFile -Path "C:\Users\Manoj\Desktop\$pageName" -Folder "SitePages"
Using all these methods you can successfully copy SharePoint site page to another site in the same tenant.
If you are getting access denied error, make sure you have the right permissions. You can connect to SharePoint Online PowerShell and then run the below command to disable DenyAddAndCustomizePages. I was also getting the same error when uploading the file.
Set-SPOSite -DenyAddAndCustomizePages $false -Identity https://cloudbiktest.sharepoint.com/sites/testing
Conclusion
Copying SharePoint site page to another site can save you time in creating same page. It can be done through the Power Automate or you can use the PowerShell for the same. However, to duplicate page in same SharePoint site, you can use the SharePoint site page “copy to” function. I have described all the possible ways in this article. Let me know if you have any questions.