Videos are modern way of communication, from training sessions to tutorials, and Microsoft 365 makes it easy to store and share them across platforms like SharePoint and OneDrive. Trimming a video stored in SharePoint or OneDrive can help you to remove unnecessary part from the video to make it short and professional. In this blog, we will see how to trim a video stored in SharePoint using Microsoft stream.
Contents
Using Microsoft Stream for Non-Destructive Trimming
Microsoft Stream offers a powerful, non-destructive trimming feature for videos stored in Microsoft 365. Unlike traditional editing, this method hides trimmed sections without modifying the original file, allowing users with edit permissions to revert changes anytime. Users with view permissions will be able to see the trimmed video only.
How to Trim a Video in Stream:
- Navigate to the video in SharePoint or OneDrive.
- Open the video in the Stream web player.
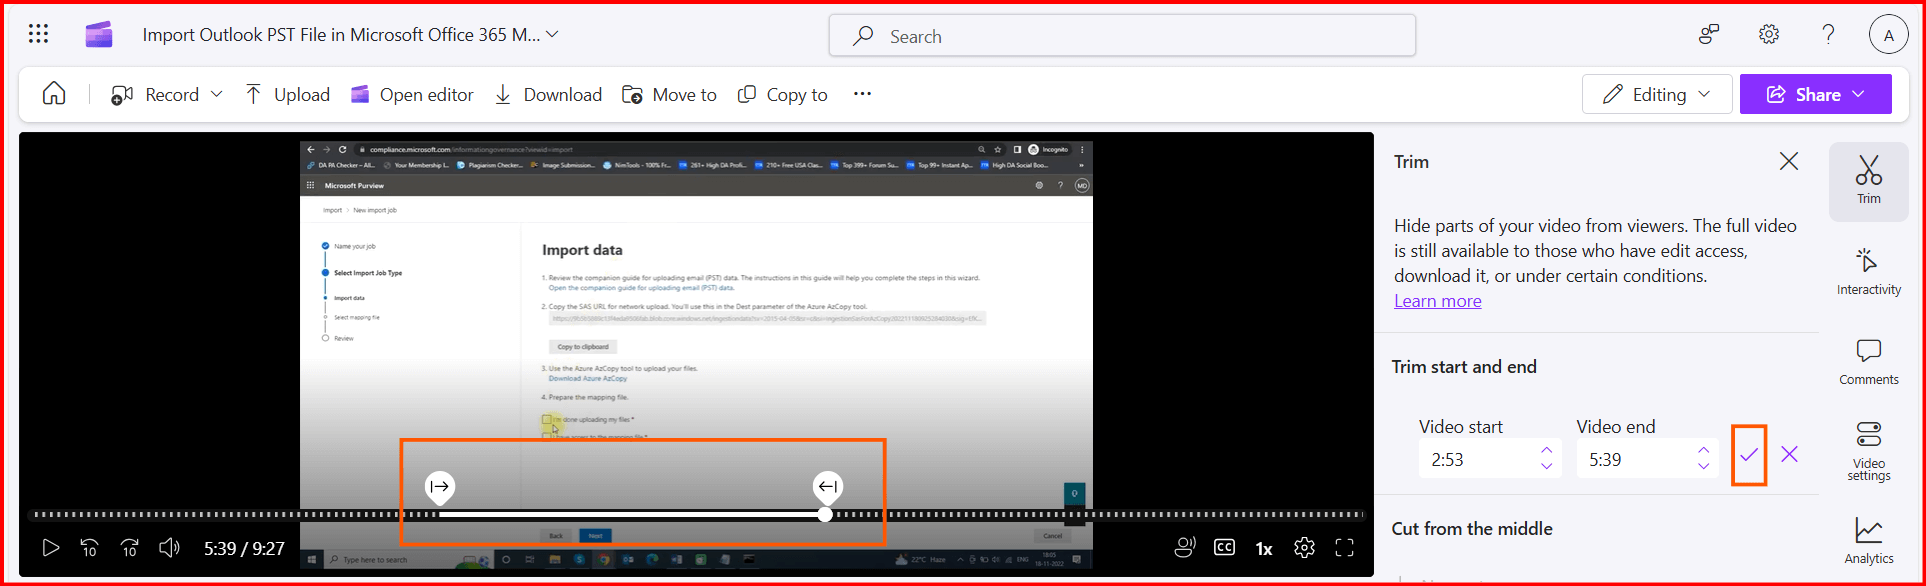
- In the “Trim start and end” section, drag the timeline handles to set the start and end points. Alternatively, you can enter the “Video start” and “Video end”. Once done click on the check button.
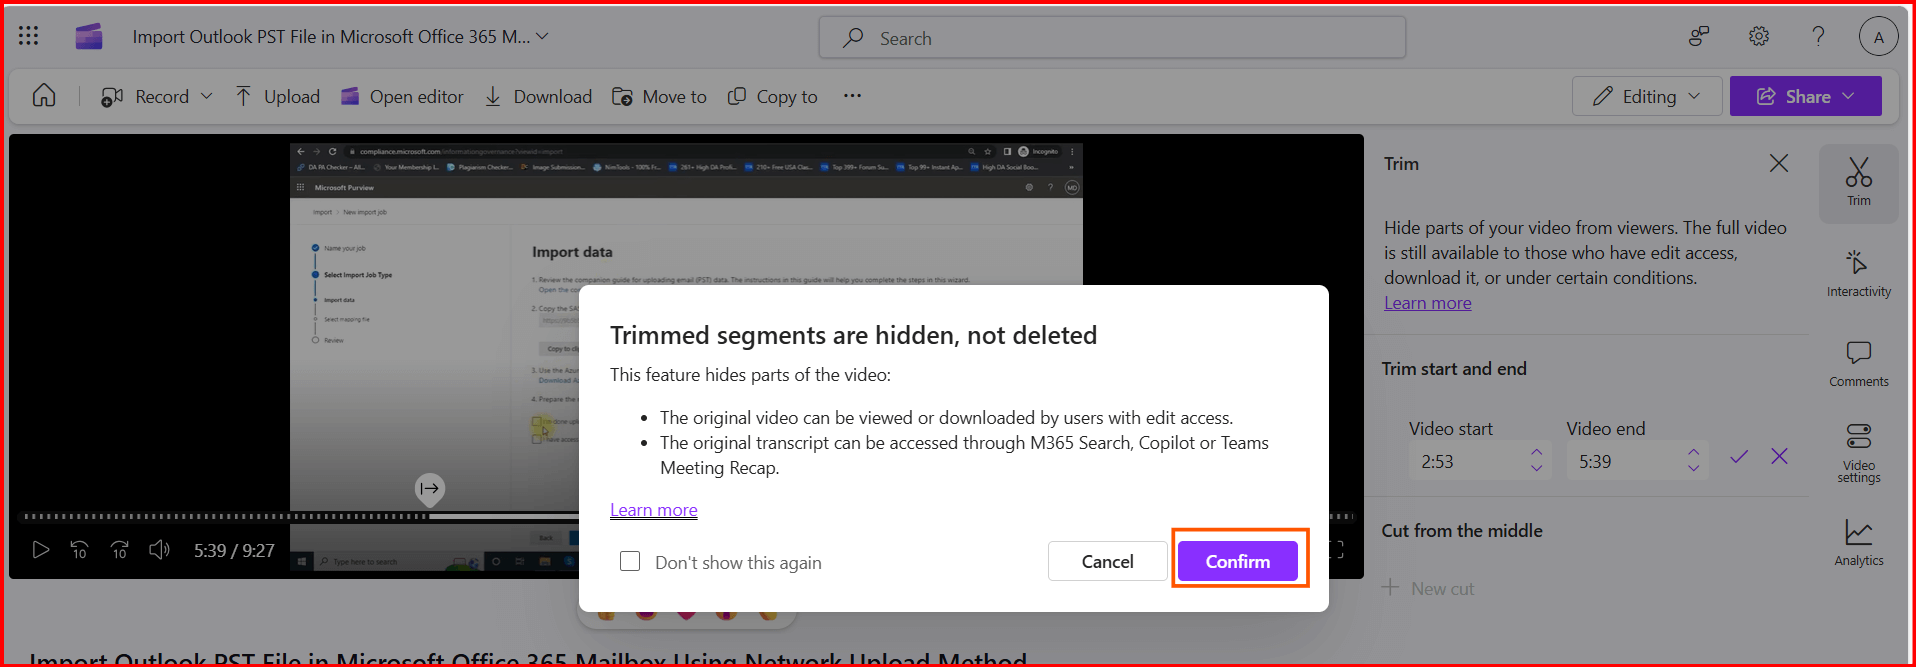
- Now click on the confirm button in the popup to trim the selected section.
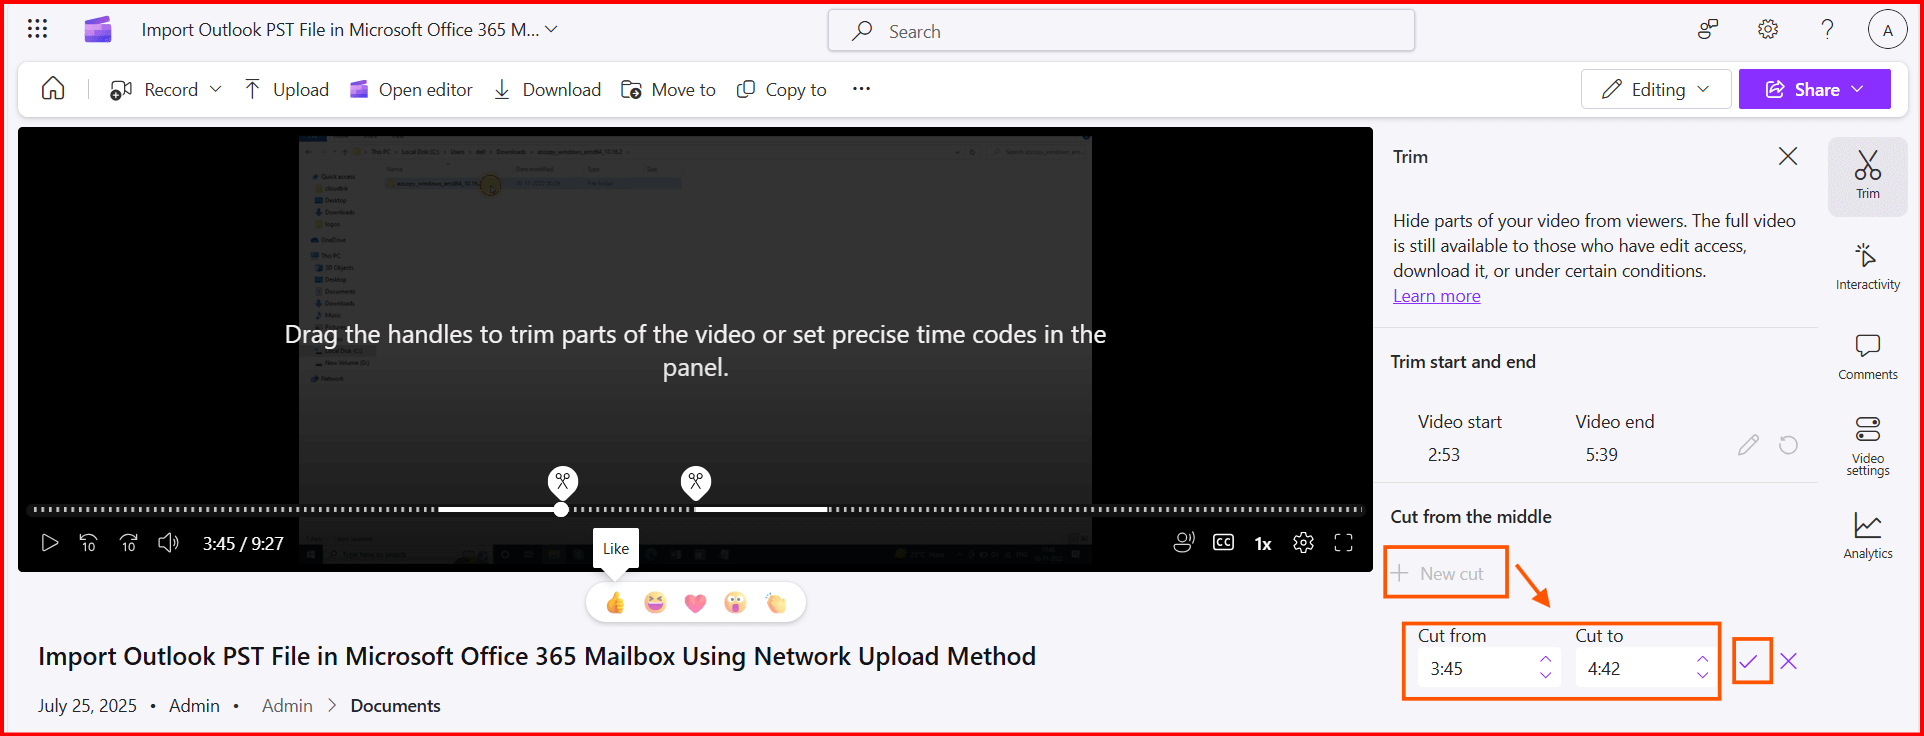
- To remove middle sections, select “+ New cut” in the “Cut from the middle” section and adjust the handles. Click the checkmark to save.
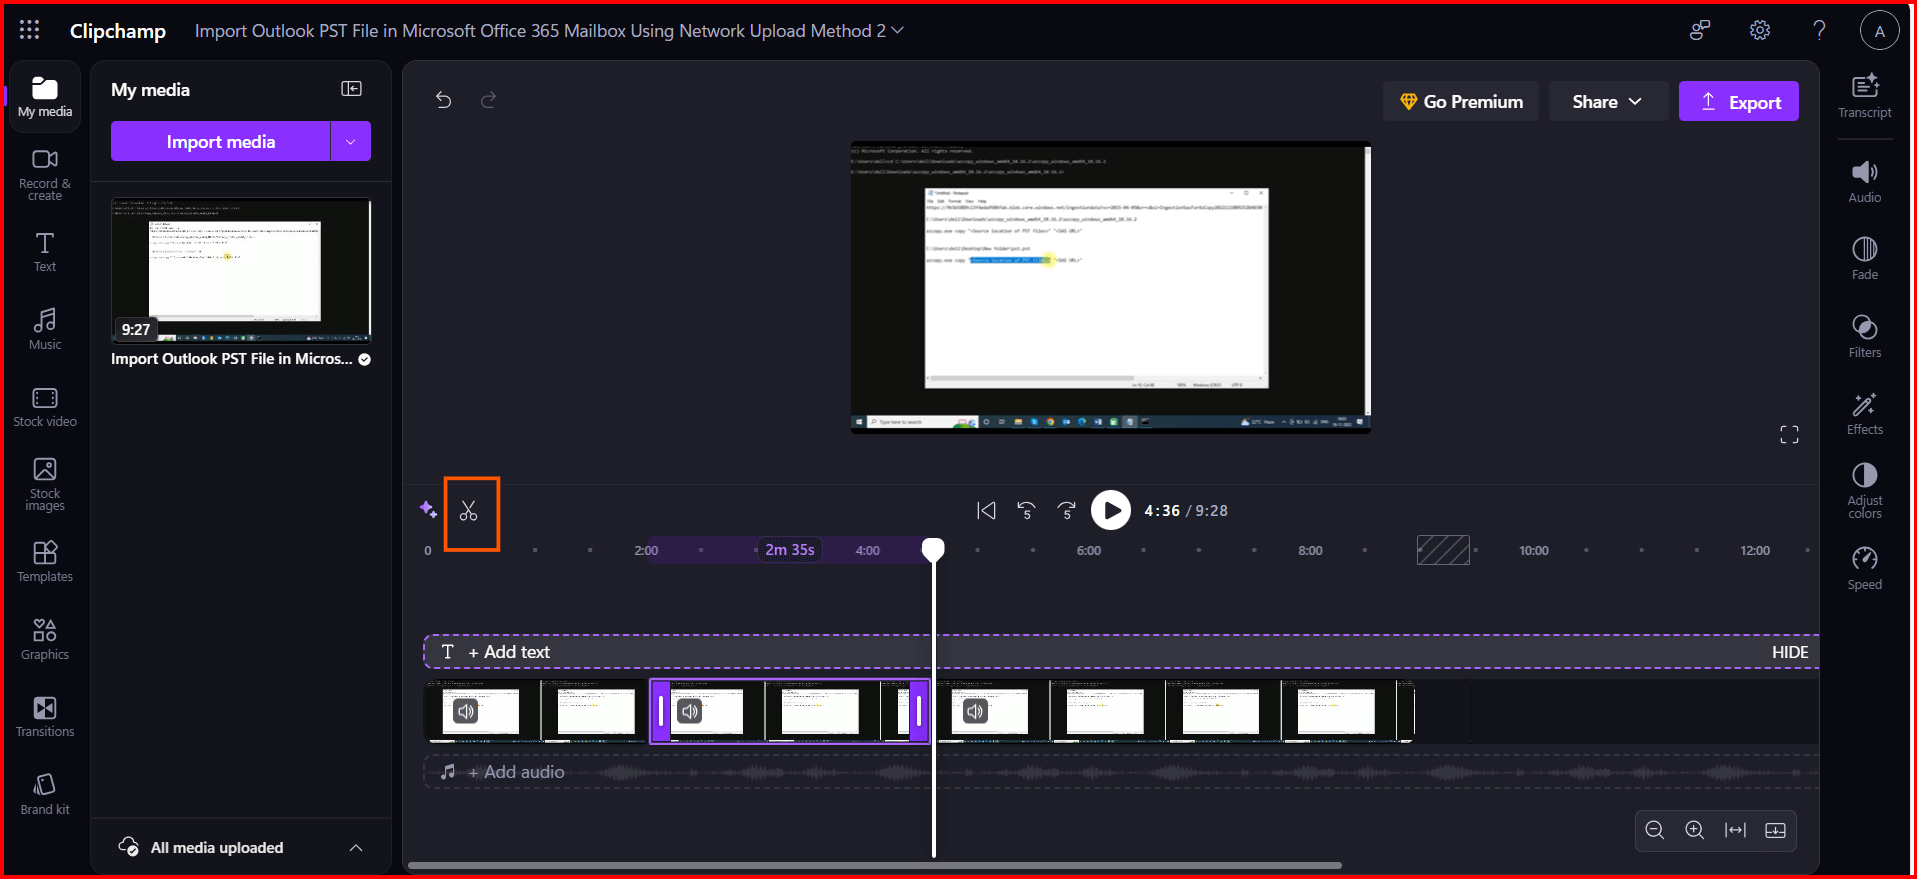
Use Clipchamp’s Video Player for Trim a Video and Full Editing
For users with a Microsoft 365 license that includes Clipchamp, the video player in OneDrive, SharePoint, and other OneDrive offers a quick trimming option as well as full editor. For quick trimming, open the Clipchamp app and then open any video in it. After opening the video, use the same procedure as described above.
Steps to Full Editing with Clipchamp’s Editor:
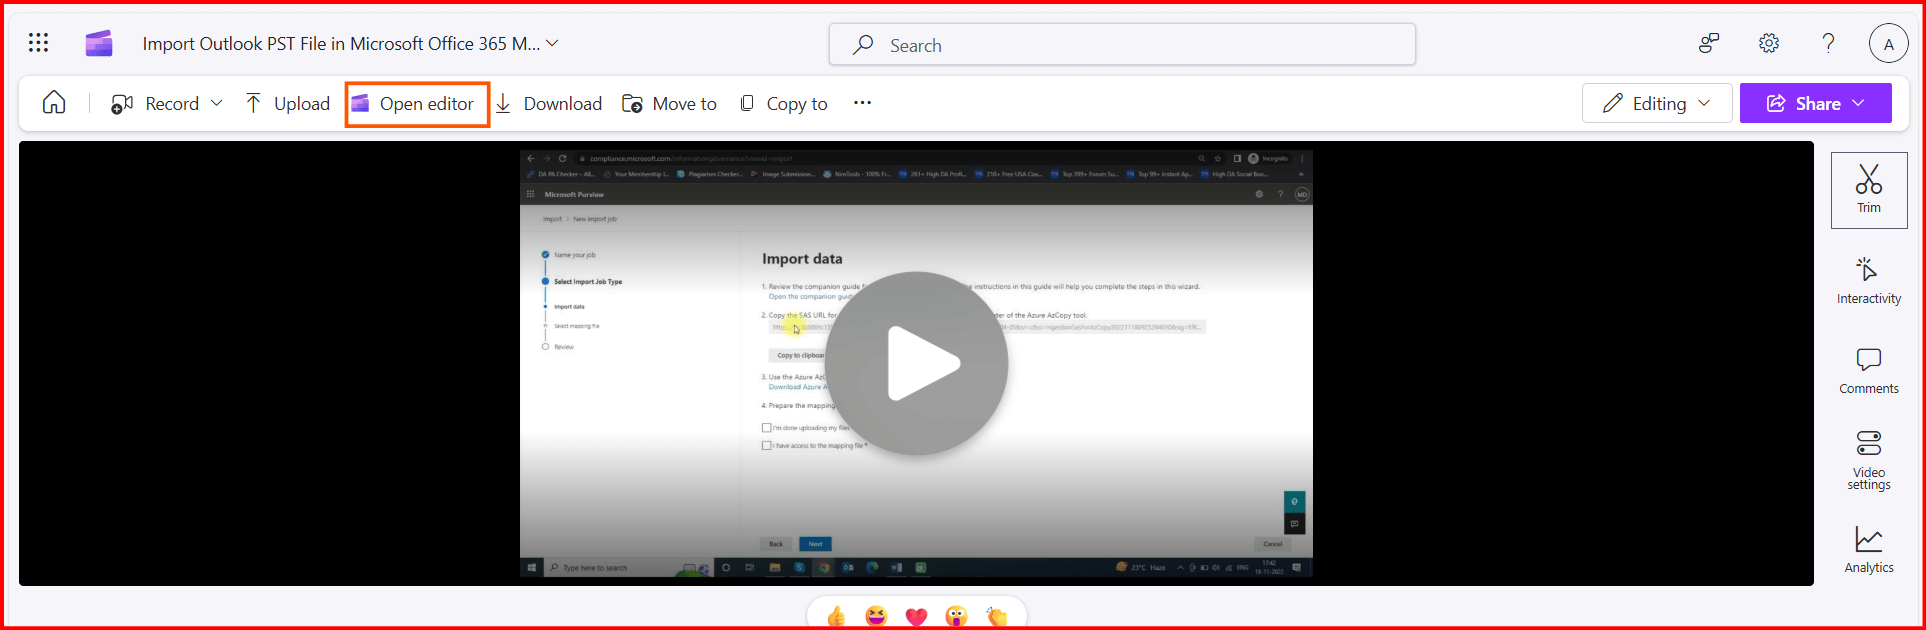
- Open the video and click on the Open editor.
- Now split the video, remove unnecessary sections and gaps from the video.
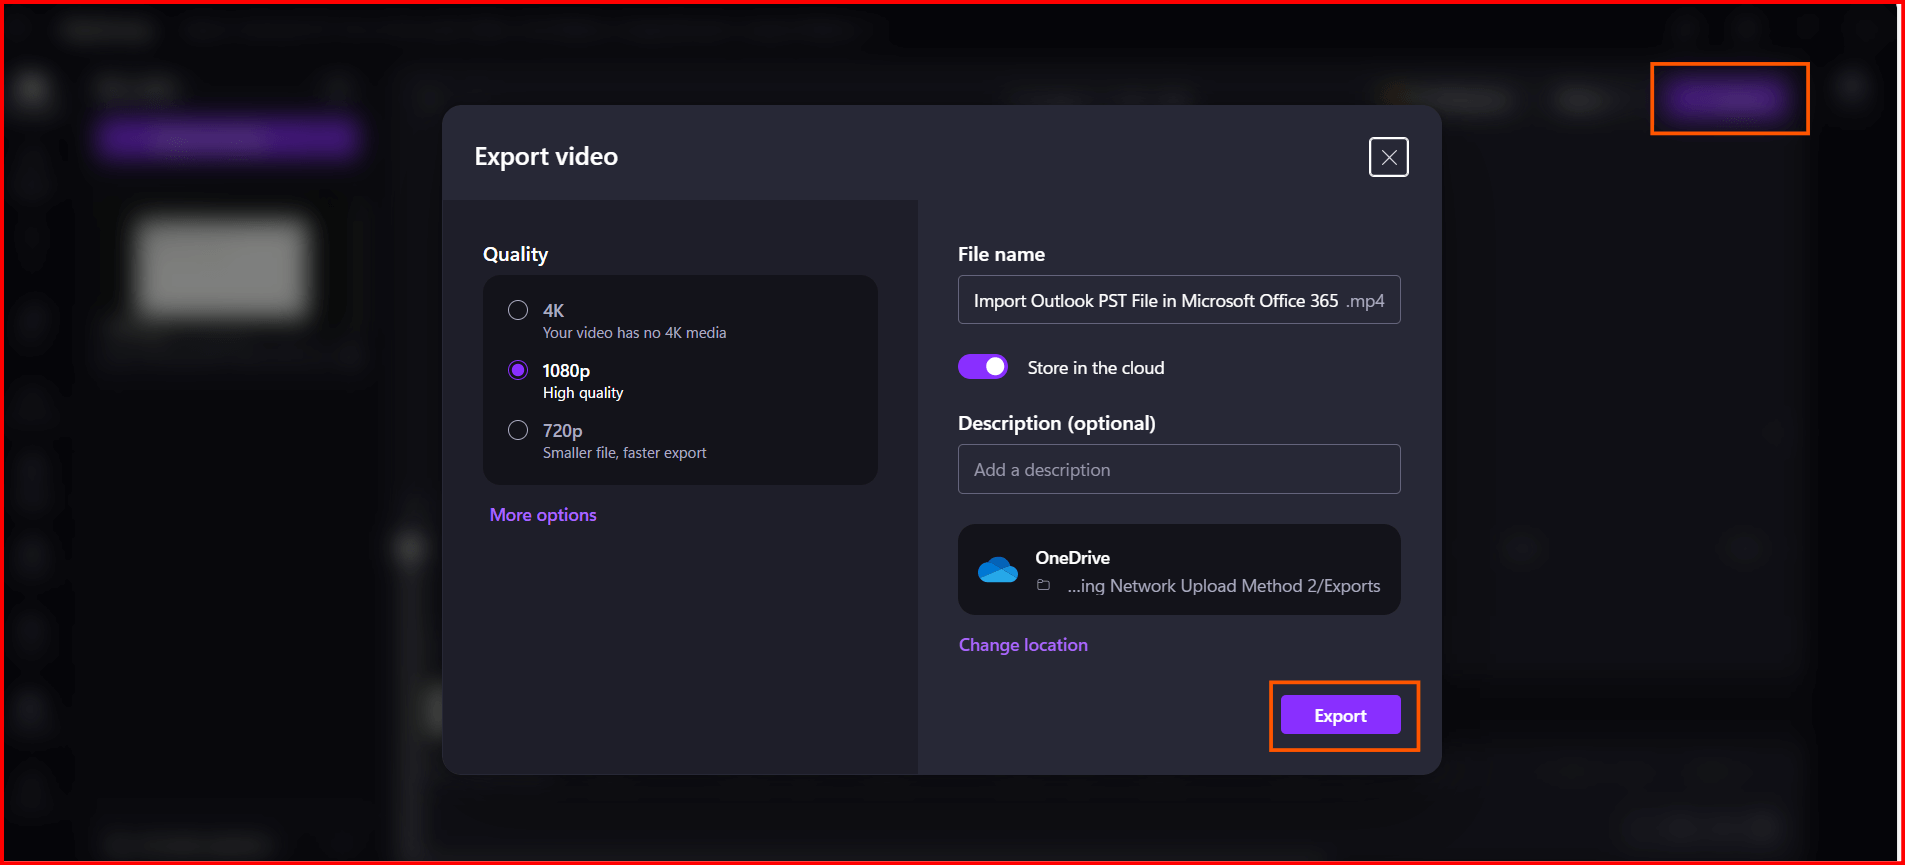
- Once all editing done, click on the Export button and choose desired options and again click on the Export button to save your trimmed video.
Now you can share the exported video, and all users will be able to see the trimmed part only.
Practical Tips for Effective Video Trimming
- Preview Before Saving: Use Stream’s preview mode to ensure the trimmed video flows naturally for your audience.
- Trim Early in the Workflow: Trim videos before adding manual transcript edits, as trimming can reset custom transcripts.
- Check Permissions: Ensure only authorized users have edit access to prevent access to untrimmed content.
- Use Clipchamp for Advanced Edits: For cuts requiring permanent removal, export a new video via Clipchamp’s editor and replace the original in SharePoint.
Conclusion
This blog describes practical way to Trim a video in SharePoint or OneDrive using the Clipchamp or Microsoft Stream. Microsoft Stream and Clipchamp’s video player offer user-friendly, non-destructive trimming options for making the video shorter and professional. Doesn’t matter if you are trimming meeting recordings or promotional videos, these tools can help you to make your content better by trimming the unnecessary part.