SharePoint is a powerful collaboration platform that enables teams to store, organize, and share files and documents. While accessing SharePoint through a web browser is convenient but adding it to your local File Explorer can further enhance productivity. In this article, we will provide you with a step-by-step guide on how to add SharePoint to file explorer and explore the benefits of syncing SharePoint with OneDrive using the sync to OneDrive feature.
Contents
Syncing SharePoint with OneDrive to access library in the file explorer offers several advantages:
- Easy access: By adding SharePoint to File Explorer, you can directly access your synced libraries from your desktop without needing to navigate through web browsers.
- Offline availability: Synced libraries are available offline, allowing you to work on files even when an internet connection is not available. Changes made while offline will automatically sync once a connection is established.
- Enhanced collaboration: Collaborating on documents becomes streamlined as all team members have immediate access to synced files in their local file system.
- Familiar interface: Working within the familiar environment of File Explorer makes navigating and managing files in SharePoint easier for users familiar to this interface.
Step 1: Install and Sign into OneDrive.
- Download OneDrive for Business from Microsoft’s official website if you do not have installed it yet.
- Once installed open OneDrive and sign in using your Microsoft 365 account credentials.
- Go to office.com and open SharePoint Online.
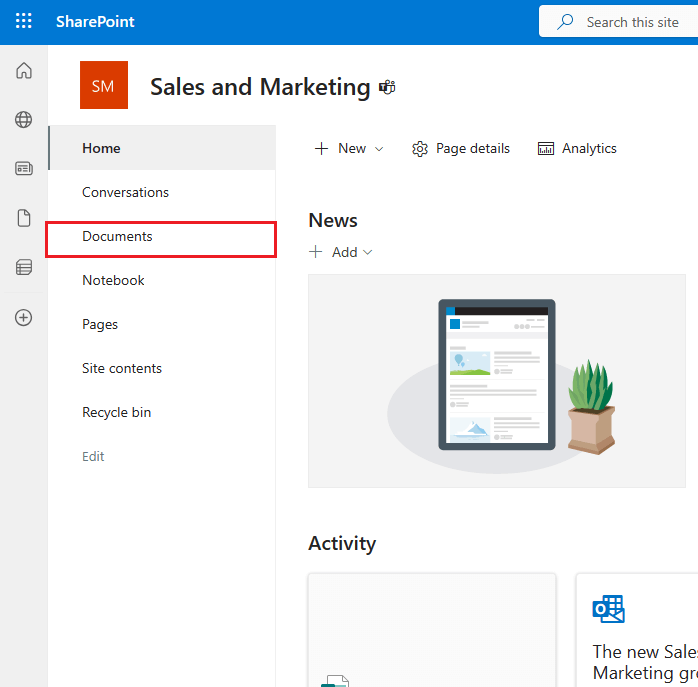
- Once you enter into the SharePoint, open the SharePoint site that you want to sync with OneDrive for Business. You can also search for the site name if it is not showing to you.
- After entering into the SharePoint Site, click on the documents showing on the left side.
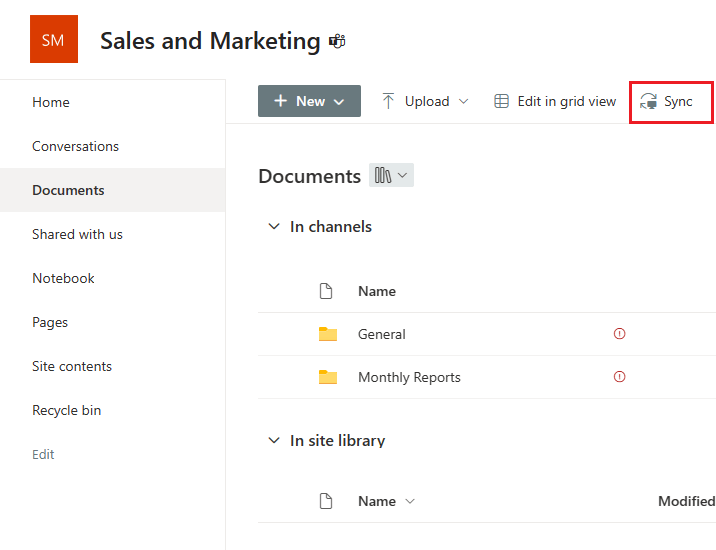
- In the documents, click on the Sync button.
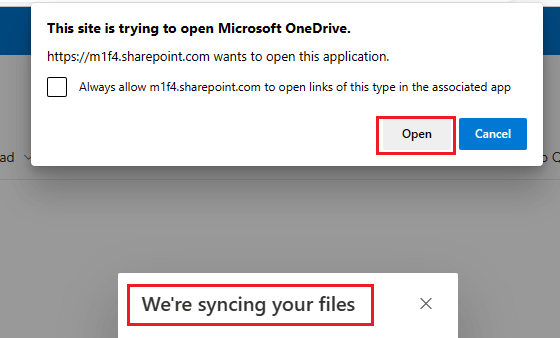
- It will ask you to Open OneDrive, click on the Open.
That’s it. We have successfully completed steps for syncing SharePoint to OneDrive. Also this way you can sync files from OneDrive to SharePoint as adding files to these OneDrive folders will automatically be added to the respectively SharePoint Site. Now we will see how to access SharePoint Library in the file explorer.
Step 3: Access Synced Libraries/Folders in File Explorer
Open the File Explorer and in the left sidebar you can see the MSFT SharePoint Library.
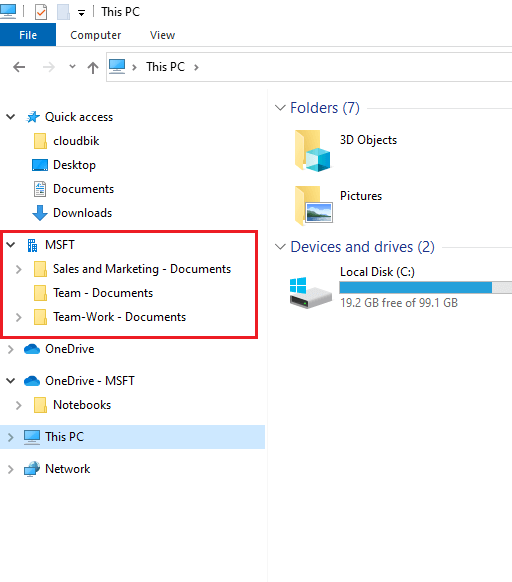
To access documents of the multiple sites, you must follow the same procedure. Sync each site that you want to add to the File Explorer.
With the above steps one can easily sync SharePoint document library. Also, you can add any file in the file explorer SharePoint Document folder to sync that to the SharePoint site also.
Note: Change made in these files will be automatically synced with the Cloud Documents. Everyone with the access can see the changes in the files saved in the SharePoint Site.
Conclusion:
This article describes how to add SharePoint to file explorer. By adding SharePoint Sites to File Explorer through sync OneDrive feature, you can enjoy easy access, offline availability, enhanced collaboration opportunities, and a familiar interface when working with documents stored in SharePoint libraries. Follow our step-by-step guide outlined above to sync SharePoint to OneDrive today and unlock new levels of productivity within your team!
Read More: Delete SharePoint Site

