
Staying connected and productive in the fast-moving digital world depends on having effective communication. One of the most popular email clients, Outlook, provides a number of tools to improve and streamline email management. One of the features has the ability to send emails to multiple recipients at the same time by creating the email group. In Outlook, we can create an email group in three different ways: as a distribution group, as a personal group (also known as a contact list), or as an email group that we can extend using Teams, SharePoint, etc. In this blog, we will learn all three different ways to create email group in Outlook.
Contents
Distribution List vs. Email Group vs. Contact List
As earlier stated, there are simply three methods in which you can make a group in Outlook. Every one of them has benefits and purposes of its own. It is simple to email several recipients at once because they are all serving the same function.
Basically, a contact list that you can create is called a Contact List (Contact Group in Outlook 2019). You can easily send an email to multiple recipients by adding multiple internal or external email addresses to the list.
The main distinction between distribution lists and contact lists is that the former are shared with your colleagues. A distribution list is typically something that you will need to have created by your IT department.
An email group is the final choice. As an email group isn’t just for email, the name is now incorrect. In reality, when you create a new group in Outlook, you’re creating a Microsoft 365 Group, complete with an inbox, Teams, Planner, and SharePoint site.
| Contact List/ Group | Distribution List | Email Group | |
| Personal | X | ||
| Shared will colleague | X | X | |
| Both internal and external recipients are possible | X | X | X |
| Created by User | X | X | |
| Internal email address available | X | X | |
| Group Inbox | X | ||
| SharePoint, Team, Planner access | X |
Create Email Group in Outlook, Contact List, Contact Groups, Distribution List.
See the below steps to learn how to create email group, contact group, distribution list and contact list in Outlook.
Contact List in Outlook
Outlook Contact List, also called Contact Group, is an effective tool that lets users effectively manage and arrange their contacts in Microsoft Outlook. This feature is especially helpful for people and organizations that frequently need to communicate with particular groups of people. Outlook Contact Groups can be a useful tool whether you’re working on a project, organizing an event, or just want to simplify your communication process.
Process to create a Contact List/ Group
Below are the steps to create a contact list/group:
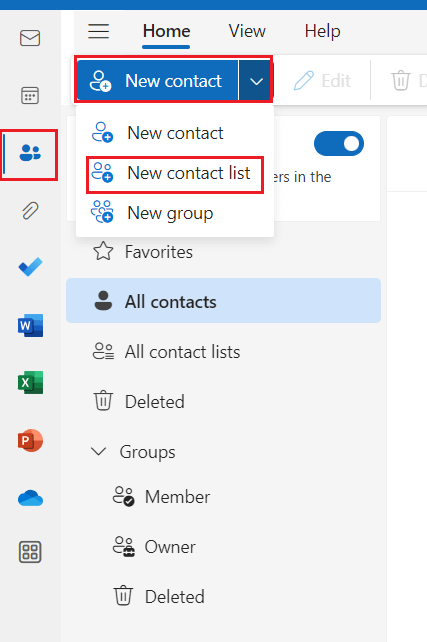
- Go to Outlook Online and select Contact.
- Go to People from the option and then select new contact and click on new contact list.
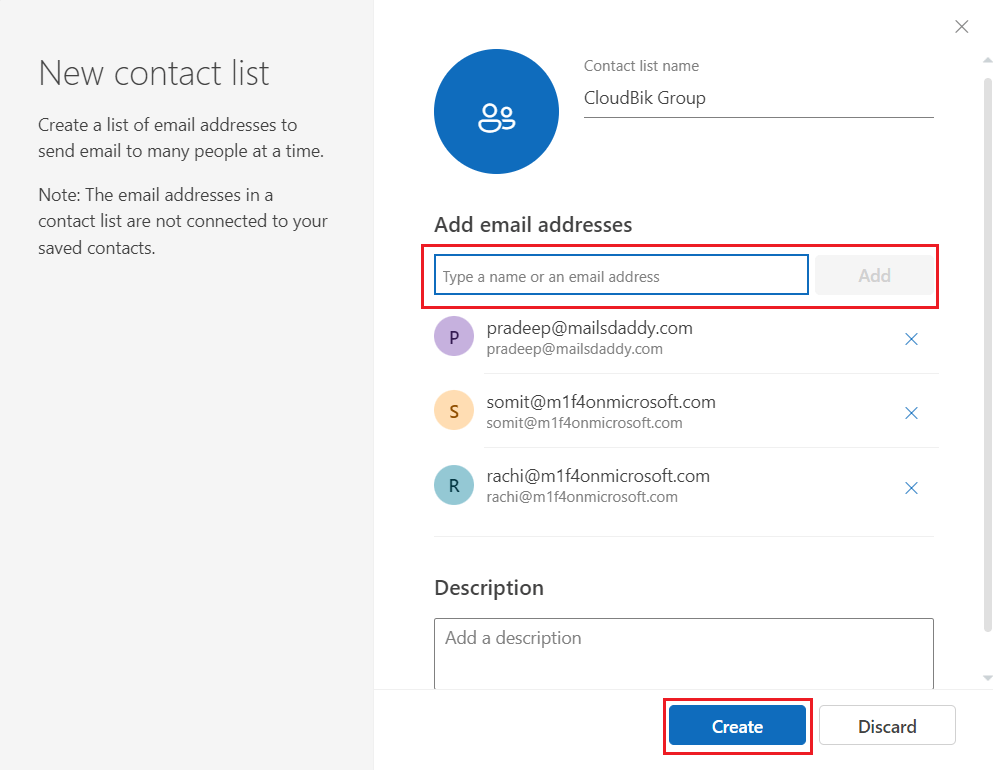
- We can now assign a name to our Contact list. You are free to give the list any name you choose because it is personal. The group name won’t be visible to your co-workers. The next action is to include the email addresses in the group and once completed, select create:
- In Outlook, you can easily add or remove contacts from the list by clicking on Groups. After choosing your list, you can edit the group by clicking Edit in the menu bar.
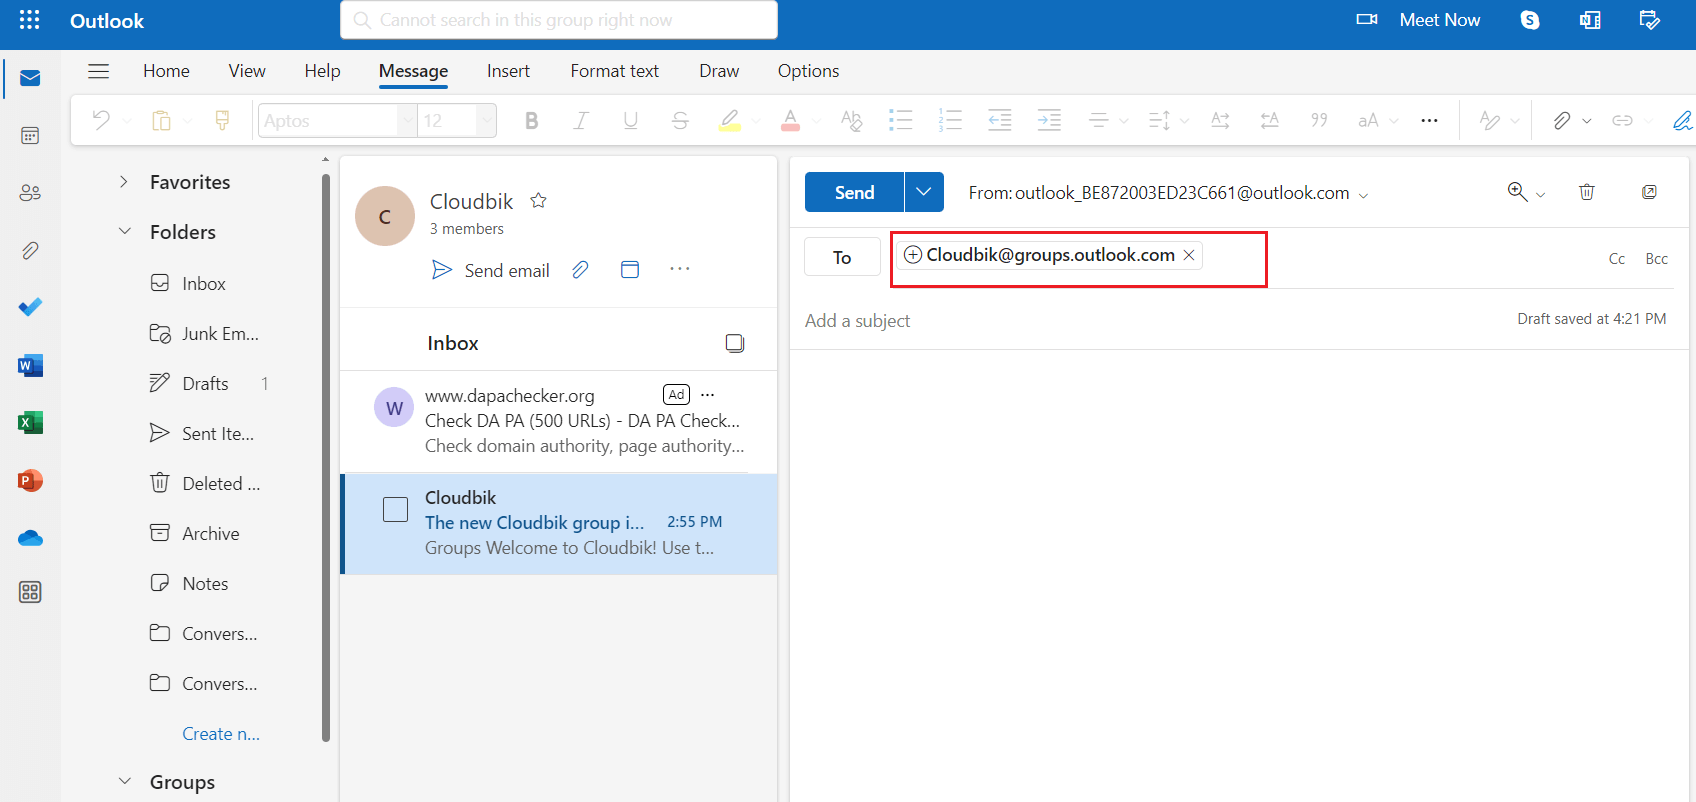
- Go to Mail, click on new mail and just starts typing the name of the group in the new mail section. You can see the name of the group members just by clicking on “+”.
Create a Contact Group in Outlook
You can create a contact group in Outlook if you are not using the new Outlook app. The idea is the same as for a contact list, and you’ll also notice that an Outlook contact group will show up in Outlook Online as a contact list.
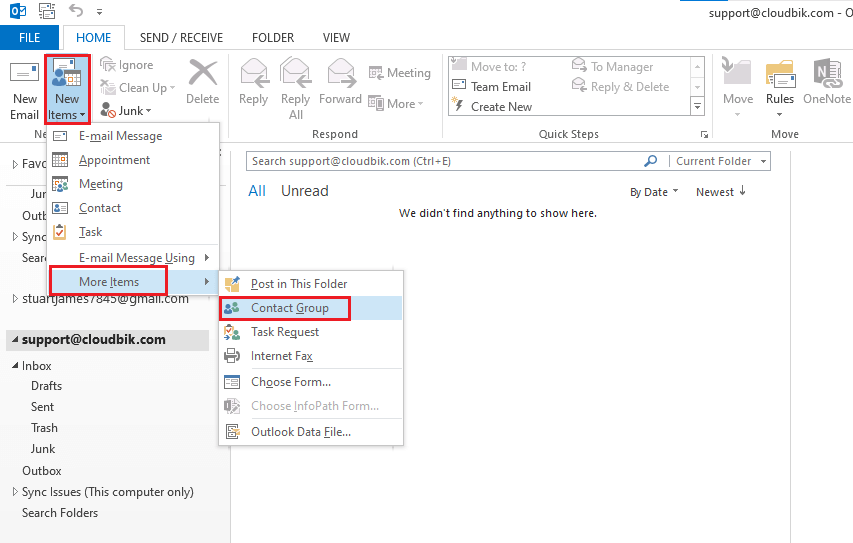
- Open the Outlook Application and click on new items then more items the choose Contact Group.
- Provide a name to Group and to Add members click on the add members tab and choose the appropriate option.
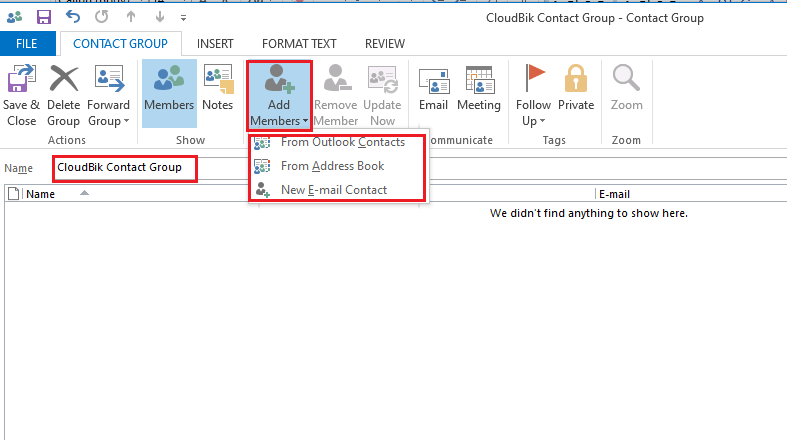
- You can now select the contact that you want to add to the group. If you don’t see all contacts, then change the Address Book to Global Address List. When done click on Ok and Save & Close in the menu bar (ribbon).
Create Email Group in Outlook
In reality, email groups are Microsoft 365 Groups. Though it shouldn’t be a problem, remember that a Microsoft 365 Group is more than just an email group. It also includes a planner, a Teams team, an inbox for the group, and a SharePoint site for file sharing.
Once more, let’s start by going over how to use the new Outlook app and Outlook Online:
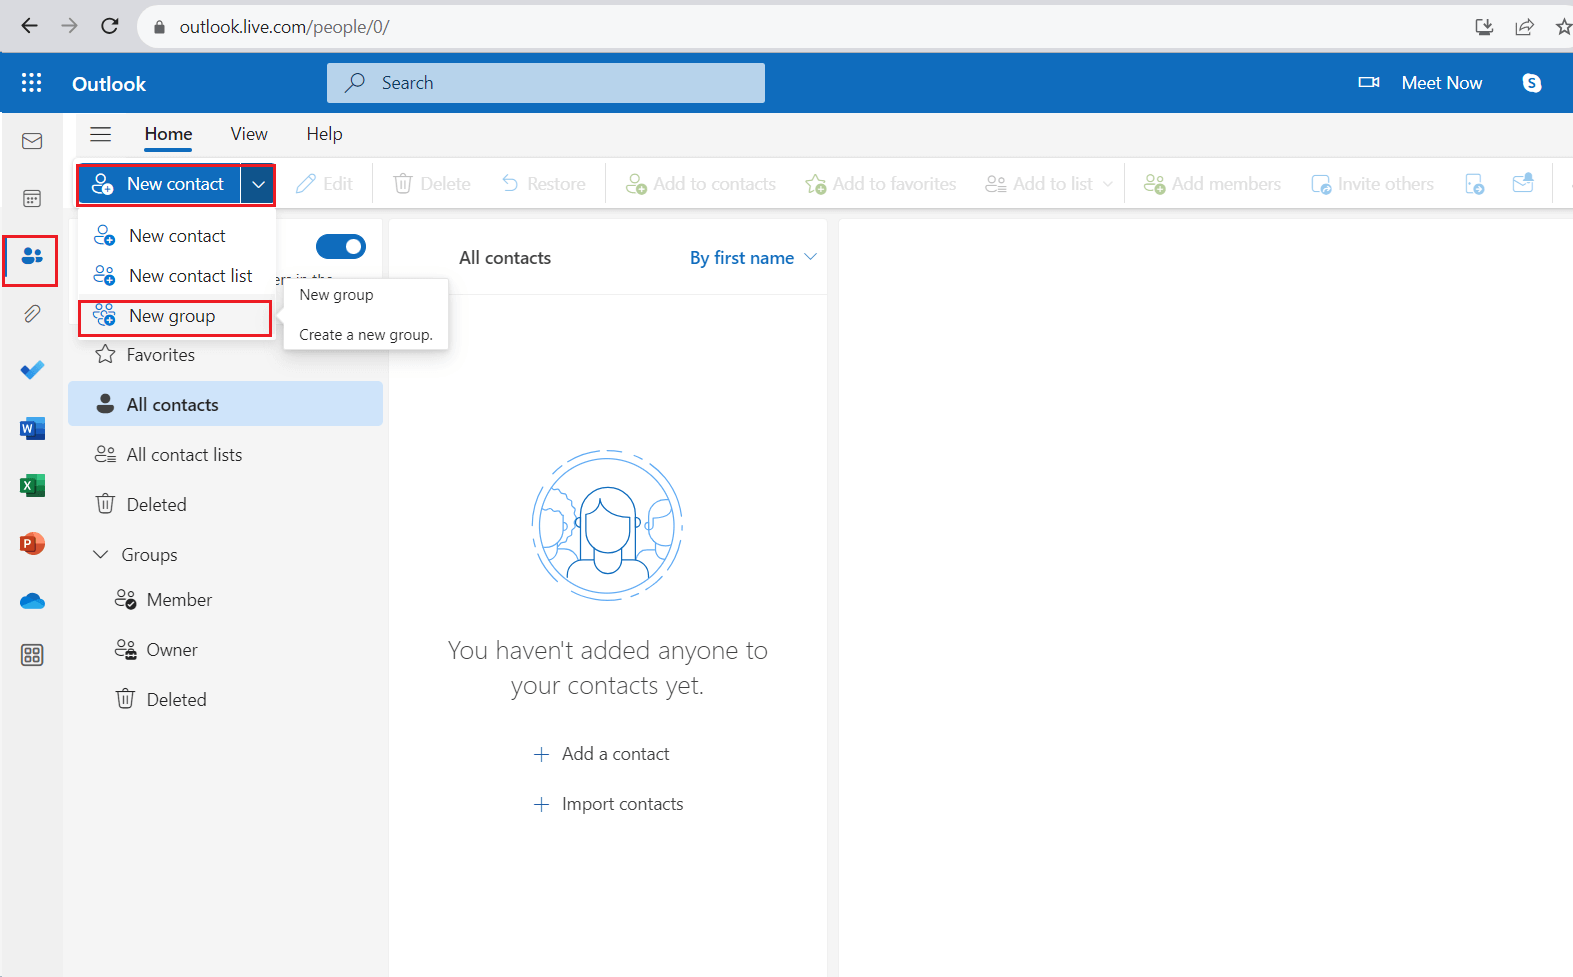
- Tap Contacts in Outlook Online. Click the dropdown arrow next to “New Contact and Select New Group.
- The group, like the contact list, must have a name. The requirement that the group name be different within your company makes this situation different. Add description about telling users the purpose of group (Optional). After finishing click on Create.
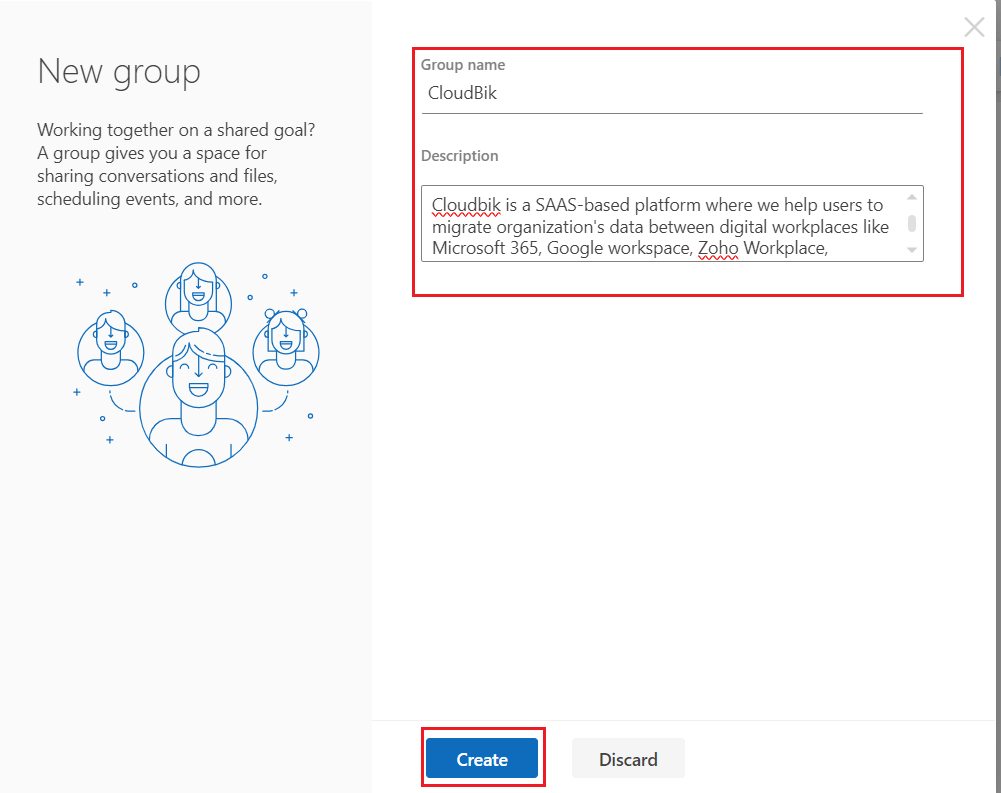
- Additionally, you have the option to modify the group’s privacy settings. By default, it is private, but you can make it public. Everyone is free to join the group without permission when it is set to public. After creating the group, we can add members.
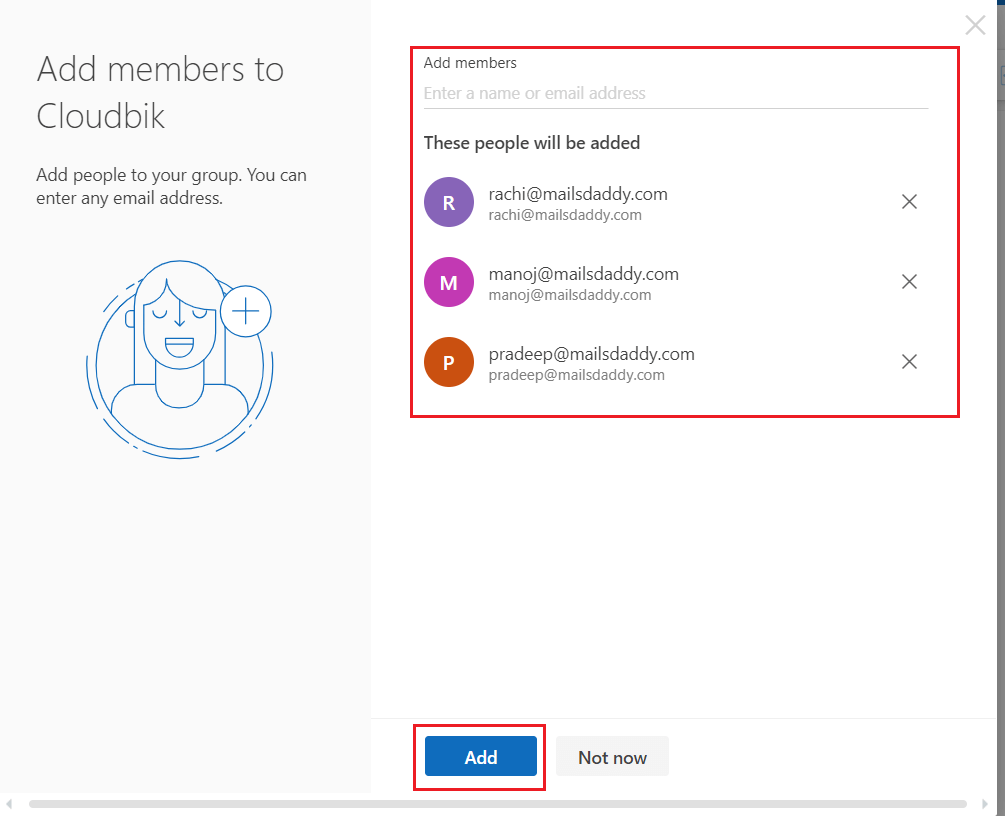
- Members of the group, both internal and external, can now be added. To add someone, just begin typing their email address or name. Once finished, select Add to include the members. An email confirming membership and the ability to begin working together will be sent to each member.
Using Outlook to Create a Distribution List
IT administrators are the only ones who can create distribution lists in Exchange Online; distribution lists cannot be created in Outlook. As previously mentioned in this article, you must first create a Contact List or Contract Group in Outlook before you can create a distribution list.
We must launch Microsoft 365 Admin Centre or Exchange Online in order to generate a distribution list.
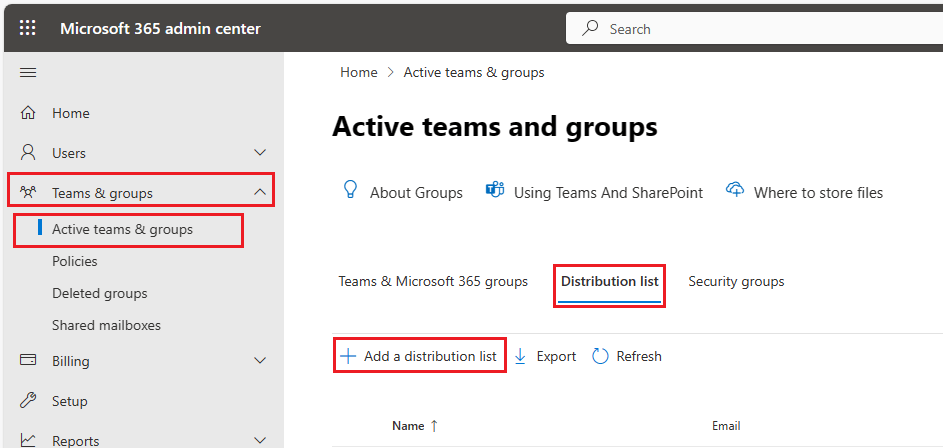
- Get the Microsoft 365 Admin Centre open.
- Extend Teams and Groups and choose Active Teams and Groups. Now Choose Distribution List Tab and click on Add a distribution list.
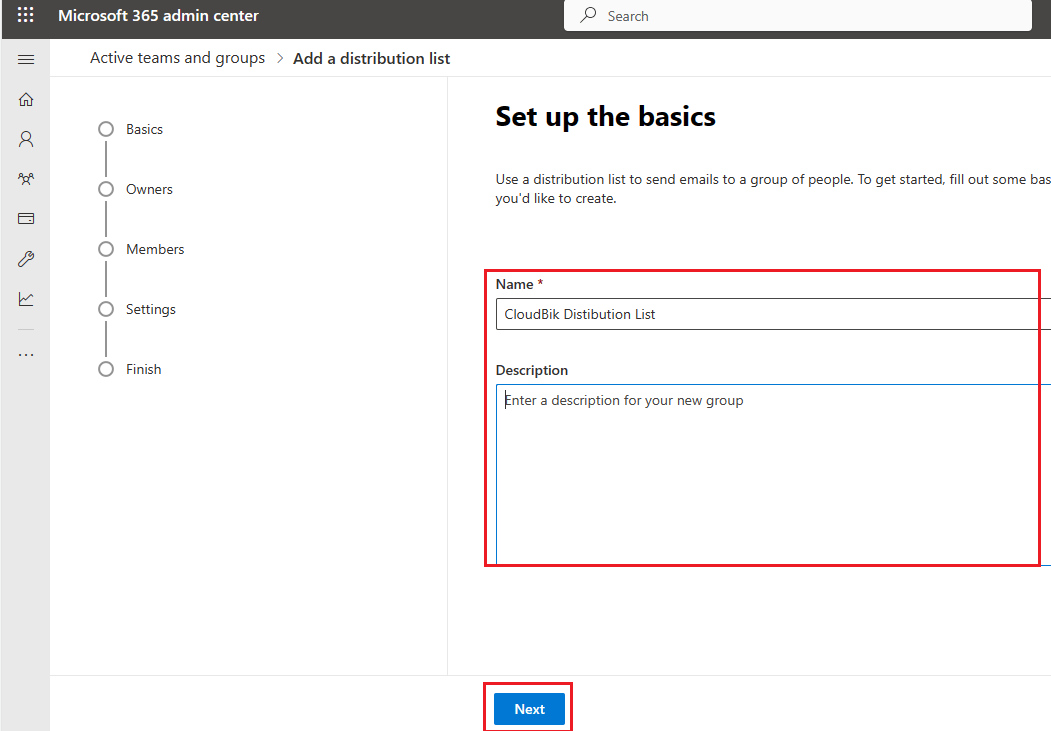
- Give the Group Name and Description and click next.
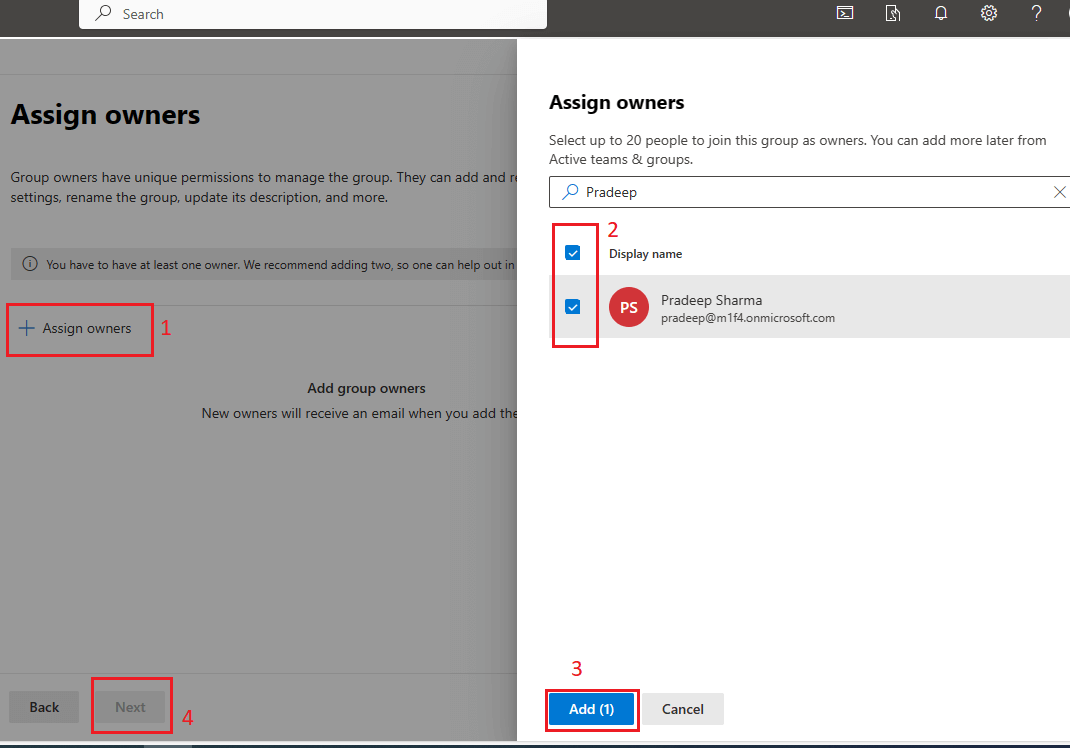
- Assign a group owner, who has the authority to modify the group’s name, add or remove members, and more. Once done, click next.
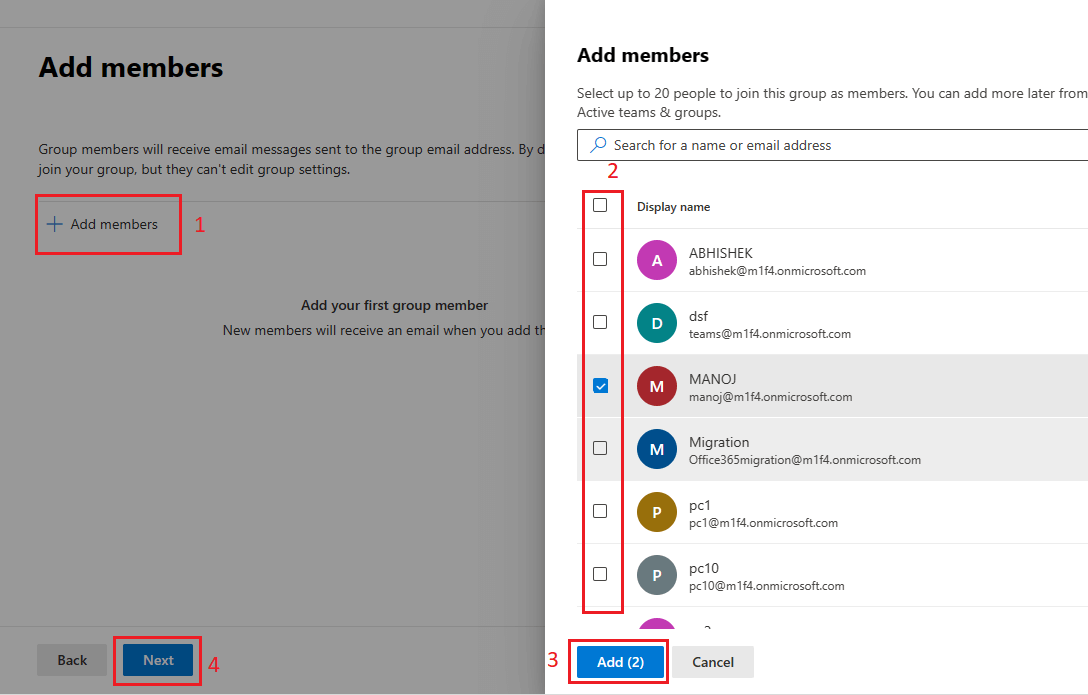
- Add members in the distribution list and proceed further.
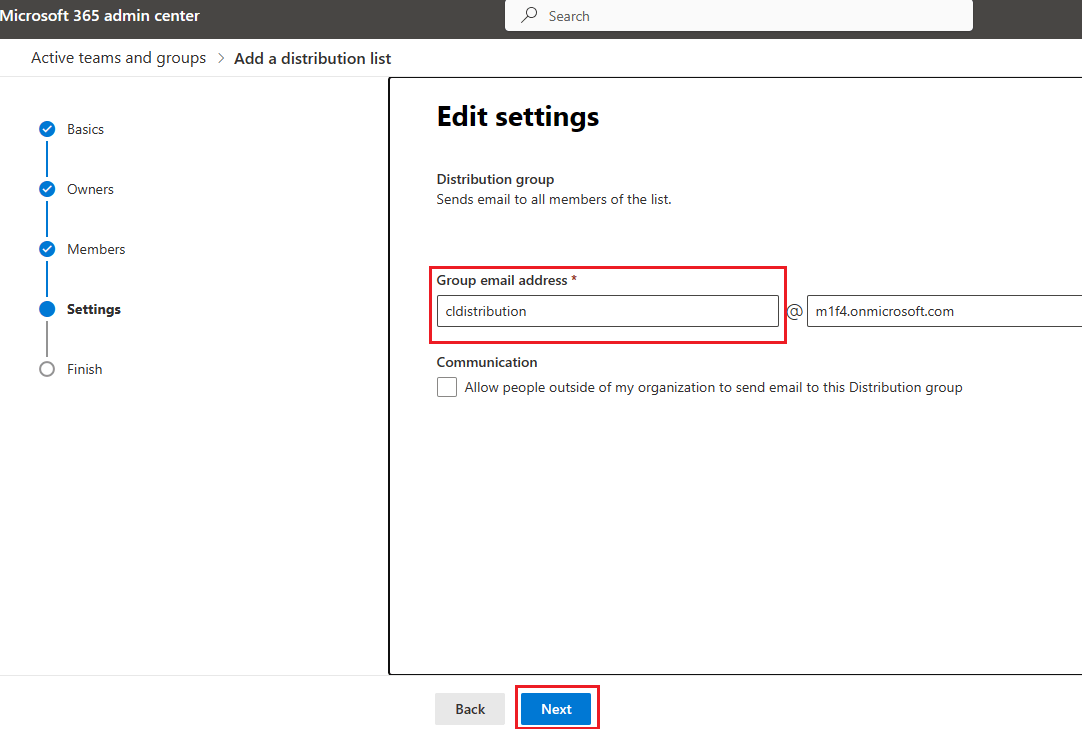
- Assign an email identity to the distribution list and click next.
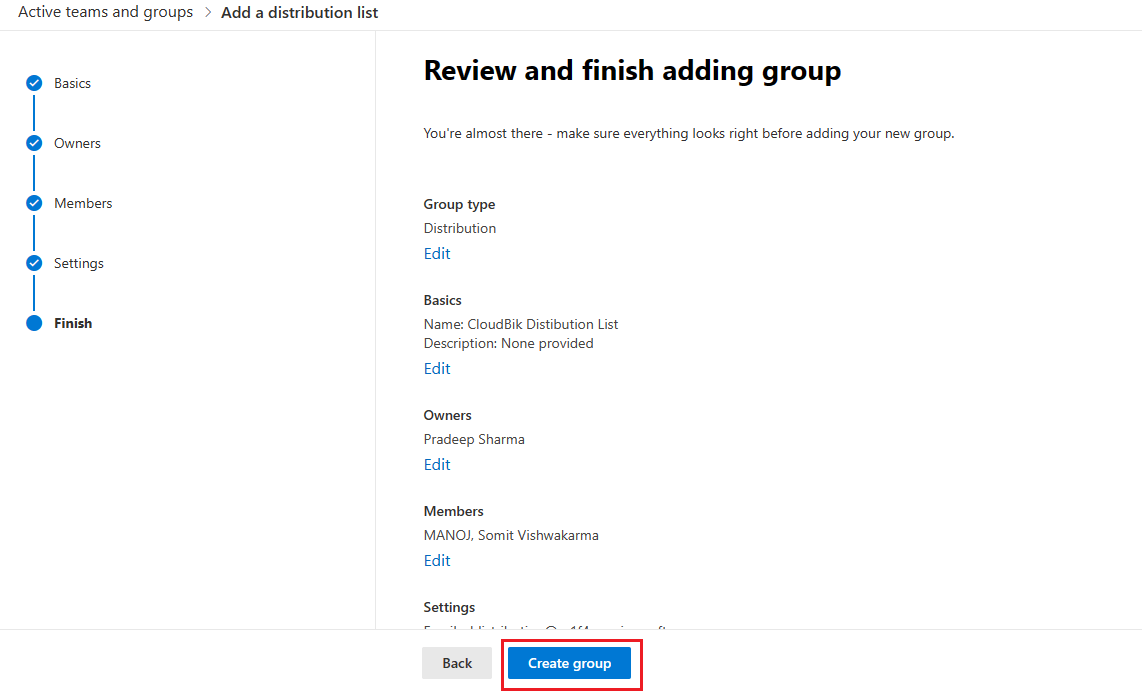
- Review your details and Select “Create group”.
Every user in your company can send email to the distribution list.
Wrap- Up
As you can see, there are variety of options to create email groups in Outlook. If you want to form a private group, contact lists are the best option. An Outlook Group (Microsoft 365 Group) is the ideal choice if you wish to share the group with your co-workers.
I hope that this post was helpful in addressing your query about how to set up an Outlook email group. Please feel free to ask questions in the comments section below.
Also Read: How to Enable External Email Forwarding in Microsoft 365?

