OneDrive Business is a cloud-based storage service that is part of the Microsoft Office 365 suite. Although incredibly useful for document sharing and collaborative work, there may be instances where OneDrive usage needs to be disabled for all users. In this article, we will guide you step-by-step, on how to disable OneDrive in Office 365 for all users. To perform this, you need to have admin privileges as this can be done through SharePoint admin center.
Contents
Need to Disable OneDrive
Some common scenarios to Disable OneDrive in Office 365:
Security Concerns: OneDrive is a cloud-based service, which means that files stored on OneDrive are accessible from any device with an internet connection. This can raise security concerns in organizations that handle sensitive data, as it increases the risk of unauthorized access and data breaches.
Storage Management: OneDrive offers a limited amount of storage space, which can become a concern for organizations with a large number of users. Disabling OneDrive can help organizations manage their storage resources more effectively.
User Productivity: Some organizations may find that OneDrive can be a distraction for users, leading to decreased productivity. Disabling OneDrive can help users focus on their core tasks and improve their overall productivity.
Steps to Disable OneDrive for All Office 365 Users.
Below are the steps required to follow for Disabling OneDrive for Business.
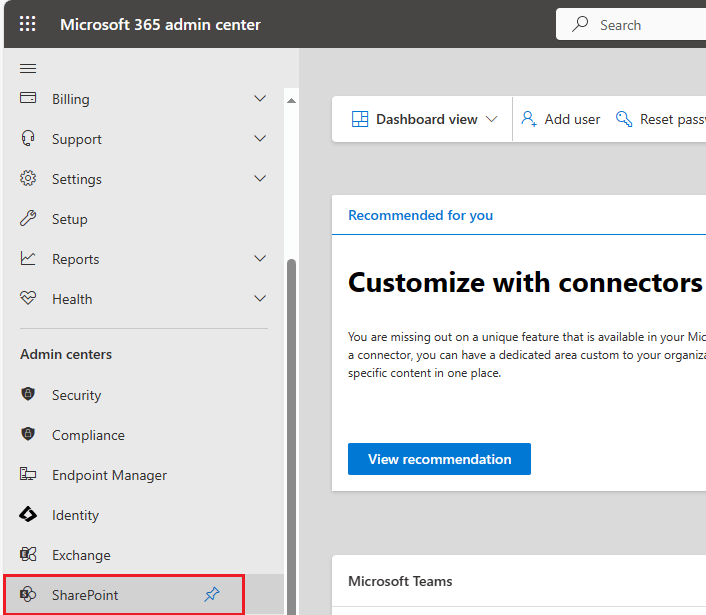
- Open Microsoft 365 admin center and the visit SharePoint Admin Center.
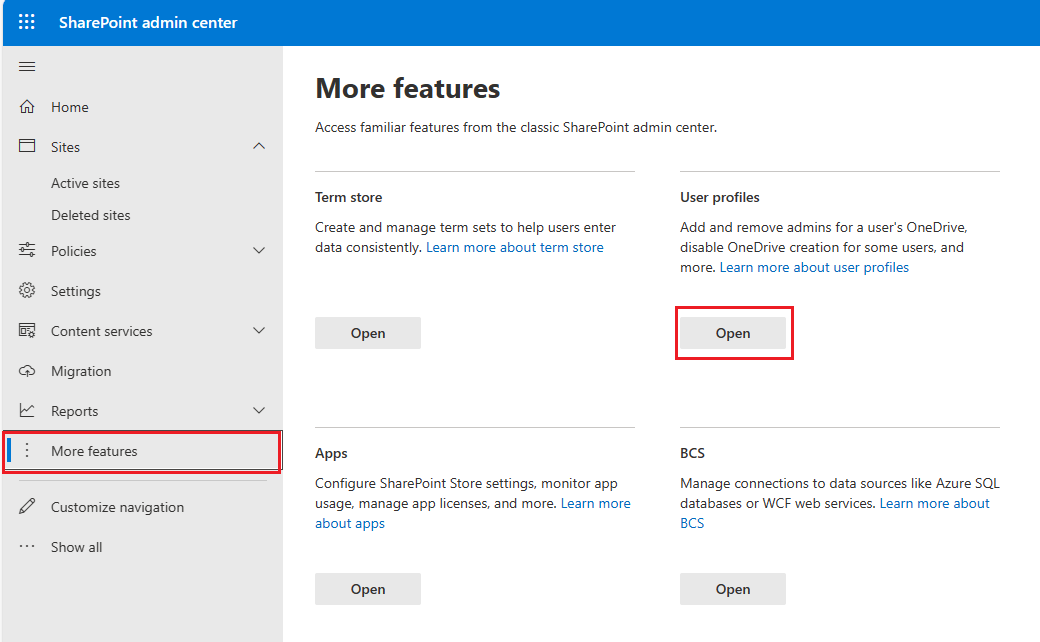
- In SharePoint Admin Center, click on More features then go to User Profiles.
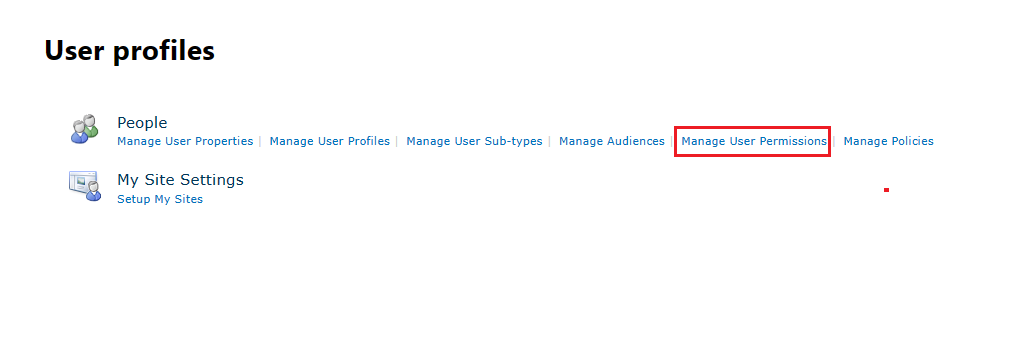
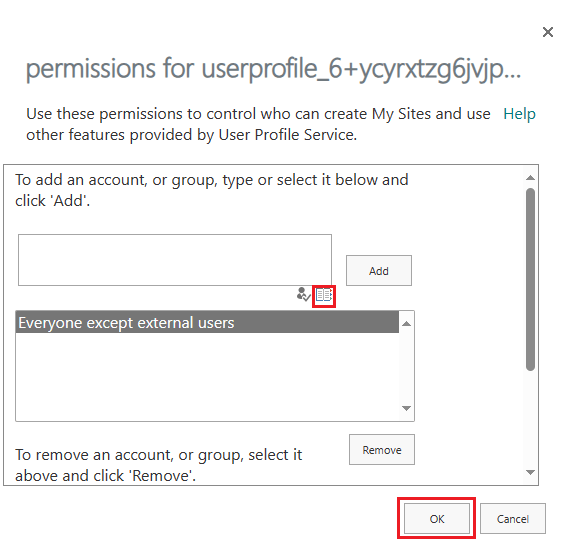
- Now Select Manage User Permissions in the User Profiles.
- Click on the browse button in permissions windows.
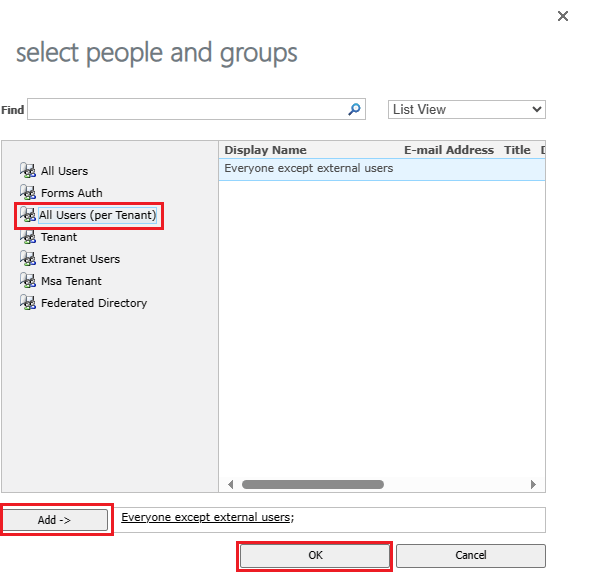
- Now add all users per tenant and click on the Ok button.
- Uncheck the option for Create Personal Site and click on the Ok.
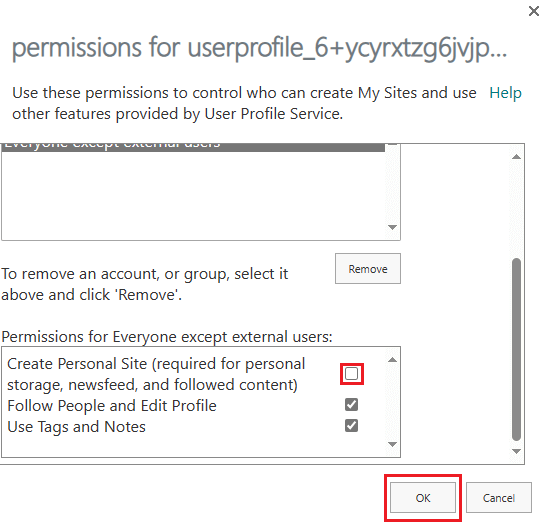
Once done, you will see that OneDrive is disabled for all Office 365 users in your tenant.
Additional Considerations
When disabling OneDrive for all users, there are a few additional considerations to keep in mind:
Existing Files: Files that are already stored on OneDrive will not be deleted when OneDrive is disabled. However, users will no longer be able to access these files from OneDrive.
Re-enabling OneDrive: If you decide to re-enable OneDrive in the future, you can follow the same steps as outlined above, but this time set the toggle switch to “On.”
User Notification: It’s a good practice to notify users in advance that OneDrive will be disabled. This will give them time to prepare and make any necessary arrangements.
Conclusion
Disabling OneDrive for all users in Office 365 is essentially a matter of modifying a few settings in your Office 365 Admin Center. However, it’s critical that you understand the implications of these changes, as they’ll affect the OneDrive access and capabilities for all of the users in your network.
Please note that while this guide outlines the steps to disable OneDrive for all users, enabling it back in simply involves reversing the steps. Be sure to carefully manage your settings and make the best choice for your given situation. Also, it’s recommendable to inform all users on their new lack of access to OneDrive to avoid any confusion or potential workflow disruptions.

