Windows PowerShell is a powerful command-line shell and scripting language that enables you to automate tasks, manage system settings, and troubleshoot issues. Windows PowerShell 7 is the latest version, offering significant performance improvements and new features. By Default, you will find older version of PowerShell installed in your Windows. You can install Windows PowerShell 7 separately in our system. The older one will remain on your system. In this guide we will learn the procedure for installing PowerShell 7.
Contents
How to Install Windows PowerShell 7?
Installing PowerShell 7 is not a difficult task, it can be done easily. Below are some methods mentioned through which one can easily install Windows PowerShell 7 in their system or PC.
- Winget – To install PowerShell 7 through the Winget command.
- Microsoft Store – Using Microsoft store to install PowerShell.
- MSI File – Through the MSI installer file.
So, we will be exploring each method one by one. You can choose the one you find suitable and easy for you.
Installing PowerShell through Winget Command
To use this method, you should have Windows Package Manager winget installed on your PC.
Note: Windows Package Manager winget command-line tool is available on Windows 11 and modern versions of Windows 10.
- Search for Windows PowerShell and run as Administrator.
- Now run the below command to install the PowerShell 7.
winget install Microsoft.PowerShell
- It will automatically download the latest version of the Windows PowerShell.
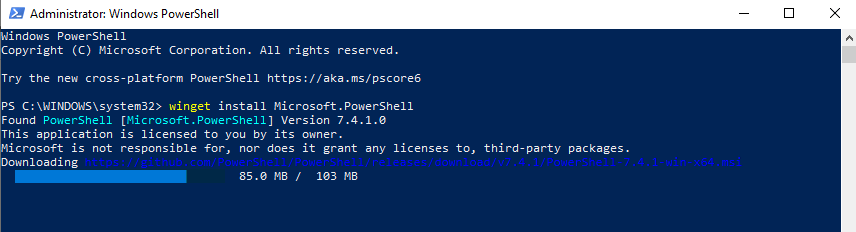
It will take some time in downloading and installing the PowerShell. Once completed you can search for PowerShell 7 in the windows search bar and use it.
Through Microsoft Store
Another method to install Windows PowerShell 7 is through the Microsoft Store. Follow the below steps for the same.
- Open Microsoft Store in your PC.
- Search for PowerShell in Microsoft Store and open it.
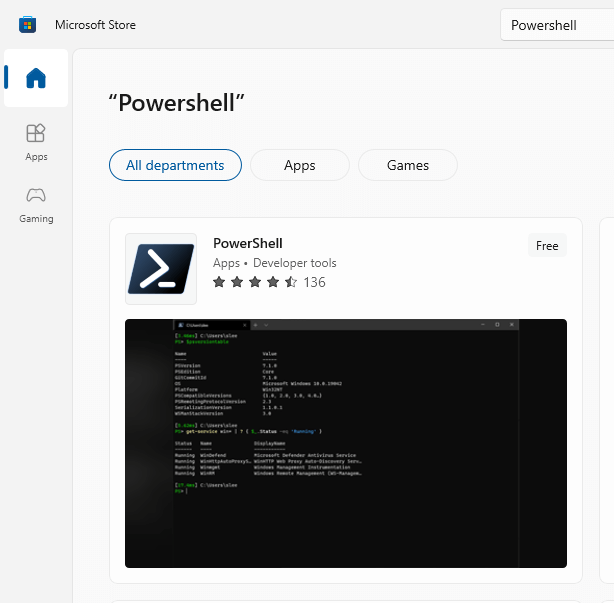
- Now click on the Get button to install the PowerShell.
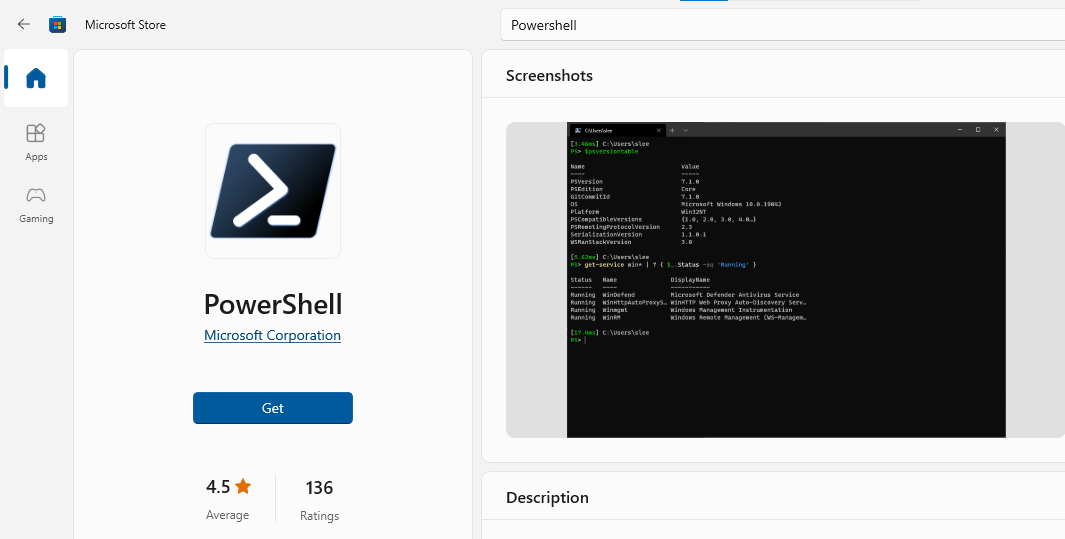
It will install the latest PowerShell version and update it automatically in the future.
Install Windows PowerShell 7 through MSI Package
It is another available option to install Windows PowerShell. It allows you to choose which version you need to install. Always go with the stable version instead of beta or testing versions.
You can check out Microsoft Documentation to download and install the MSI package. To install the old versions you can visit Github PowerShell Releases page and download the one.
- Once downloaded, run the MSI file for Installing PowerShell.
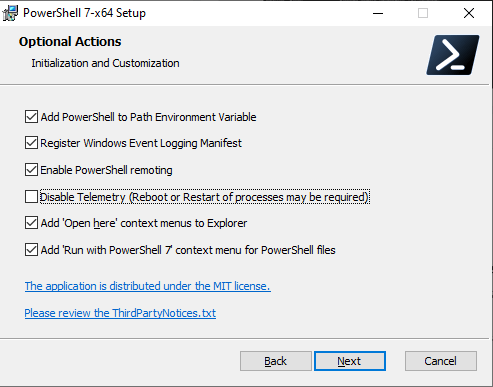
- Choose the recommended options and click next.
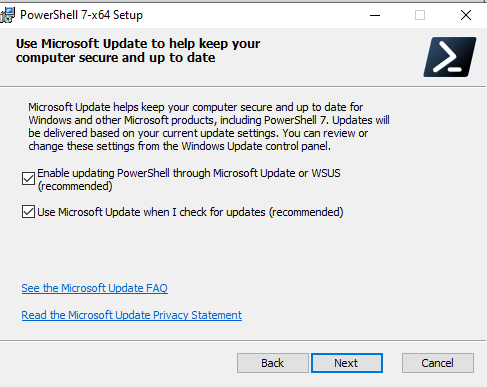
- Enable updates to get future updates automatically and click next.
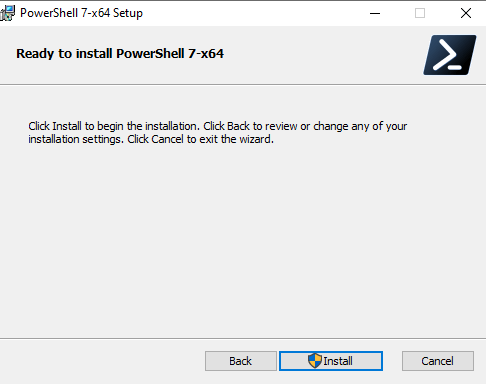
- Now click on the Install button to install the Windows PowerShell.
Once installed, you can search it in windows search bar and use it.
Conclusion:
This article describes multiple methods to install Windows PowerShell 7. PowerShell 7 is fully compatible with Microsoft Office 365. It is the latest available version of the Windows PowerShell. You can choose any of the method to install Windows PowerShell. You can use your Old PowerShell and the new one you just installed. It will not replace the Old installed PowerShell. I hope this article have provided you with valuable insight on PowerShell installation. If you got any queries, just comment down.

