
The world is moving to the cloud, so on my reader’s demand, I will tell you how to migrate yahoo mail to Office 365 mailbox cloud environment.
The e-mail service Yahoo! Mail was created on October 8, 1997, by Yahoo, Inc. in the United States. It provides 1 TB of storage to its users for mailing purposes.
Due to the user interface and features, users of other mailing clients are trying to migrate from their e-mail clients to Microsoft 365, and Yahoo Mail is one of them. M365 is the leading cloud service provider. It allows users to access their data and accounts using all Office 365 applications anytime, anywhere.
“I must move all agents from Yahoo Mail to Office 365 platforms. Please advise the best technique so that I easily complete this process free of cost.”
”How can I upload Yahoo Mail’s database into Office 365 free of cost? I want to migrate from Yahoo Mail to Office 365 urgently. ”
”Currently, I am running my business through Yahoo, but now I need an environment to perform any work-related action on the cloud so that I efficiently work on it in any place. Is there any process to import Yahoo data items into Office 365 account? ”
Contents
- 1 Why do users want to migrate Yahoo Mail to Office 365 account?
- 2 Import Yahoo mail into Your O365 account
Why do users want to migrate Yahoo Mail to Office 365 account?
There are many common reasons:
- Fear of data loss.
- Microsoft 365 offers many new features and updated applications from time to time.
- No additional charges or installation.
Follow the below methods to export your Yahoo Mail data to Outlook.
Import Yahoo mail into Your O365 account
There are many ways to import yahoo mails data into office 365:
- Inbuilt feature of Migration in Microsoft Exchange admin center
- Using Microsoft Outlook
- Using third-party software
Method 1: Inbuilt feature of Migration in Microsoft Exchange admin center
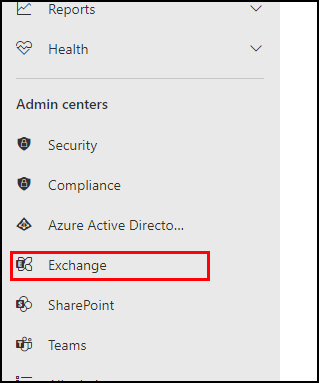
Log in Microsoft Office 365 account and visit the Microsoft Admin Center.
Note: You must have full admin access to Microsoft Admin Center to migrate your or any other user’s Yahoo account to O365.
- Click on Exchange. It will open a new window, Exchange Admin Center.
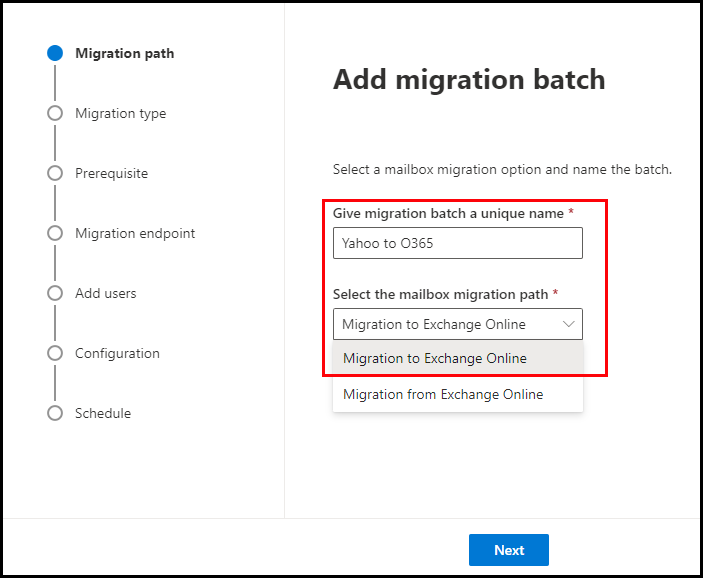
- Click on Migration, and create a migration batch by clicking Add migration batch.

- Give migration batch a unique name and select Migration to Exchange Online Select the mailbox migration path.
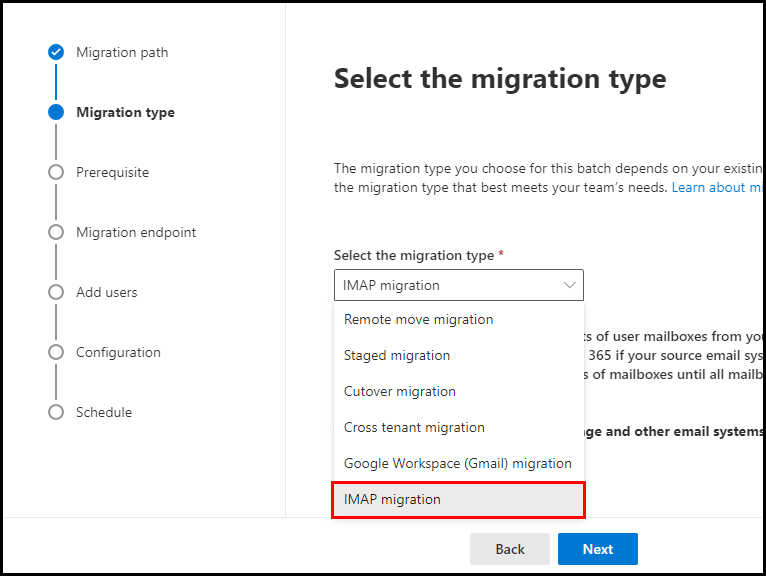
- Select IMAP Migration to Select the migration type. Click Next.
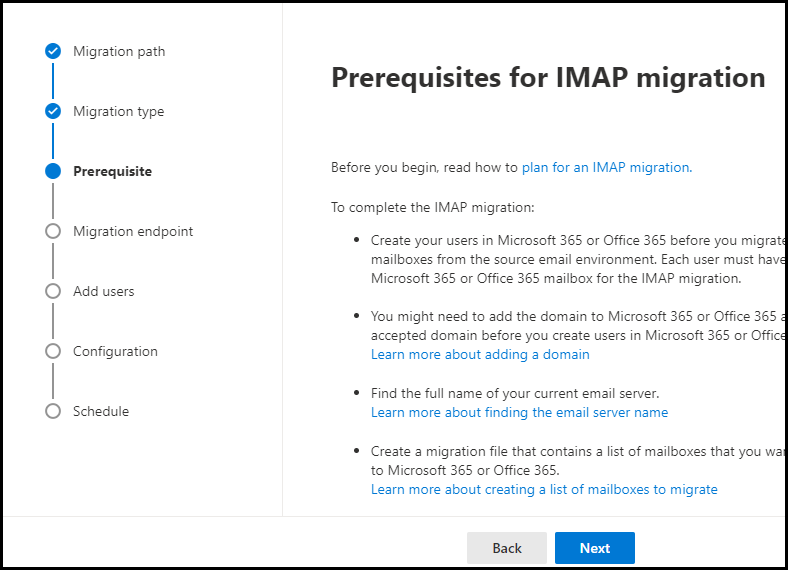
- On the next window, click Next.
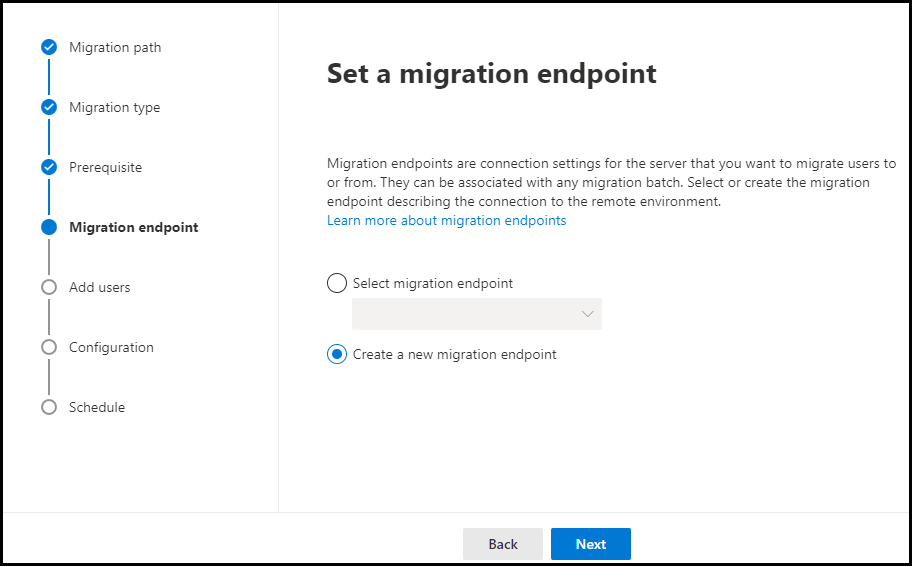
- Select Create a new migration endpoint. Click Next.
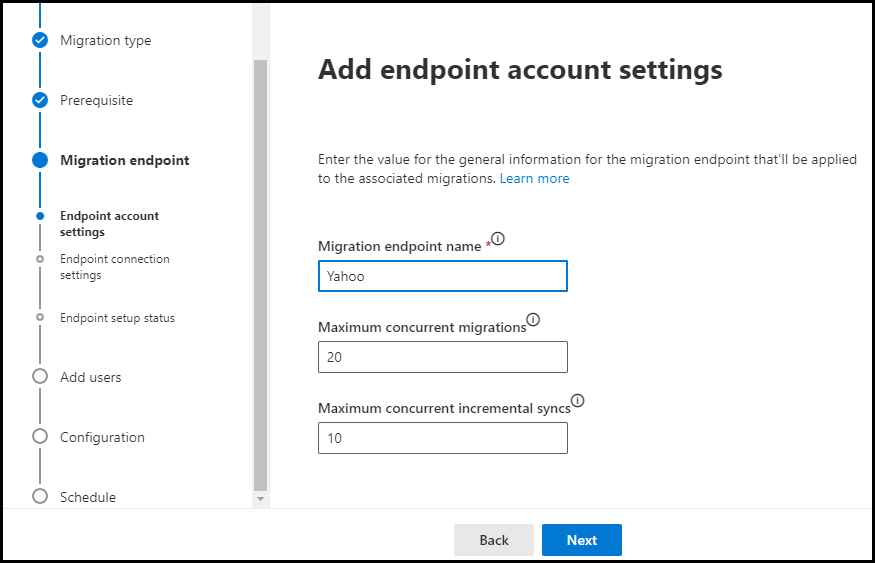
- Enter the Migration endpoint name, and select Maximum concurrent migrations and Maximum concurrent Incremental syncs per your requirement. Click Next.
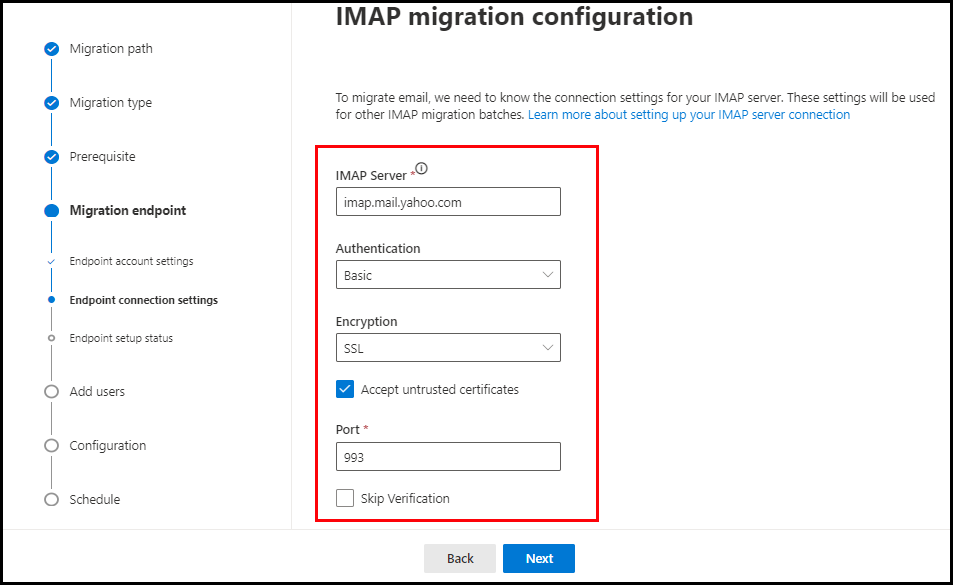
- Enter imap.mail.yahoo.com in IMAP Server, select Basic in the Authentication, SSL in the Encryption, tick the Checkbox and enter 993 in port. Click Next.
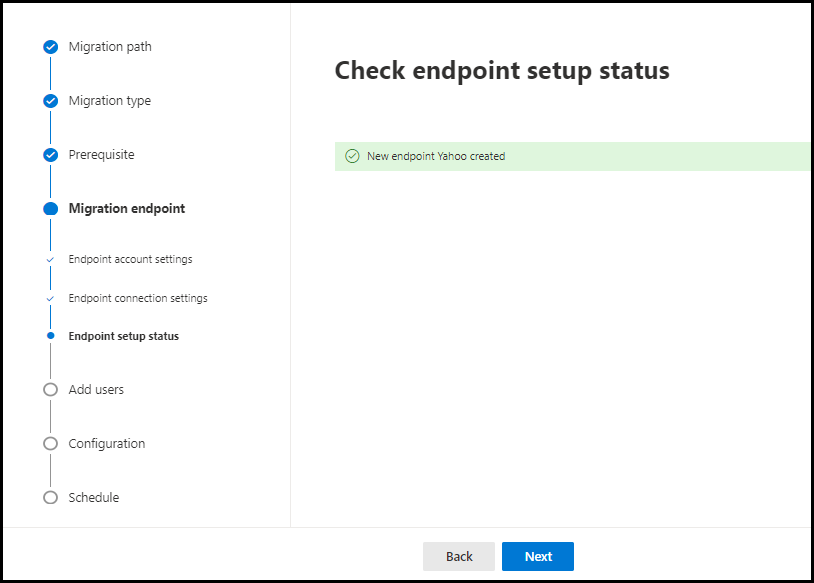
- It will show the status of the new endpoint. Click Next.
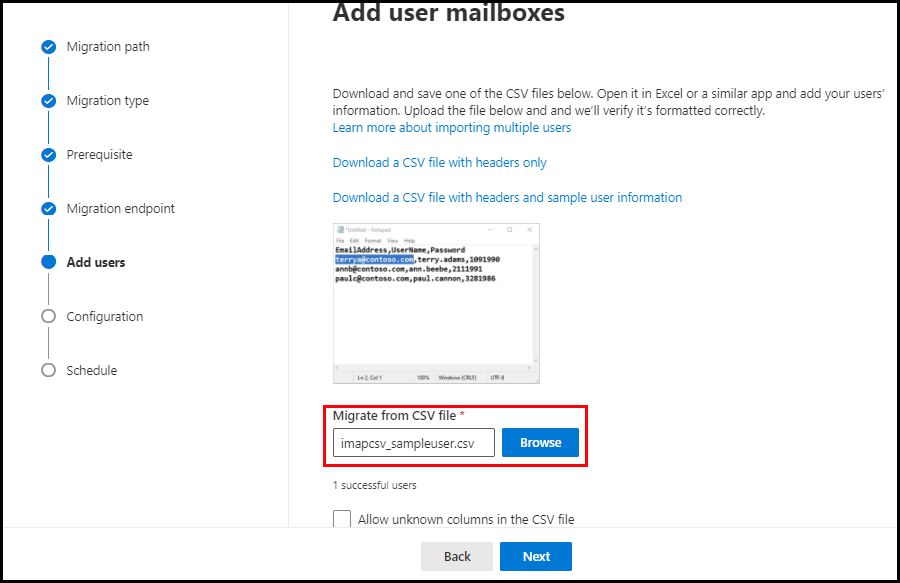
- You have to add user mailboxes via .csv file format. You can find a sample file by clicking on download a CSV file with headers and sample user information. Create a CSV file.
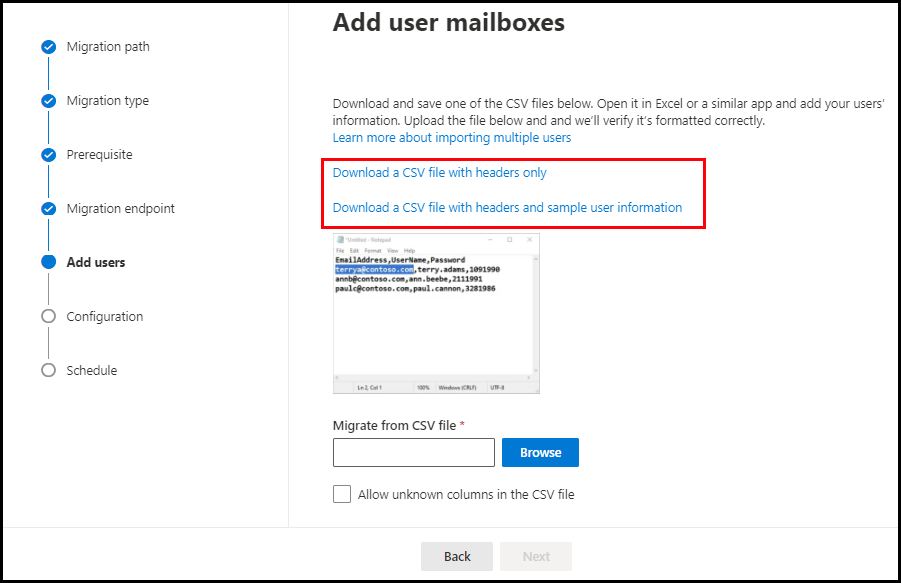
-
- Insert the E-mail ID of your M365 Mailbox in the e-mail address.
- Enter Yahoo’s e-mail ID in place of the username.
- If your 2-step verification is on, enter the app password; otherwise, give the Yahoo mail password. Save this file in CSV format.
- Browse the saved CSV file. Click Next.
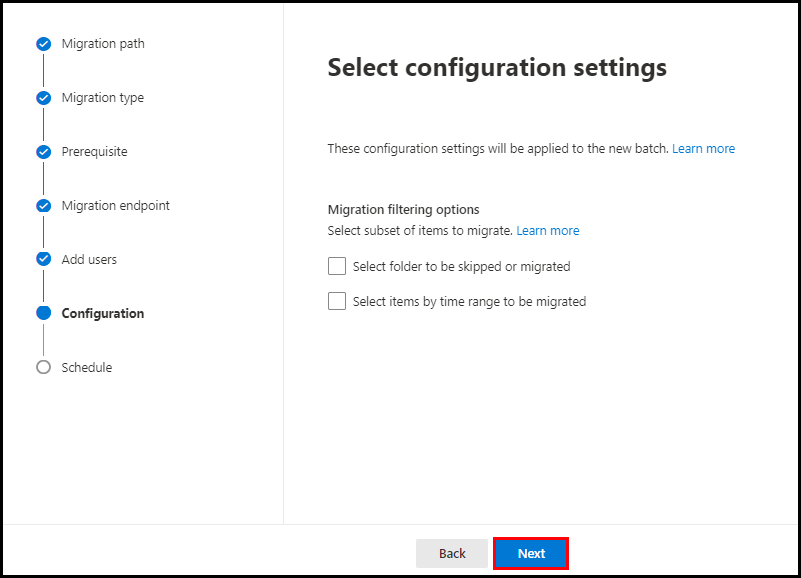
- Now you have some migration filtering options that are entirely optional. You can select these options if you want to migrate some specific folder or data for a particular date range. Otherwise, uncheck the options and click Next.
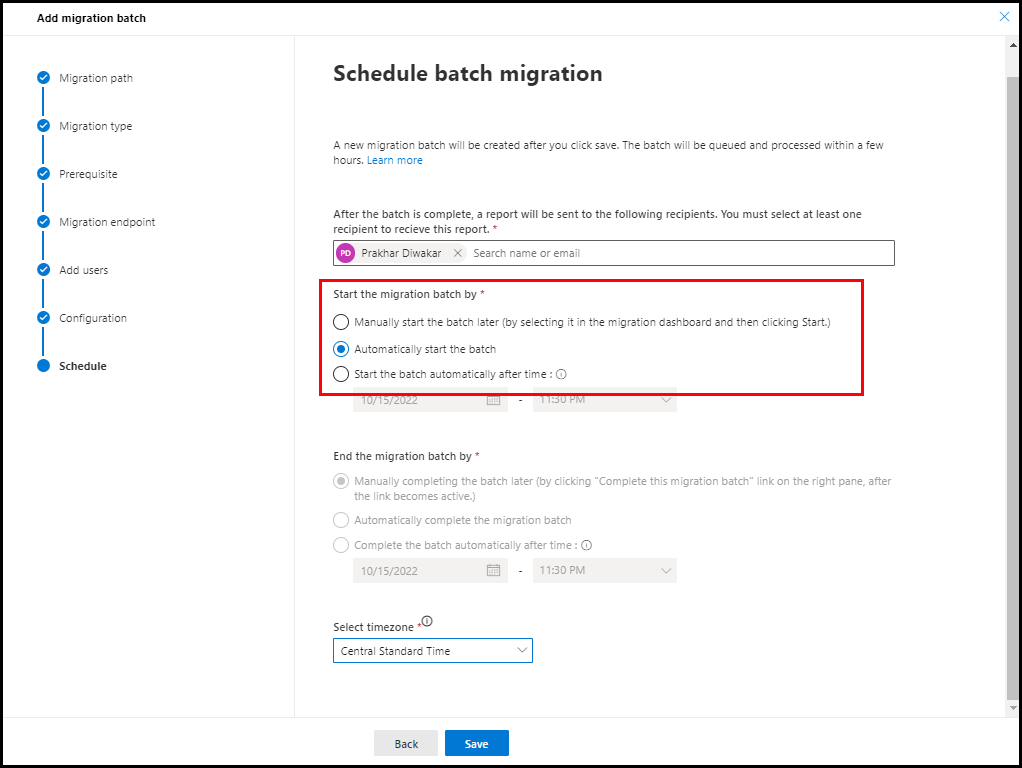
- Select the user account to send the migration report. Here you have three options to run the migration: Manually, Automatically, or you can choose a particular time. Please select one of them. Select your time zone and click Save.
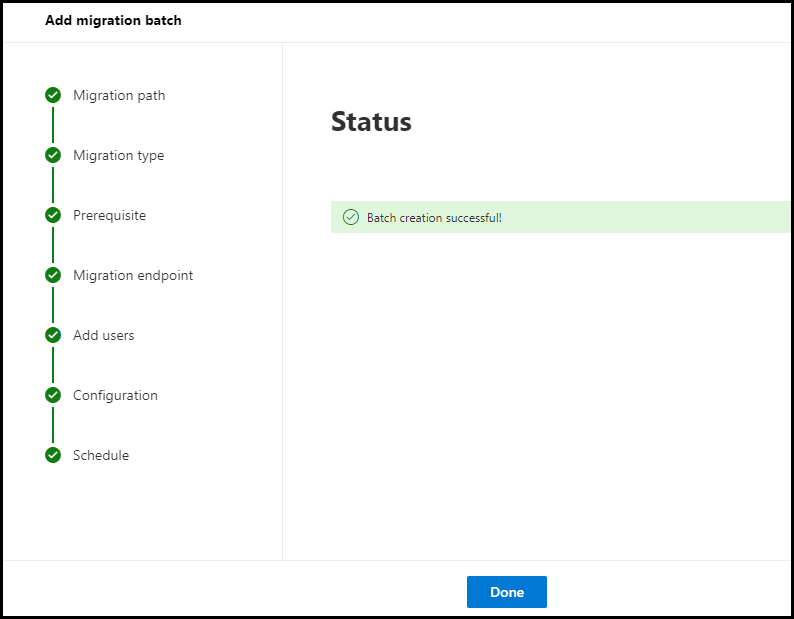
- Your batch has been successfully created. Click Done.
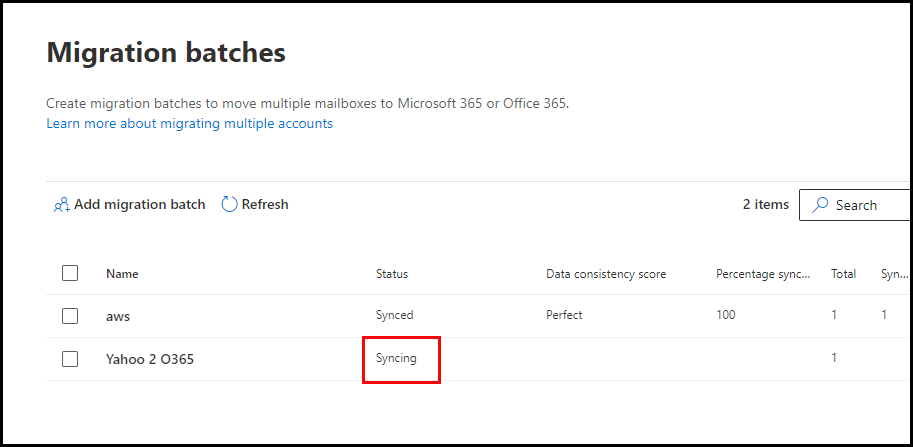
- Here, your migration process has been started. It will show the status as syncing for the batch and will take some time to complete. You can click refresh to check the status. You can also check the status by double click on the migration batch name.
- After completing the migration, you can log in to your M365 account to check the migrated data.
Method 2: Using Microsoft Outlook
It is a three-step process.
First Step: Configure your Yahoo mail into MS Outlook
Before configuring your Yahoo mail into office 365, you need to enable IMAP in Yahoo mail and create an app password. Follow the below step to configure your Yahoo account into Outlook.
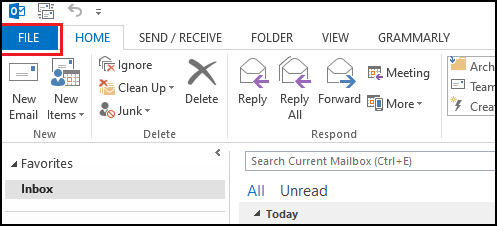
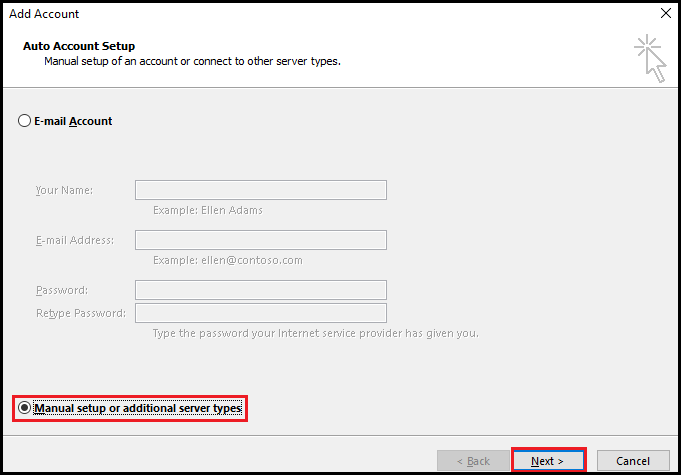
- Open Outlook. Click File.
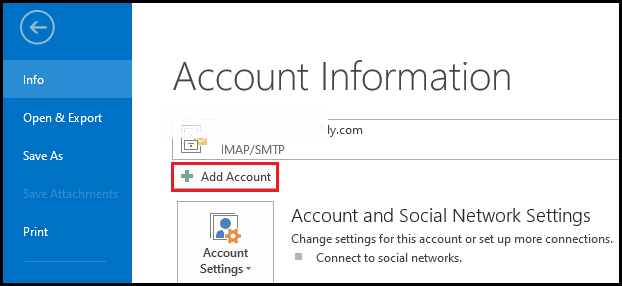
- Click Add account.
- Select Manual setup or additional server types. Click Next.
- Select POP or IMAP. Click Next.

- Fill in all the details.
Note: Your server information is mentioned below.
-
- Incoming mail server: imap.mail.yahoo.com
- Outgoing mail server: smtp.mail.yahoo.com
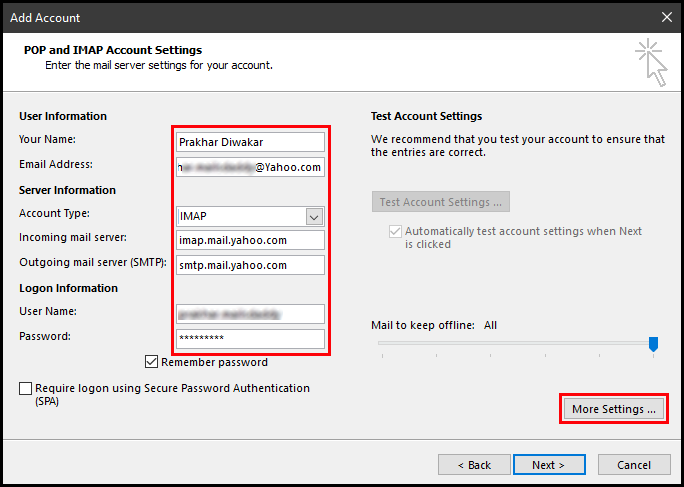
- Click More Settings.
-
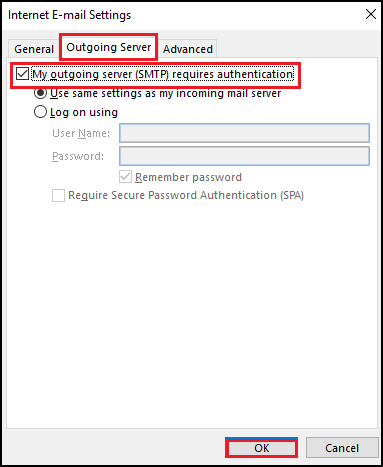
- Select the Outgoing server tab and Check the first option. My outgoing server (SMTP) requires authentication. Select Use same settings as my incoming mail server.
-
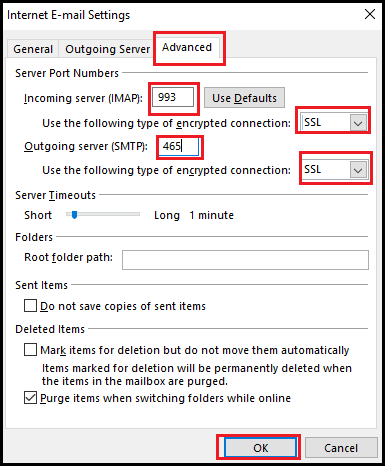
- Select the Advanced tab, and fill in the details like the screenshot below. Click OK. Click Next to finish.
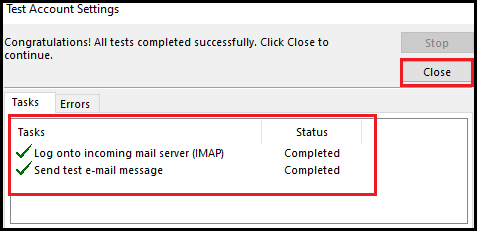
- Now Outlook checks your Account settings and shows you the status. Click on Close after showing the completed status.
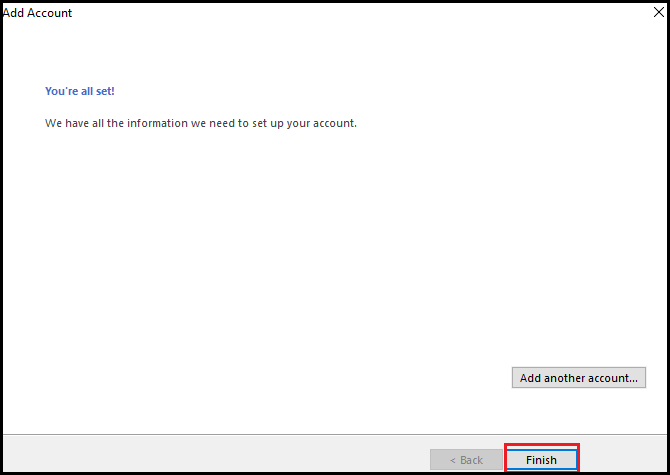
- An alert message comes up showing you. You’re all set! Click Finish.
Second Step: Export PST file from MS Outlook
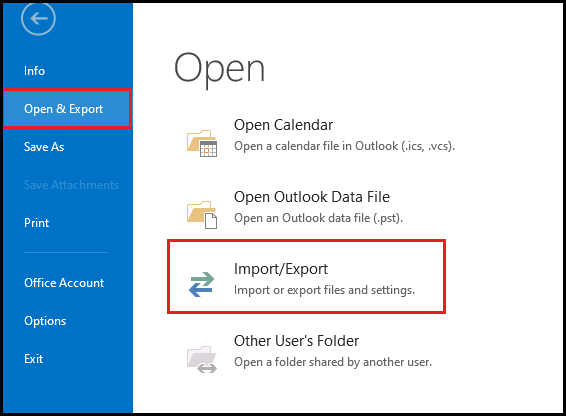
- Click File>Open & Export>Import/Export.
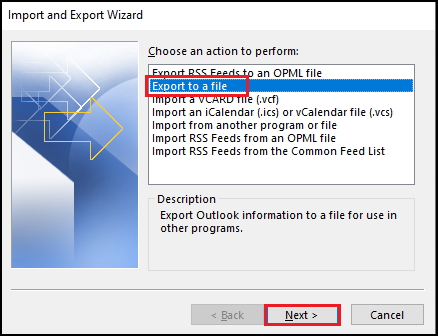
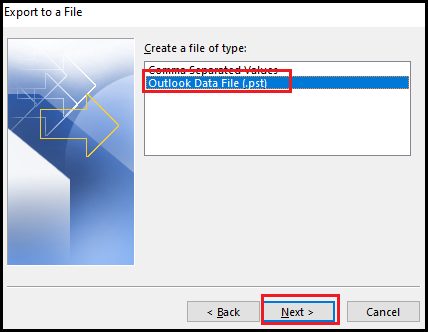
- Select Export to a file. Click Next.
- Select Outlook data file (.PST)>Next.
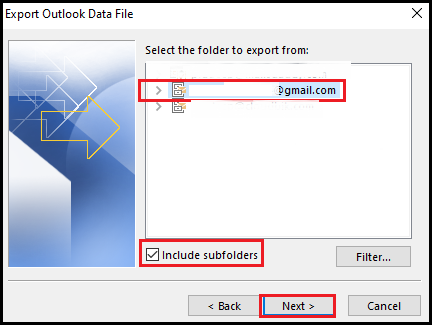
- Select your Yahoo Account. Check Include Subfolders. Click Next.
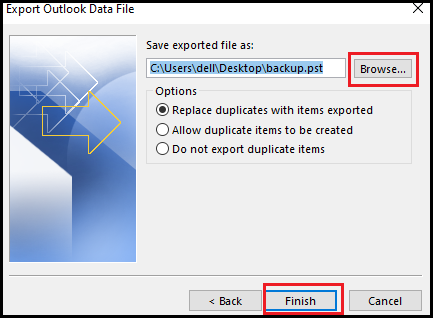
- Browse the location where you want to save the PST file. Select any one option & Click Next.
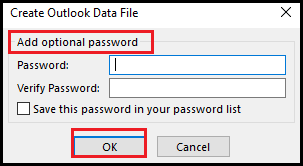
- You can add a password to your PST file if you need it. Click OK.
Third Step: Import Outlook PST into the office 365 account
There are two ways to import PST files into Office 365.
- Import PST to Office 365 Using Azure Storage Tool: That process is also known as Network Upload Method.
- Import PST into Office 365 Using the Import/Export Method: That is a two-step process:
-
- Configure Microsoft O365 account on Outlook
- Import the PST file into the O365 account
Read How to Import Outlook PST to Office 365 – Step-by-Step Guide for the complete process to import PST in the O365 account.
Method 3: Using third-party software
Nowadays, many software is available in the market, which can help you migrate Yahoo Mail to Office 365. You can sit, relax and use your time correctly. This software is responsible for protecting data during the complete data migration process.
Conclusion
Here we told how to migrate Yahoo mail to Office 365 cloud environment. We discussed three processes, and you can follow one of them at your convenience. Read the article below to migrate any mailing client’s data into M365.
Read more: How to Migrate AWS workmail to Office 365.

