Most users search the free or manual tricks to migrate AWS Workmail to Office 365 Outlook platform. I am writing this article so that users can easily import Amazon Workmail to Office 365. Let’s start;
AWS (Amazon Web Services) is an online platform that offers cost-effective, robust, and effective cloud computing services to increase the stability of different organizations. AWS Workmail is an impotent service that is provided by Amazon Work Place. It is a cloud-based email and calendaring service.
In another hand, Office 365 is a top-class Software-as-a-Service solution that offers different Microsoft Office desktop applications, Microsoft application services, and other productivity services on the cloud. In Office 365; Outlook is available to communicate without or outside of the organization.
Contents
Why do Users Need to Backup AWS Mail in Office 356?
There are different reasons that’s why users prefer to use Office 365 over AWS WorkMail. Some are:
- Microsoft is a well-known brand and most users, businesses, and organizations like to use Microsoft’s products instead of other brands.
- Working in Office 365 environment is easier than Amazon Workmail.
- Exchange 365 offers different types of services to increase the user’s work performance.
- O365 comes with native support for Outlook 2019, 2016 2013, and 2010, and AWS Workmail offers an integrated support feature for Outlook but it does not provide support for POP3 or IMAP.
How to Migrate AWS WorkMail to Office 365?
Using 4 various techniques users can shift Amazon Workmail to O365. Read all tricks one by one to get a successful and accurate migration result.
1: Office 365 IMAP Email Migration Process
2: Email Configuration in Outlook and Migration.
3: Drag and Drop process in Outlook
4: Using Trusted Third Party Tool
Method 1: Office 365 IMAP Email Migration Process:
Microsoft offers an inbuilt email migration method in Office 365 by using which users can import any IMAP-supported email account database into O365 platform. For this users have to follow different steps. Follows all the guidelines and steps to successfully migrate Amazon/AWS WorkMail into Office 365.
- Start with login Office 365 admin account and go to the Admin.
- Now click on the Show more… option and hit on the Exchange option to open Exchange Admin Center.
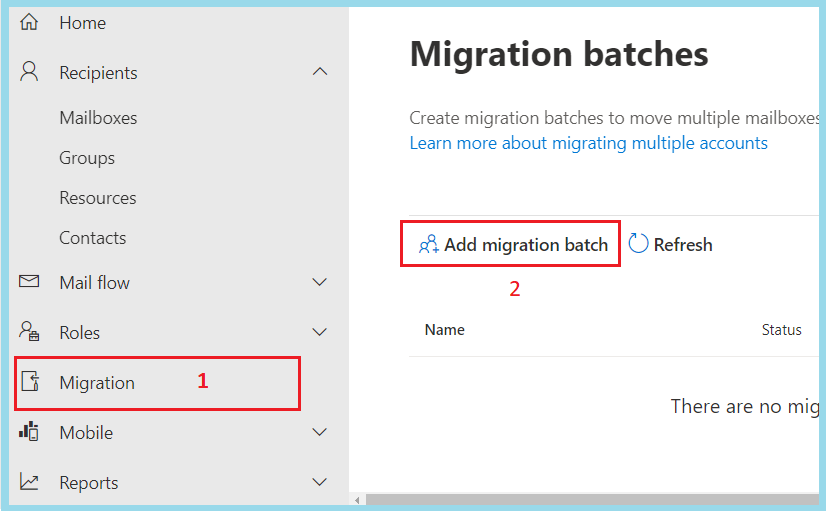
- In Exchange Admin Center, select Migration and then click on Add migration batch.
- Now a new window will appear; here strictly complete all steps.
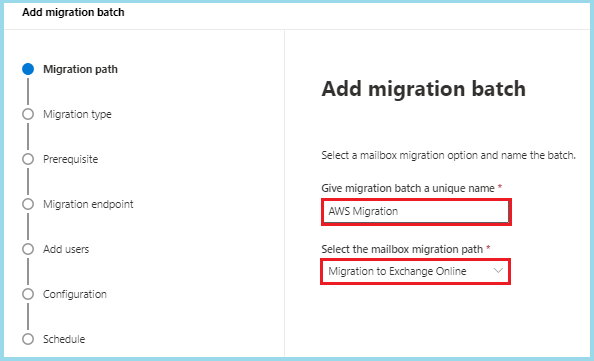
- In the Migration path part; provide any unique batch migration name, select the Migration to Exchange Online option, and press the Next.
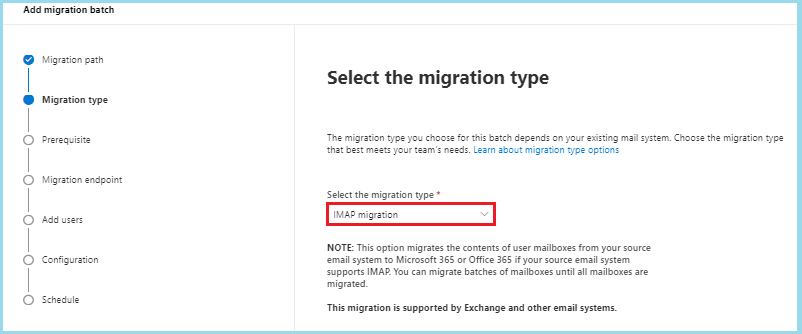
- After that, in migration type choose IMAP Migration and hit the Next.
- In the Prerequisite part, read all the pre-requirement options and complete them and go to the Next.
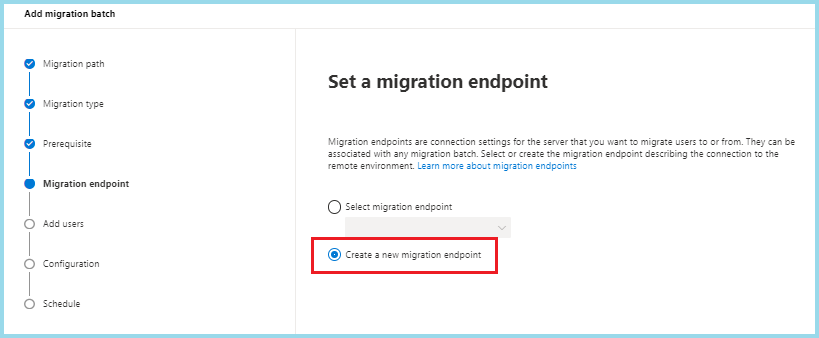
- After that in the Migration endpoint section; choose Create a new migration endpoint and press Next.
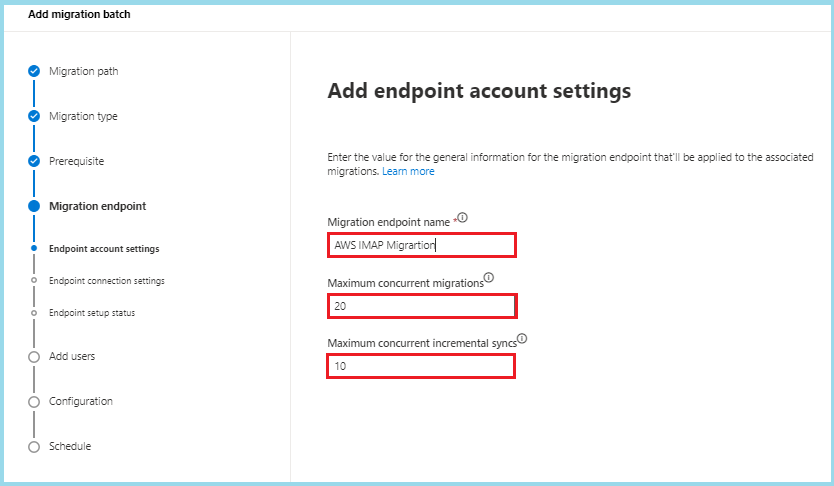
- Now provide the Migration Endpoint Name >> confirm the Maximum no. of concurrent migration and Maximum no. of concurrent incremental syncs option and then go to Next.
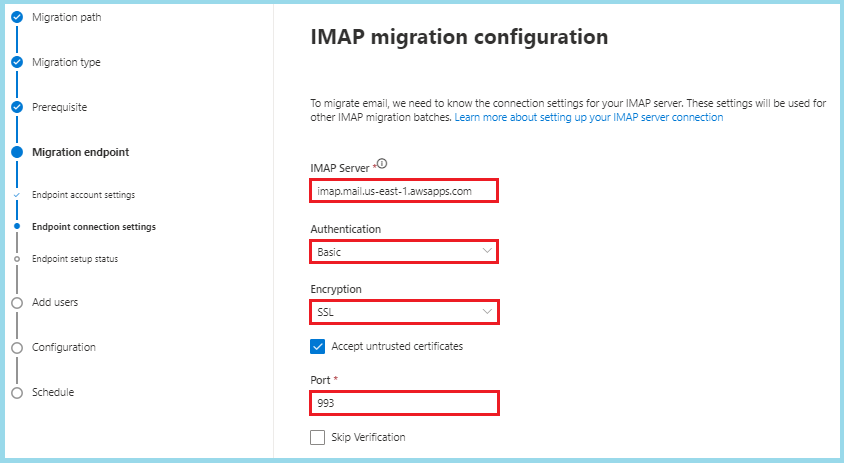
- Provide your IMAP server details as your AWS region mail.aws-region.awsapps.com. Now provide authentication, Encryption, and Port no. as updated in a screenshot& click the Next.
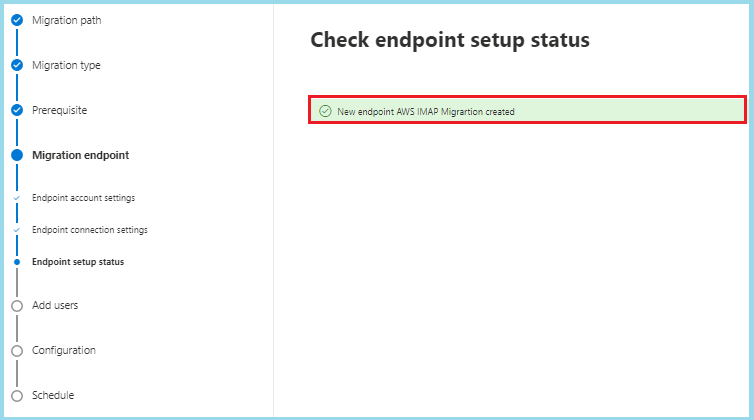
- In a few seconds, it will show the endpoint status. If all is correct press the Next button.
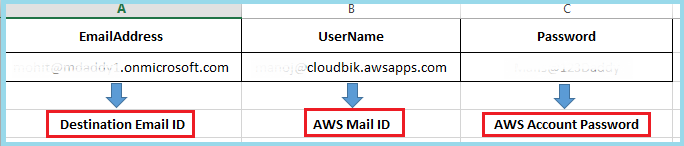
- Now in Add user part; download the CSV file to provide the user’s information and browse them.
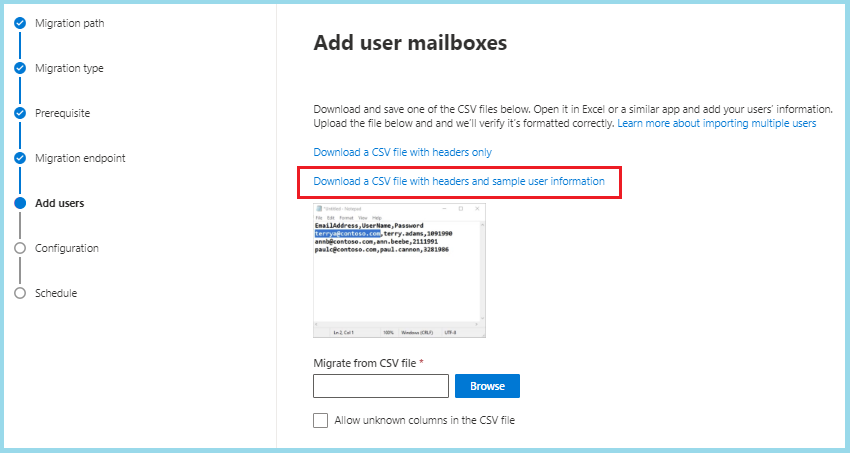
- Provide all details as updated in the screenshot. After creating and browsing the CSV file, click on Next.
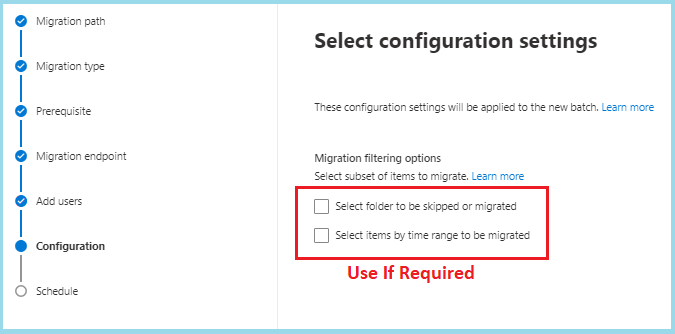
- In the Configuration part; use a different Migration filtering option if you required it, otherwise, directly click on the Next.
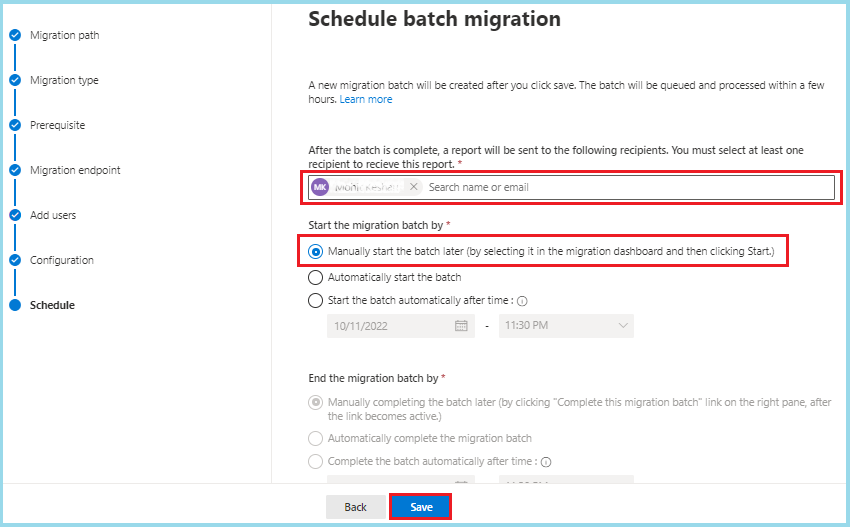
- Now in the Schedule part, select the mailbox where you want to move the report of complete migration. >> Choose the manually start the batch later >> Select your time zone and hit the Save button.
- If all processes become successfully complete, click on the Done.
- Now select the created batch migration option and hit on the Resume migration process and then press the Confirm.
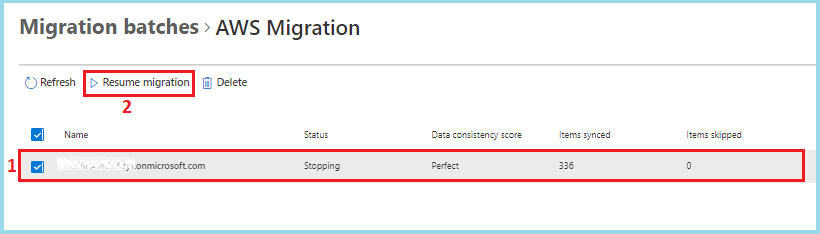
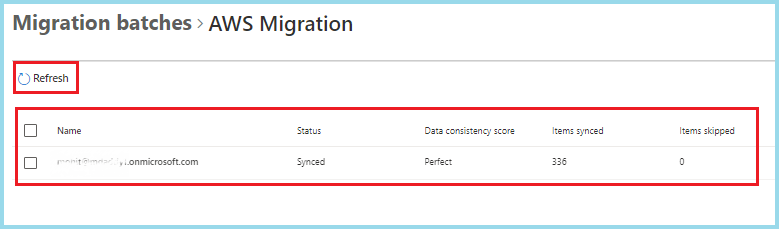
- Now the migration process will be started. Clicking on the Refresh button you can know the current status of the migration. After successful migration, you can check the emails in your Office 365 account.
Method 2: Email Configuration in Outlook and Migration:
This trick is divided into 3 parts. First, the user has to configure that AWS WorkMail Id in Outlook. After that user has to export complete AWS data in PST format and then will have upload the PST file into PST format. Let’s start the complete process one by one.
A: Configure Amazon WorkMail in Outlook:
- Go to Control Panel and click on Mail (32-bit) >> Hit on Email accounts…
- Now a new window (Account Settings) will open. Here click on the New
- After that in Add account part, select Manual setup or additional server types and go to Next.
- Now choose com or Exchange ActiveSync compatible service, and click the Next button.
- After that provide all details as updated below:
- Provide your Name and AWS WorkMail email ID.
- Put Mail server details as your AWS region mail.aws-region.awsapps.com.
- Finally provide an Amazon WorkMail username and password >> Enable Remember Password and Hit on Next. After successfully testing the account settings, users can view all data in Outlook.
B: Export AWS Mailbox Data in PST Format
- Open Microsoft Outlook >> Click on the File tab >> Go to Open & Export and Hit on Import/Export.
- Double-click on Export to a file >> Choose Outlook Data File (.pst) and click on Next.
- Now choose that AWS WorkMail mailbox and hit on the Next
- Click on the Browse button to provide the destination location of the converted PST file. Also, choose Do not export duplicate items and press the Finish
- Do not add the password and directly click on the OK button.
C: Import PST File into Office 365:
Follow the bellows listed link to easily add PST files in Outlook. Here I briefly describe all the processes.
How to Quickly Import PST in Office 365 Platform
Method 3: Drag and Drop Process in Outlook
- In this processor, first users have to configure both (AWS WorkMail and Office 365) Mail ID in Outlook. In the above-given link, I also described the process to configure Office 365 account in Outlook.
- After the configuration process, follow all the below-listed options:
- Go to the AWS mailbox and select any folder, choose all emails using Ctrl +A.
- Using the drag and drop trick drop your email in the same name folder in Office 365 mailbox.
Note: If you don’t want to remove emails from the AWS WorkMail account, simply copy your email from any folder and paste them into the same name-created folder in Office 365. I am saying this to move emails to the same name folder so that you do not feel any problem in managing emails.
Method 4: Using Third-Party Application:
After using all the above-methods users can successfully migrate the AWS WorkMail emails into Office 365. I accept that all methods are a little bit of time taking process but I believe that you will get a genuine result. If you want to save time, you can go for any third-party tool. There are multiple solutions available on the web, you can choose any trusted software and complete your requirement.
Bottom Line:
After applying the option mentioned above, you will really feel that AWS WorkMail to Office 365 migration is not really difficult a task as you were expecting. You can easily backup AWS WorkMail in Office 365 by using all the given options. For further questions, contact us.

