In this Guide, we will discuss how to create PowerShell scripts in Windows 10 in multiple ways and how to enable and run PowerShell scripts.
Microsoft created PowerShell, an open-source, object-oriented, cross-platform framework for job automation and configuration management. Users can create PowerShell scripts using any text editor or Windows PowerShell ISE, which is already present on every system in Windows 10.
Contents
Multiple Ways to Create PowerShell Scripts
-Create a Script using Notepad
Please follow the steps below to create PowerShell scripts using Notepad
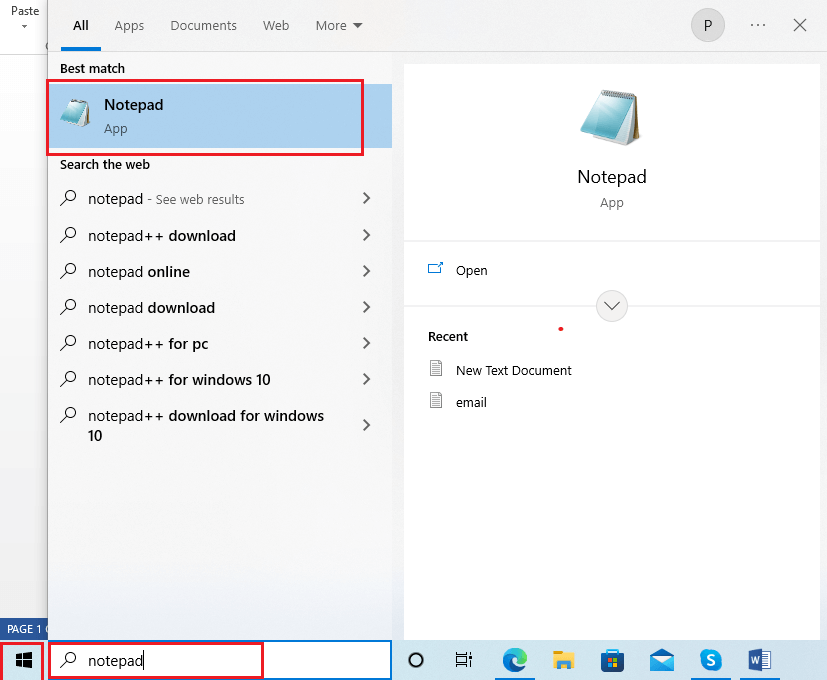
- Click on start, search notepad, and open it.
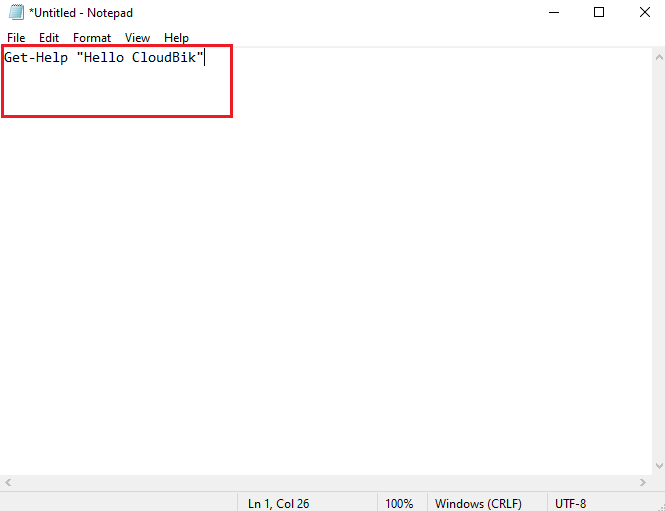
- Now, the notepad will open. Type the script in the notepad that you want to run.
For Example, Get-Help “Hello CloudBik”
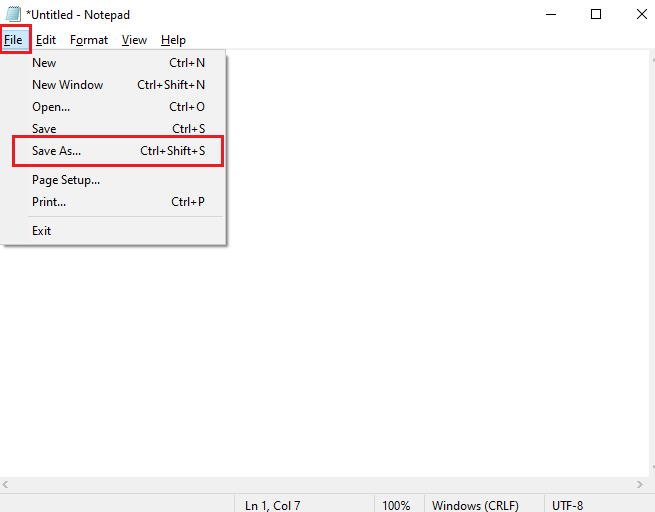
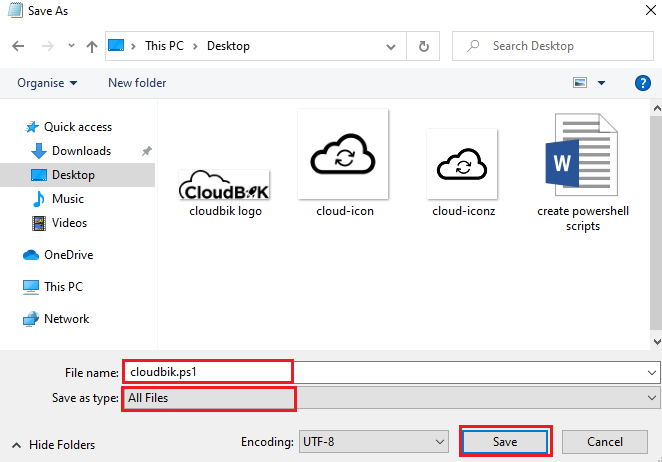
- Click on the File tab and select the save as option from the list.
- A new window will open type the file name as “cloudbik.ps1”, save as type to All Files, and click save.
You have successfully created PowerShell script using Notepad.
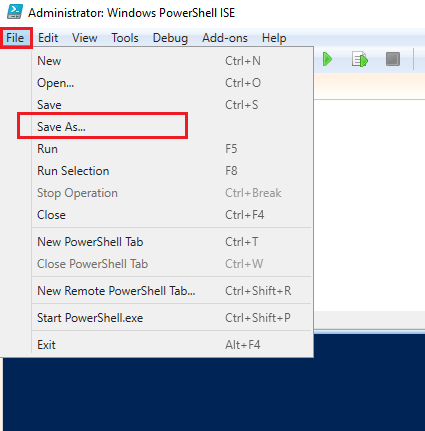
-Create a script using Windows PowerShell ISE
Please follow the steps below to create PowerShell Script using Windows PowerShell ISE.
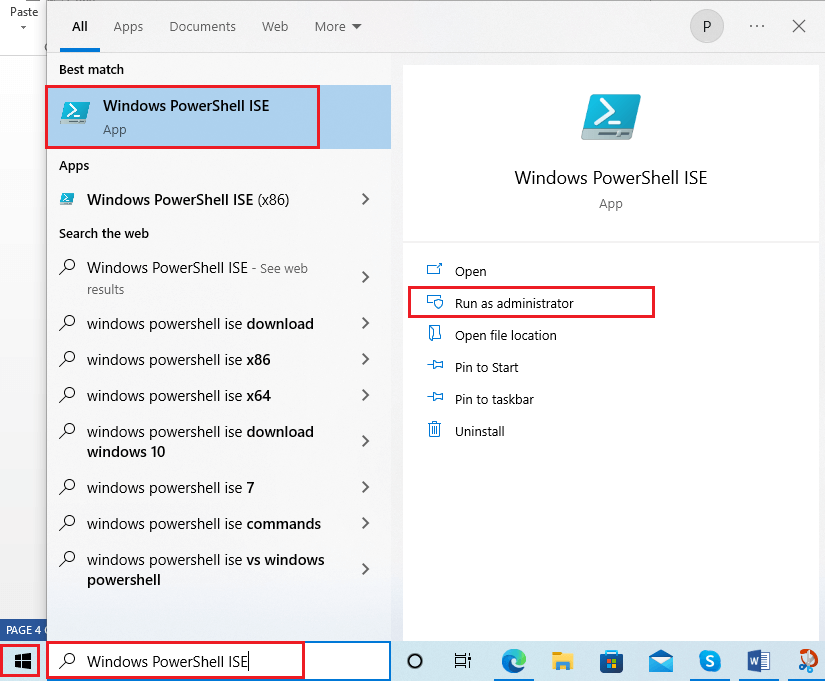
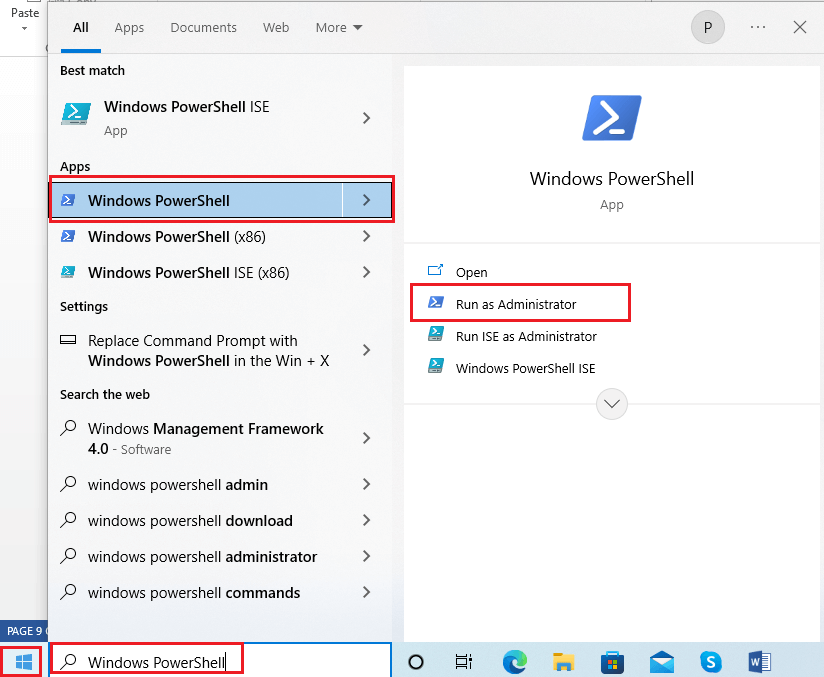
- Open Start, type Windows PowerShell ISE in the search tab, and click “Run as Administrator”.
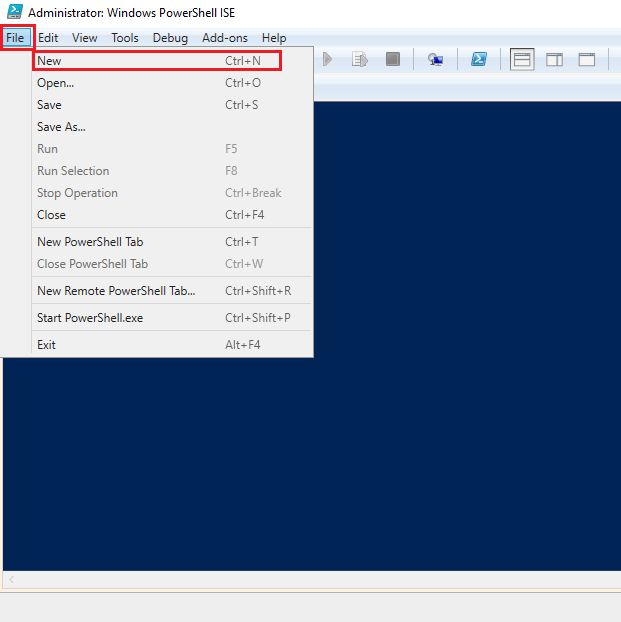
- Click on the file tab and select new to create a new script.
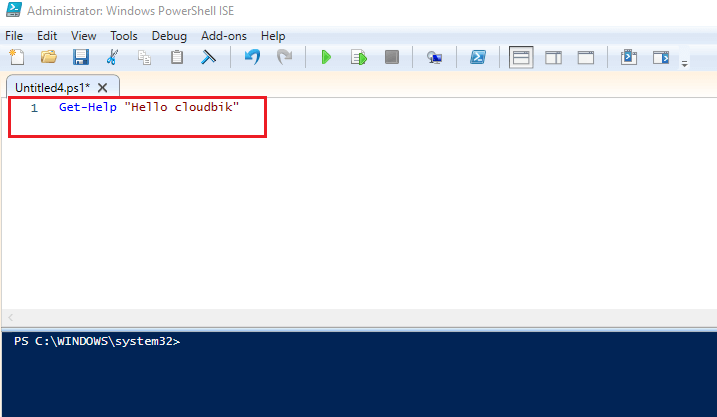
- Write a script to execute later.
For example, Get-Help “Hello cloudbik”
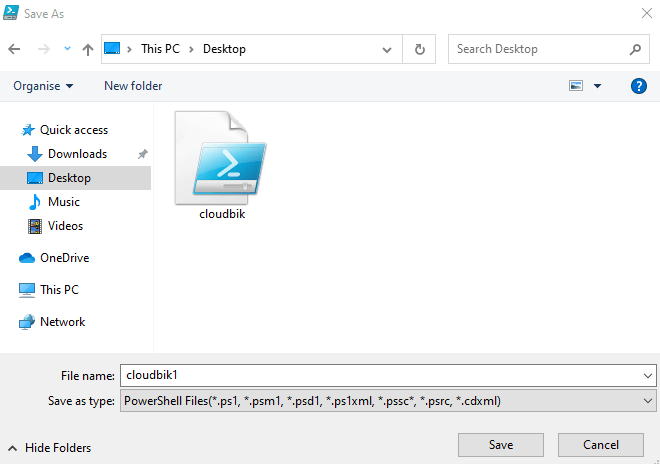
- Click on the File tab and select Save As from the drop-down menu.
- Type a file name and click on the save option to save the script file.
Now you have successfully created PowerShell script using Windows PowerShell ISE.
How to enable Execution Policy in Windows PowerShell?
The execution policy of Windows PowerShell is set as not to execute or run the scripts by default. To execute and run the scripts in PowerShell users must enable execution policy.
There is a total of four types of execution policies available in PowerShell:
Restricted- No script is executed in this policy.
RemoteSigned- Only scripts that have been downloaded from the Internet and signed by a trusted publisher can run.
Unrestricted- All scripts can run.
AllSigned- Scripts signed by a trusted publisher can run.
The execution policy in Windows PowerShell is set as restricted by default. To Change to execution policy to Unrestricted to run any PowerShell scripts, users should execute the following command.
Set-ExecutionPolicy Unrestricted
- Run Windows PowerShell as administrator.
- Type the above command and press enter.
- Type Y and press enter to confirm and set execution policy to unrestricted.
How to run PowerShell Script?
To run or execute Windows PowerShell scripts please follow the steps mentioned below:
- Open start and search Windows PowerShell and click on “Run As Administrator”.
- For executing or running the script users must type the full path of the script like (C:/desktop/cloudbik.ps1) or can also enter the file name followed by a backslash if it is in the same directory.
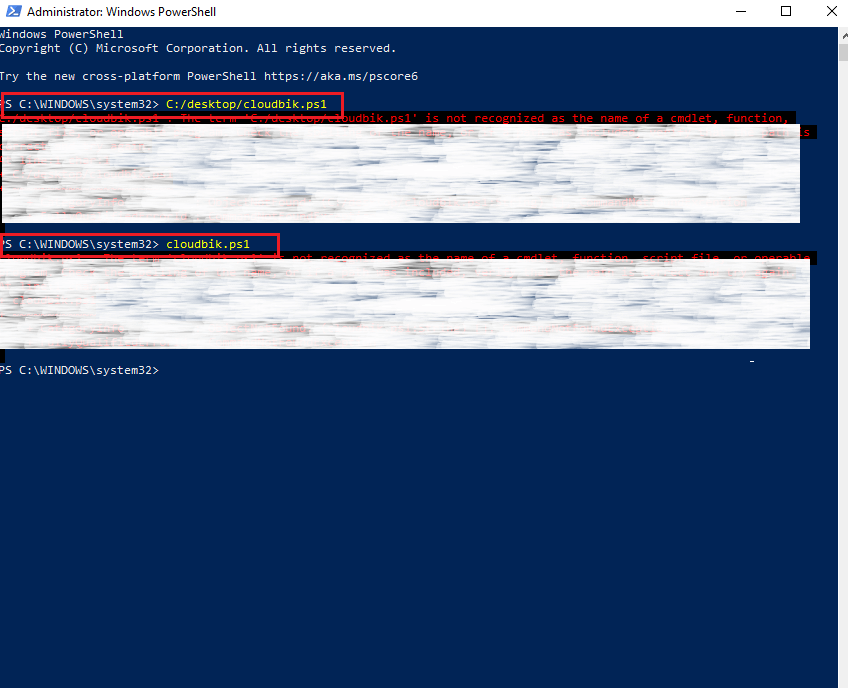
Using the above steps, you can successfully execute or run PowerShell scripts.
Also, read How to Create User Mailbox in Office 365 via PowerShell?
Conclusion:
I hope this step-by-step article helped you with how to create, enable and run PowerShell scripts in Windows PowerShell. Feel free to contact us if you have any queries.

