Nowadays, users ask questions about how to migrate Yandex Mail to Office 365. In this article, you will get to know about Yandex and Office 365 and also get to know how to migrate Yandex mail to Office 365.
Yandex Mail is an email service founded by a Russian company. It provides many services like Mail, Drive, Calendar, Messenger, Contacts, Notes, etc., with 20 GB of space to use.
But after launching Microsoft Office 365, most of the users have increasingly started migrating their data to it. It is currently the most popular cloud service, secure database, and online office platform. You can access your accounts and all Office 365 applications anytime, anywhere.
While Yandex Mail has limited facilities and features, due to which the users want to migrate Yandex mail to Office 365.
Contents
Why do users migrate from the Yandex mail to Office 365 account?
There are several common reasons why users want to upload from Yandex Mail to Office 365, which are given below:
- Today organization mailbox is naturally growing very fast, where 20 GB of space is not enough for a large organization. Therefore it is necessary for people to move towards a famous platform.
- Users migrate from Yandex to Office 365 to avoid data loss due to the accidental deletion of emails, for which no technical support is available.
- Microsoft 365 offers many new features and updated applications that are not available in Yandex Mail.
- No additional charges or installation.
After reading the above reasons, you will know the fact between Yandex and Microsoft 365. Now, if you want to move the Yandex mailbox to Office 365, follow the methods below.
Multiple Methods of Migrate Yandex mail into O365 account
- Using office365 IMAP Migration.
- Using Microsoft outlook.
- Configure Yandex mail into Outlook. (Export pst file)
- Configure the office365 account into Outlook. (import pst file into Office 365 account)
- With the help of a third-party tool.
First method: Using Office 365 IMAP Migration Process
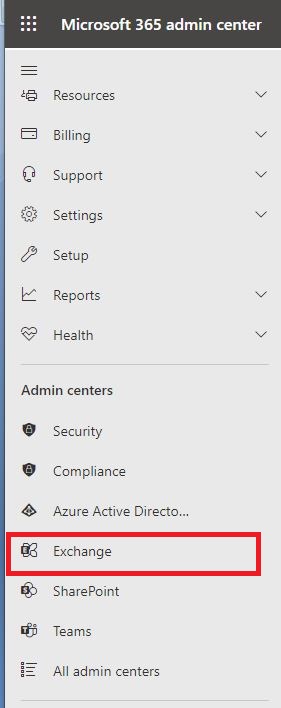
- Log in to your Microsoft Office 365 account using your credentials and move to the Microsoft admin center.
- Create a user mailbox (if it does not exist) and give permissions
- Click on Exchange >> It will open a new window.
- In the new window, click on Mailboxes.
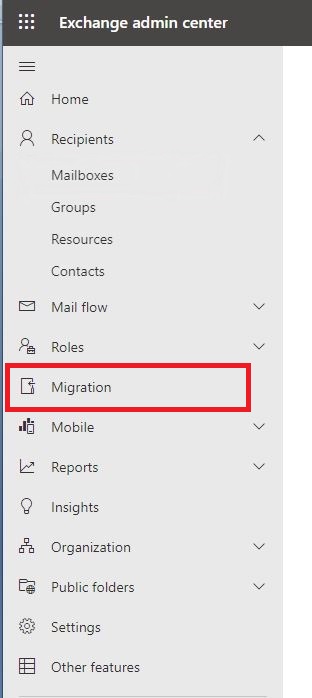
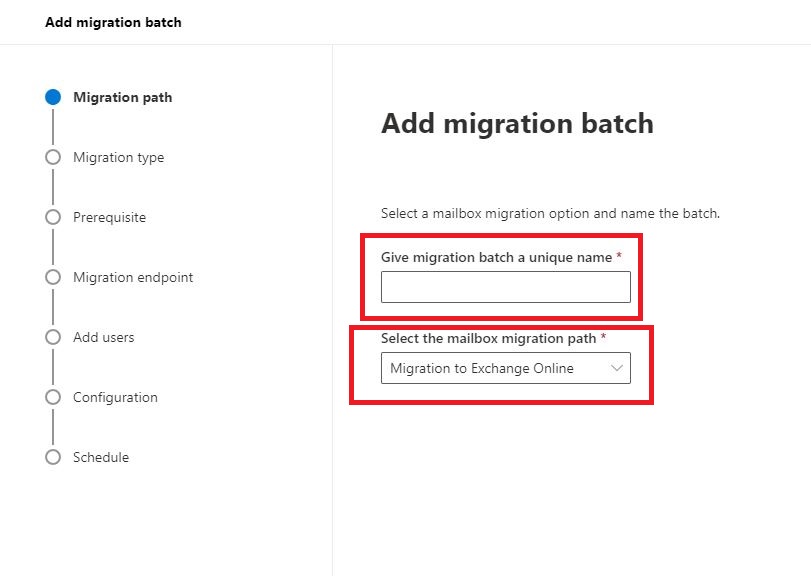
- Here you have to create a migration batch. To make a migration batch, click on Add-Migration Batch.
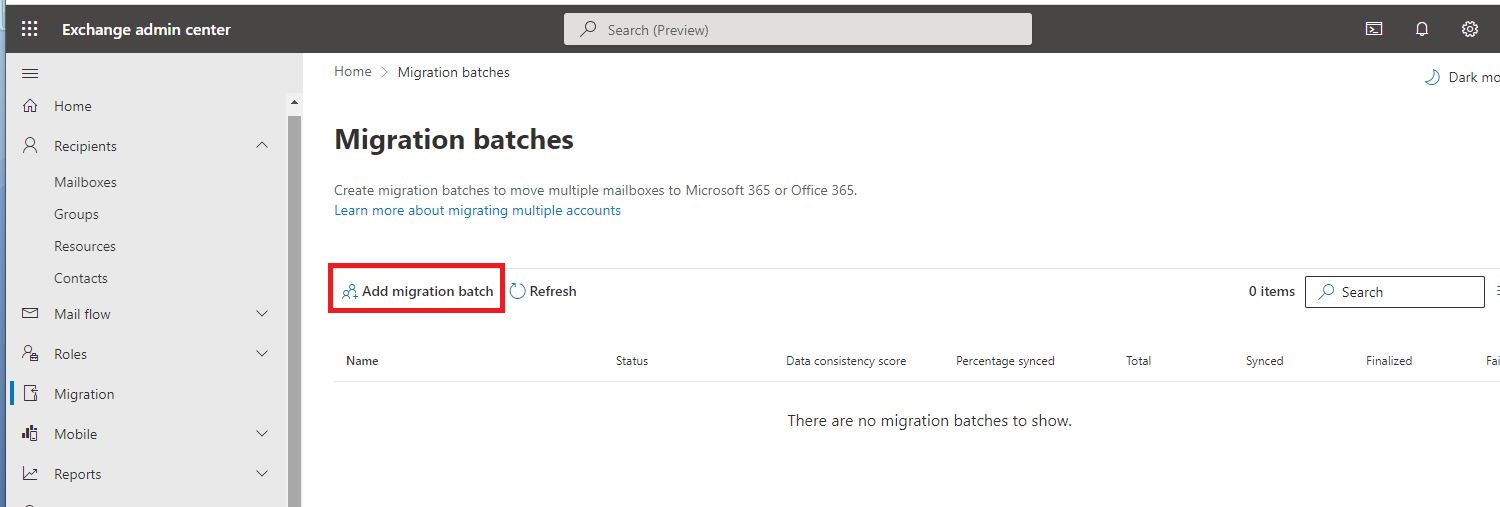
- Then give the migration batch a unique name and select migration to Exchange Online.
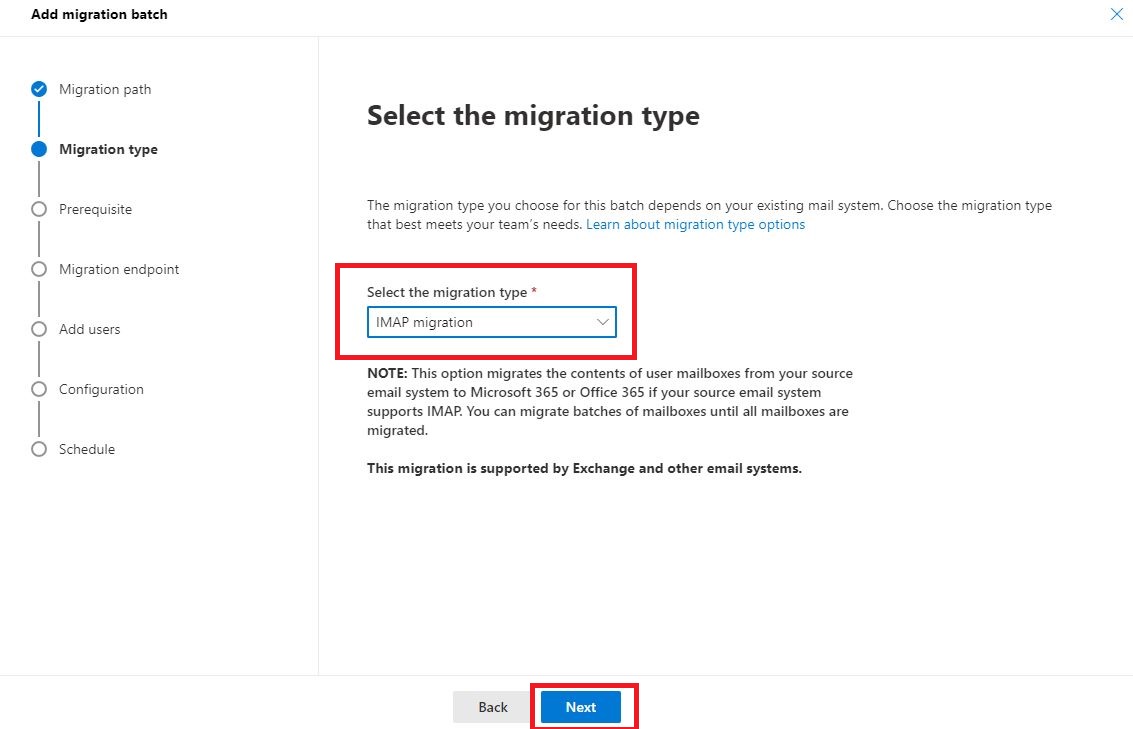
- Select the migration type: IMAP Migration.
- After that, you have to set a migration endpoint. Here you have to select “create a new migration endpoint”.
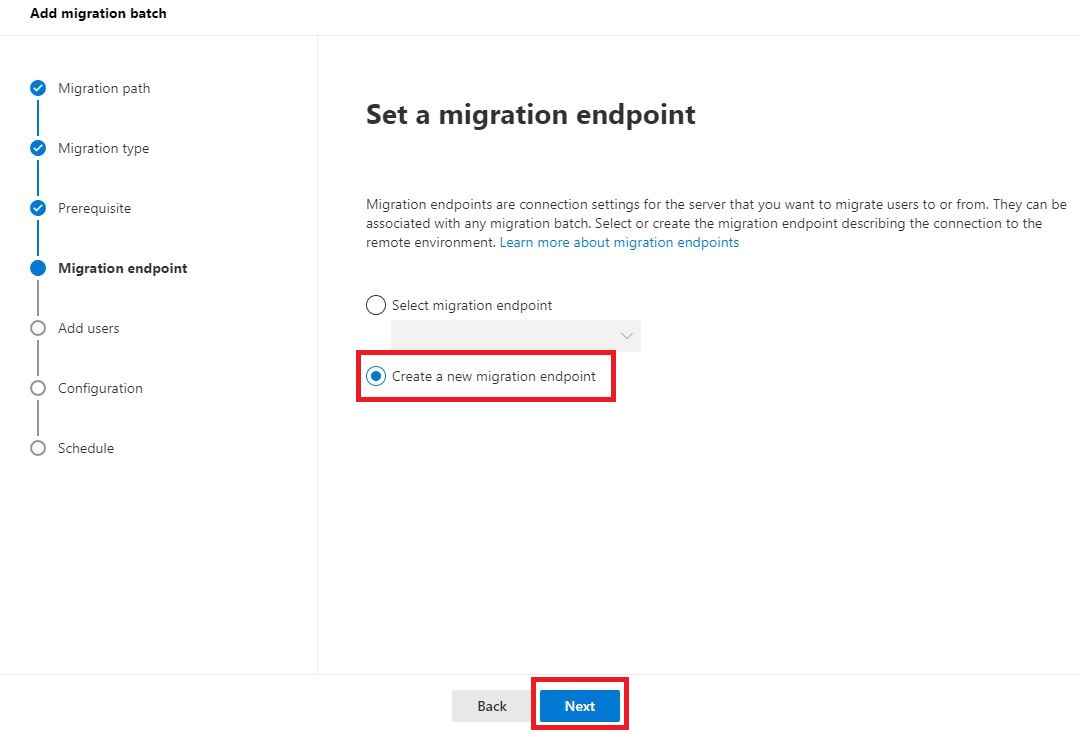
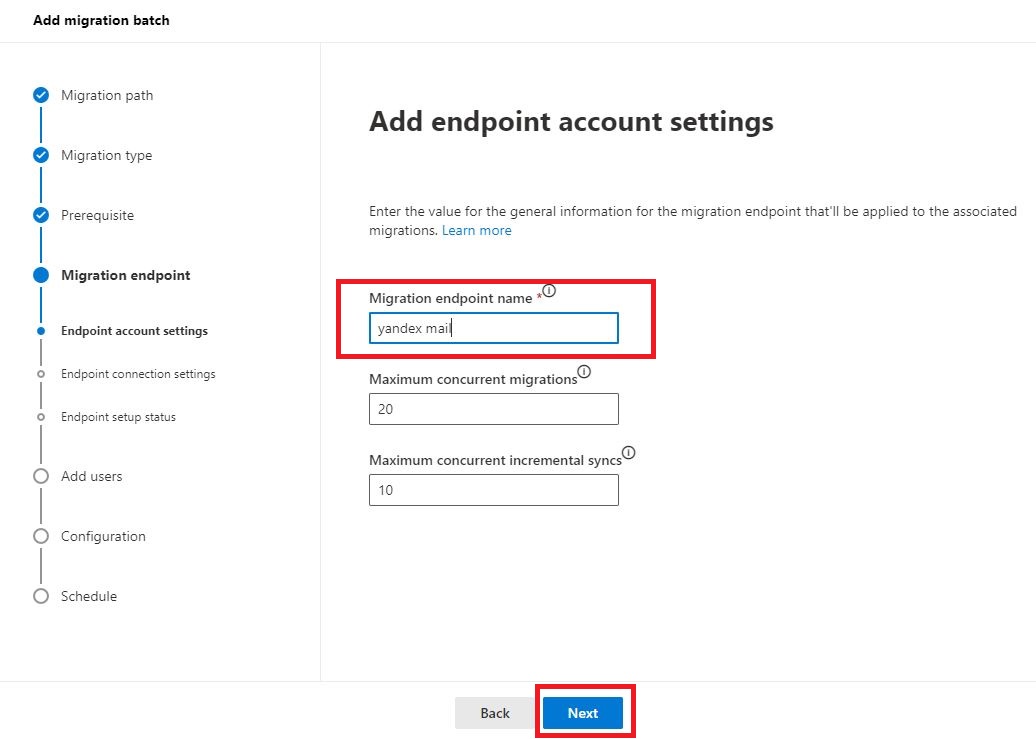
- Give the name of the endpoint migration.>> click Next
- Now you have to provide an IMAP endpoint configuration setting. Inside the IMAP server, type“imap.yandex.com” and select SSL in the encryption given below, and after ticking the Checkbox, put port 993.
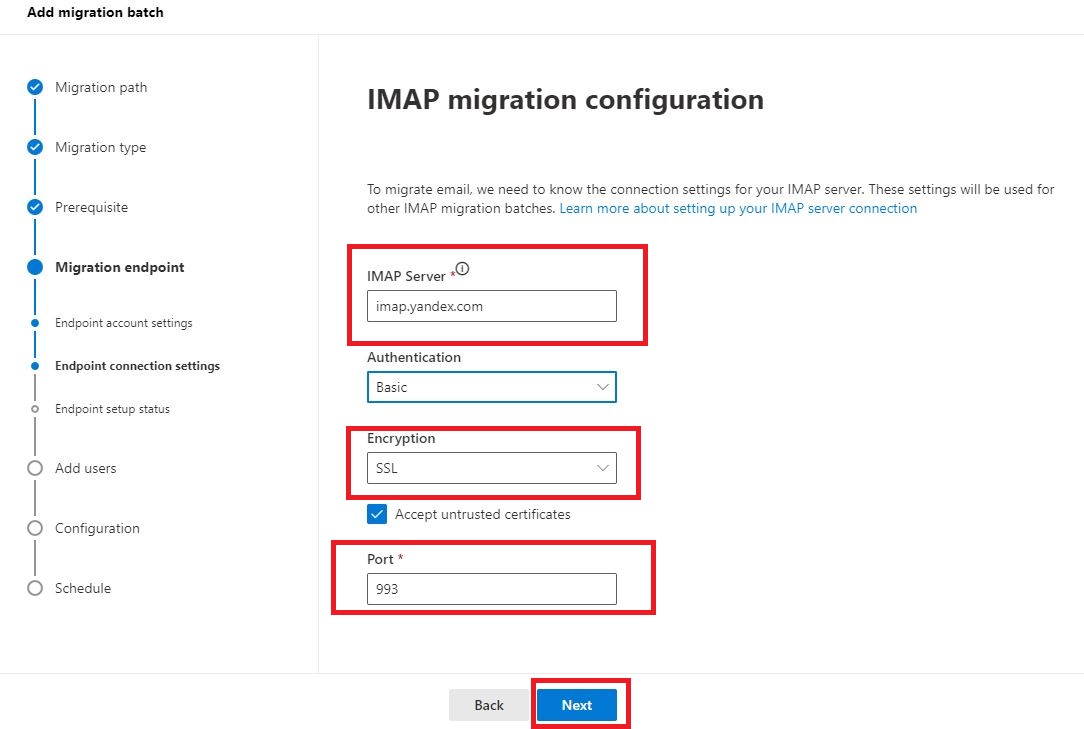
- Click on the Next
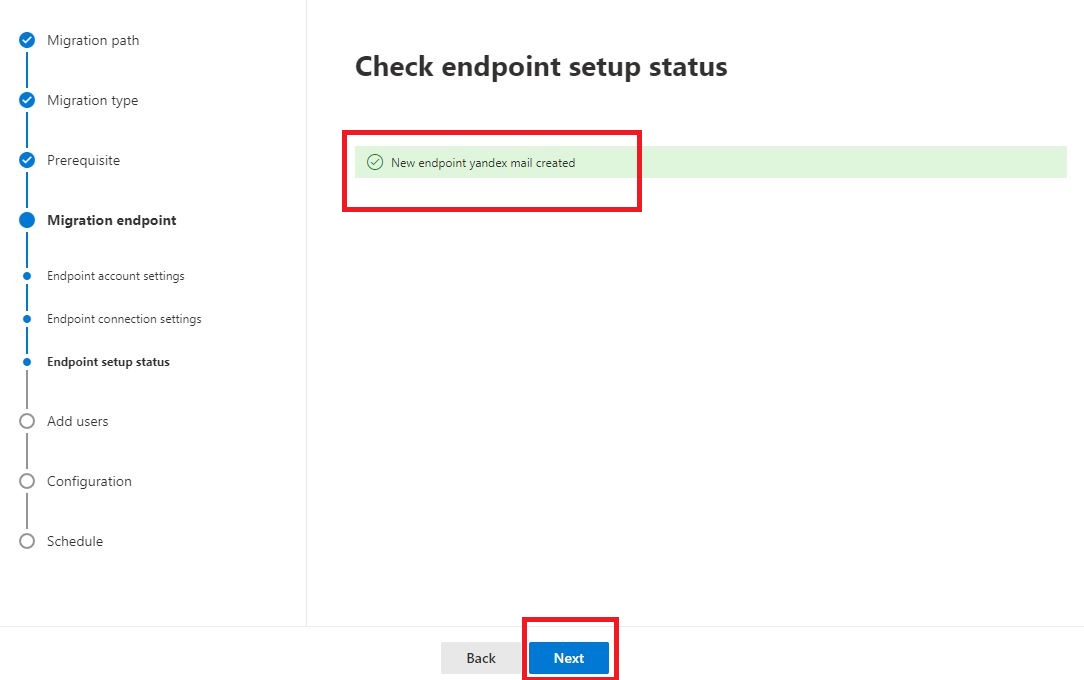
- After that, it will check the status of the Endpoint Setup, click on the next button.
- In the next screen, you must add user mailboxes via .csv file format. Create a CSV file.
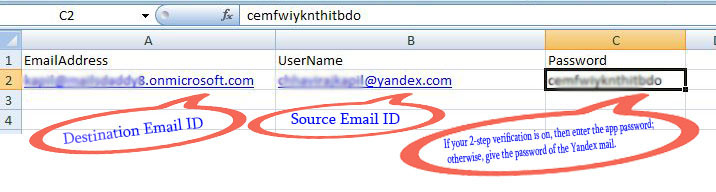
- Insert the Email ID of your O365 Mailbox in the email address.
- Enter Yandex’s email ID in place of the username.
- If your 2-step verification is on, enter the app password; otherwise, give the password of the Yandex mail. Save this file (in .csv format).
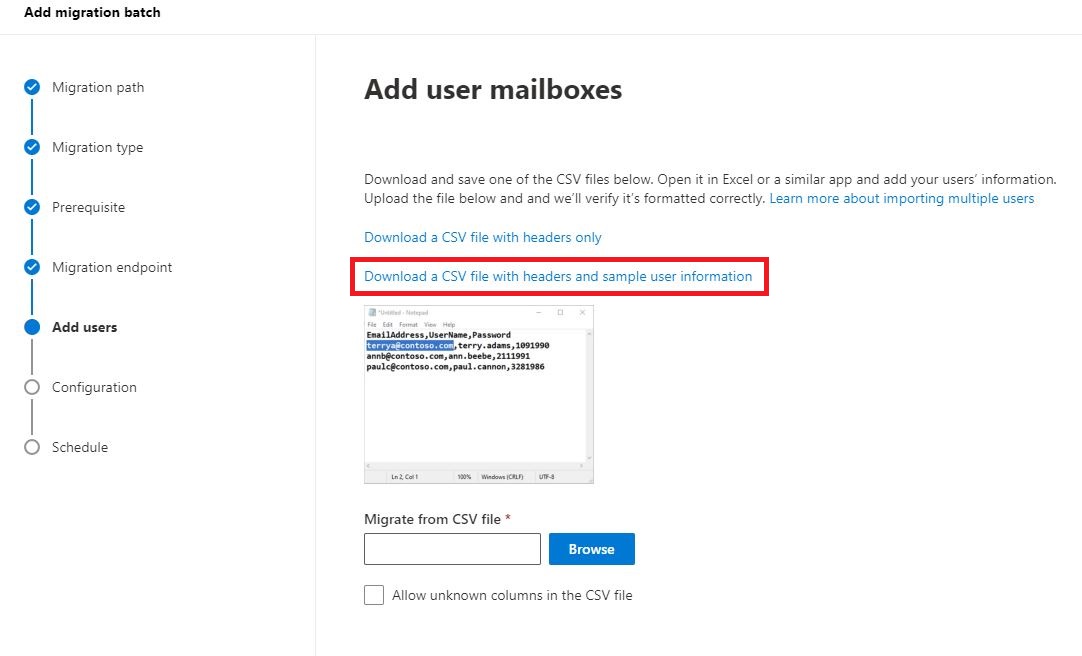
- Upload saved CSV files by clicking the Browse
- In the next window, you have to the migration filtering option. You can choose these options if you want to filter by folder and date. Otherwise, avoid it and click on the Next.
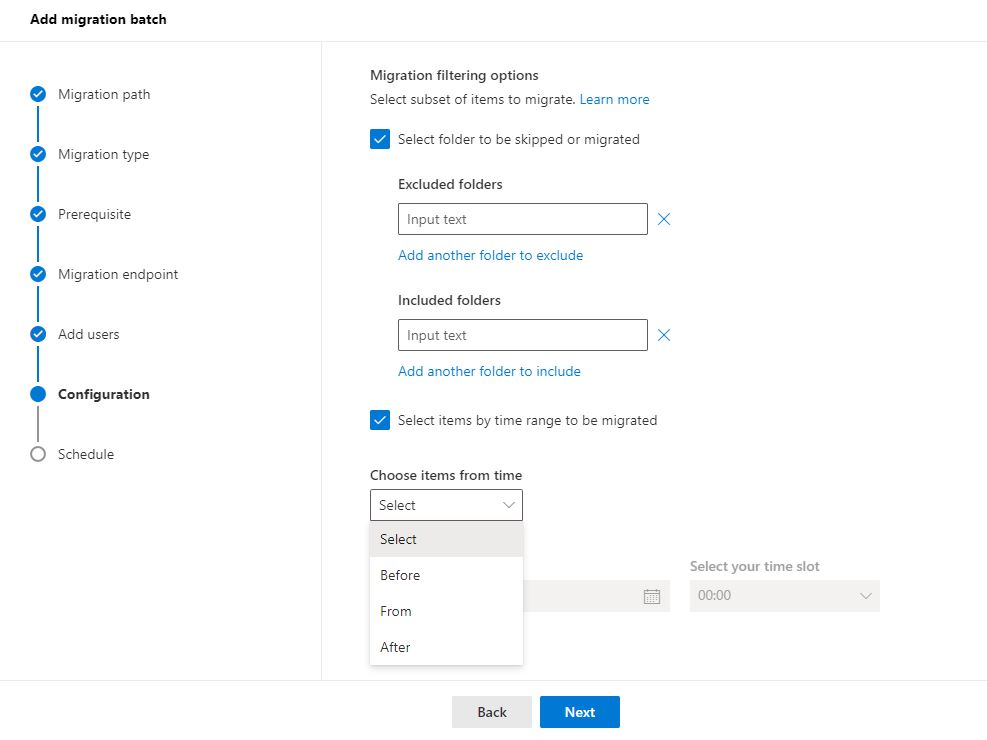
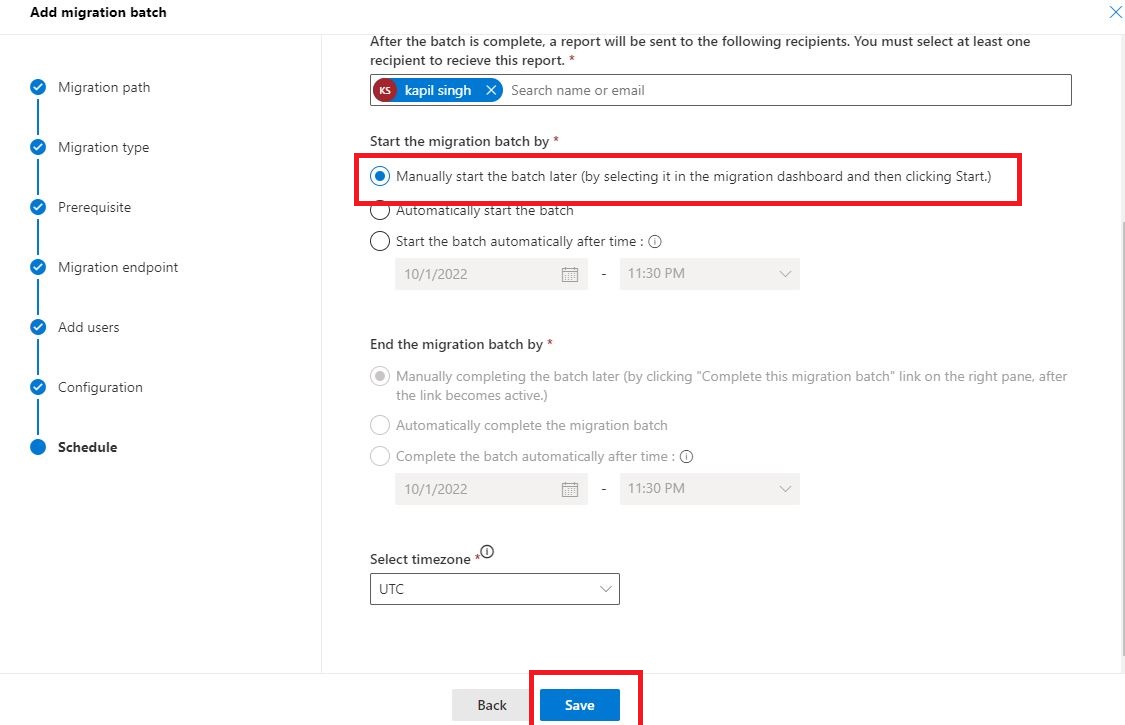
- Now you will see three options to start the migration.
- Manually start the batch later(selecting the migration dashboard and clicking start).
- Automatically start the batch. (to start migration automatic)
- Start the batch automatically after a time. (to start migration at a specific time)
- Here you select one option in any three options to start the migration. Then click on the Save
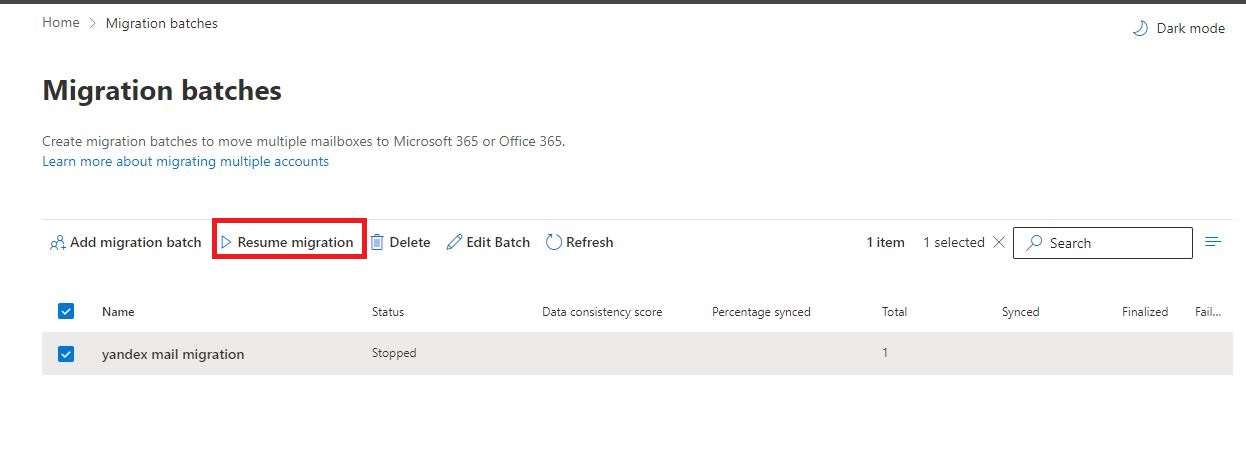
- If you choose the first option, click on Resume migration on the next screen. The process of migration will start. This process takes 5 to 10 minutes; You can see its status by clicking on it.
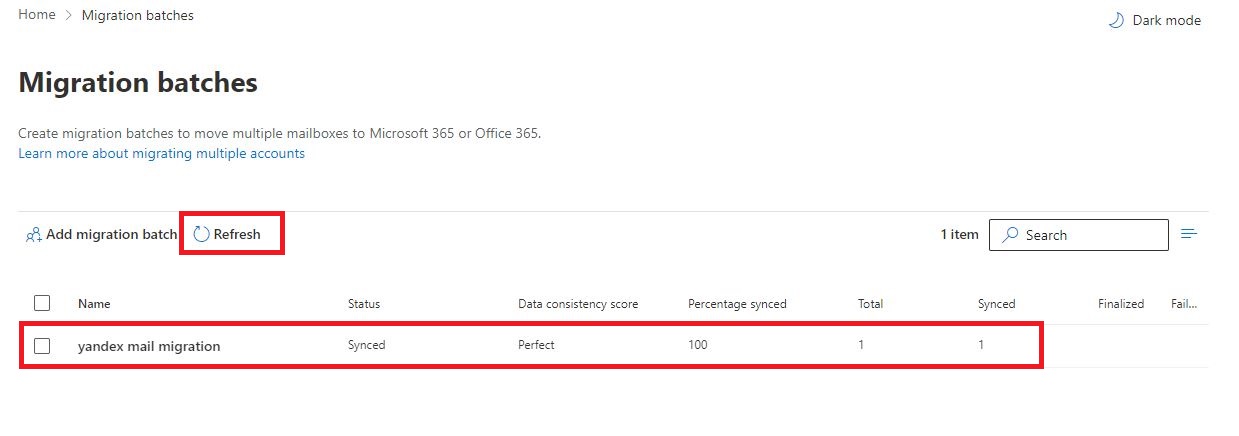
- Your migration process will be finished. You can see it by clicking refresh.
Method 2nd: Using MS Outlook
In this method, there are two parts to migrating Yandex mail to O365.
Configure your Yandex mail into ms outlook and export the pst file:
Steps for configuring Yandex mail into Outlook.
Before configuring your Yandex mail into office 365, you need to enable IMAP in Yandex mail and create an app password. To know about this process, click here.
Configure Yandex mail into Outlook:
- Open Outlook and click on the file tab >> go to the Add account.
- Then click on manually configure server setting or additional server types.
- Enter credential user information, server information, and Logon information.
- Server information
Set the following account settings: - Incoming mail: Server: imap.yandex.com. Port: 993
Outgoing mail: Server: smtp.yandex.com. Port: 465
- Click Next to finish.
Export pst file:
o Click on the file tab and go to Import/Export.
o Then click on Export to file. And click Next.
o Choose Outlook data file (.pst) >> click next.
o After that, choose your account >> click next.
o Navigate the destination path to save the pst file and hit on finish button.
Through these steps, you have successfully exported the Outlook PST file. Now, you have to import the PST file into Office 365 to complete the Yandex mail to Office 365 migration.
Second part: Import Outlook pst into the office 365 account
- Using Network Upload Method
Read this article: how to import Outlook PST into Office 365.
Using any third-party tool to migrate Yandex mail to exchange online.
If you have already made up your mind that you want to use a professional solution, then you should search online.
Today, many third-party tools are available to migrate Yandex mail to Office 365. By using these tools, you can make the process very easy and smooth. Plus, it saves you from such a long and time-consuming process.
Conclusion
In this article, we have told multiple ways to migrate Yandex Mail to Office 365, using which you can upload your data to Microsoft 365. With a little effort, each user can convert their data to an O365 account. However, there are some limitations in the IMAP method, which you have to know before the process. Otherwise, third-party tools make the migration process simple and straightforward without drawbacks.
Read more – How to Migrate Gmail to Office 365 Exchange Online for Free

