
Email forwarding in any email client is a good approach when you want to send each email coming to your inbox to multiple or single email addresses, whether you want to forward emails to internal or external email addresses. In Office 365, you can set up email forwarding to single or multiple internal or external email addresses. In this guide, I will show you how to set up email forwarding in Office 365 user accounts in simple steps with detailed information.
Contents
What are email forwarding and its benefits?
Email forwarding is a feature that enables us to forward emails coming to you to a particular email address defined by the user. You can say it is a rule defined by the user to forward emails automatically.
Email forwarding is beneficial and saves time when regularly forwarding emails coming to you to particular email addresses. If you also use the old method to forward your emails on a regular basis, I suggest you use email forwarding in Outlook 365, Office 365, Outlook, and many more email clients.
The main focus of this blog is to teach users how to set up email forwarding in Office 365 user accounts. Let’s begin to see Office 365 email forwarding to multiple email addresses.
Methods to setup email forwarding in Office 365, Outlook 365
You can set up Office 365 email forwarding in two ways.
The above two methods are used while setting up email forwarding in Office 365 user accounts. Let’s proceed both ways.
Setup email forwarding to a single email address in Office 365
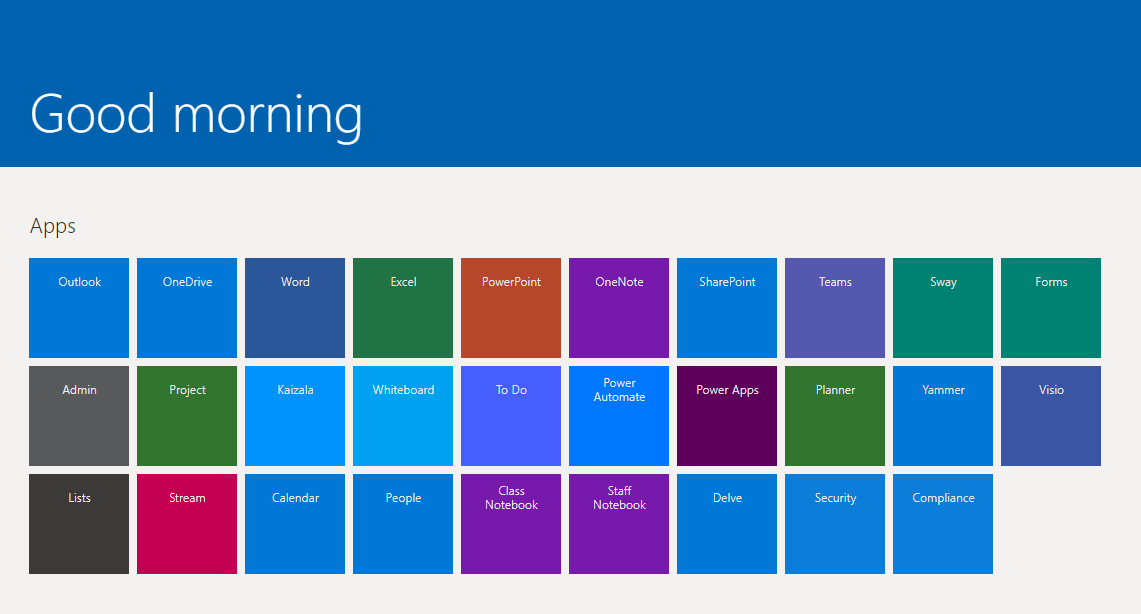
Step 1: First, open Office.com and sign into your Office 365 account using your login credential. You will see a screen showing all the apps.
Note: Remember you need an admin account to set up Office 365 email forwarding.
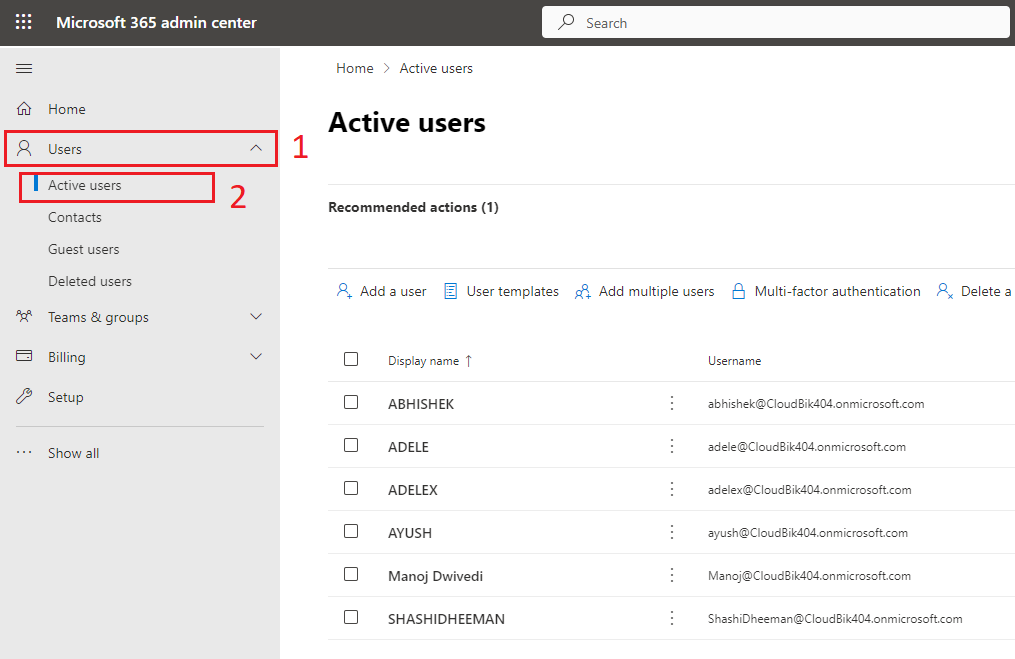
Step 2: You must go into the Admin center to set up email forwarding in Office 365 user accounts. Click on Admin from the apps list, which will take you to the admin center.

Step 3: Once you enter into Microsoft 365 admin center, click on the users and then Active users. It will show you a list of all the active users in your Office 365 account.
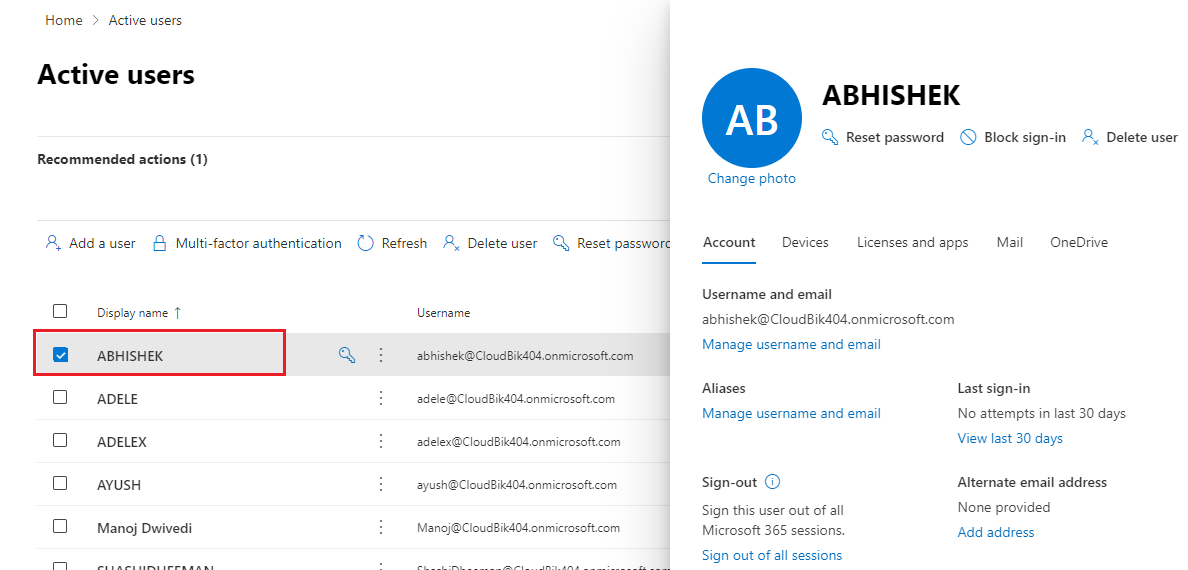
Step 4: Now click on the user to which you want to set up email forwarding. It will open the user account settings on the right side, as shown in the image below.
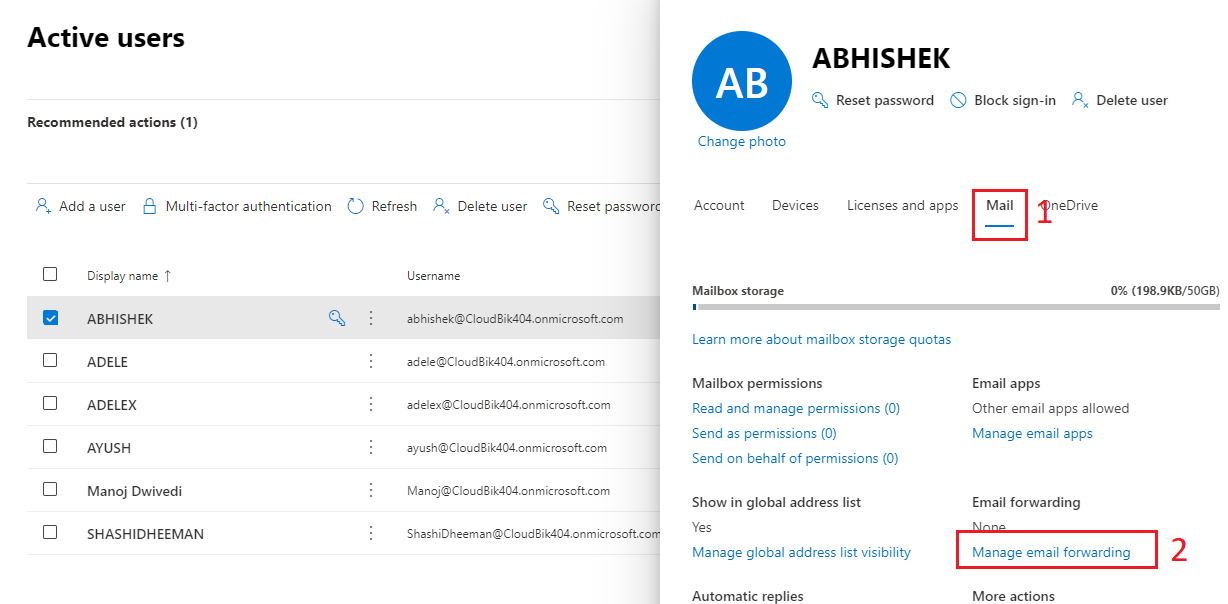
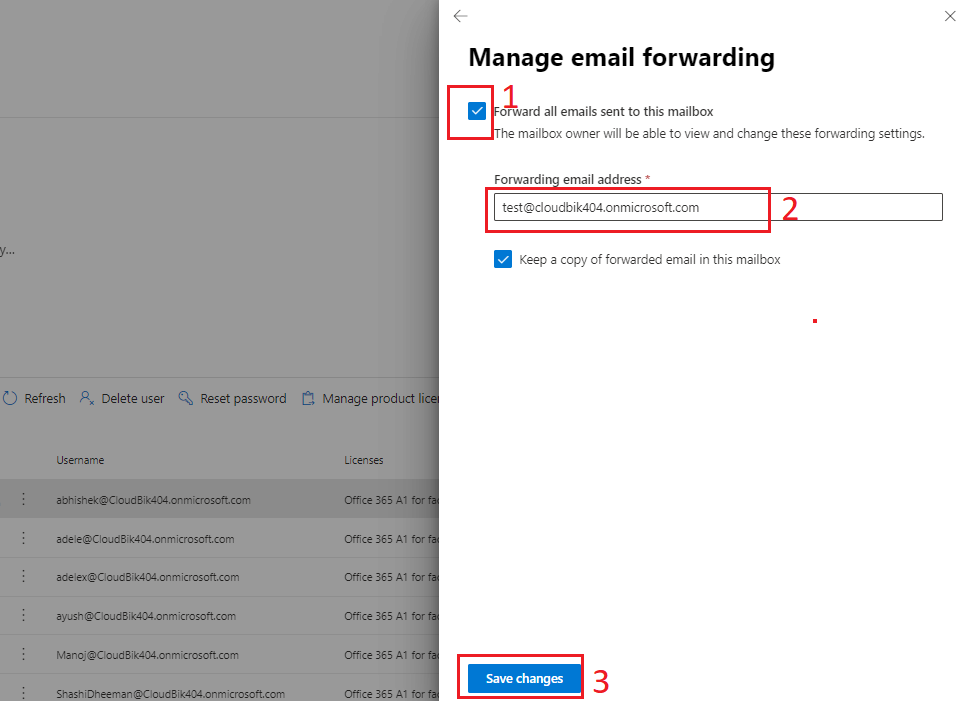
Step 5: Now, click on the Mail option on the user account page to open the Mailbox settings. Select manage email forwarding to set up email forwarding in Office 365 user account.
Step 6: Now manage email forwarding window will open. Click on forward all emails sent to this mailbox, and it will show you more details. Type the email address to which you want to forward your emails and click on Save changes.
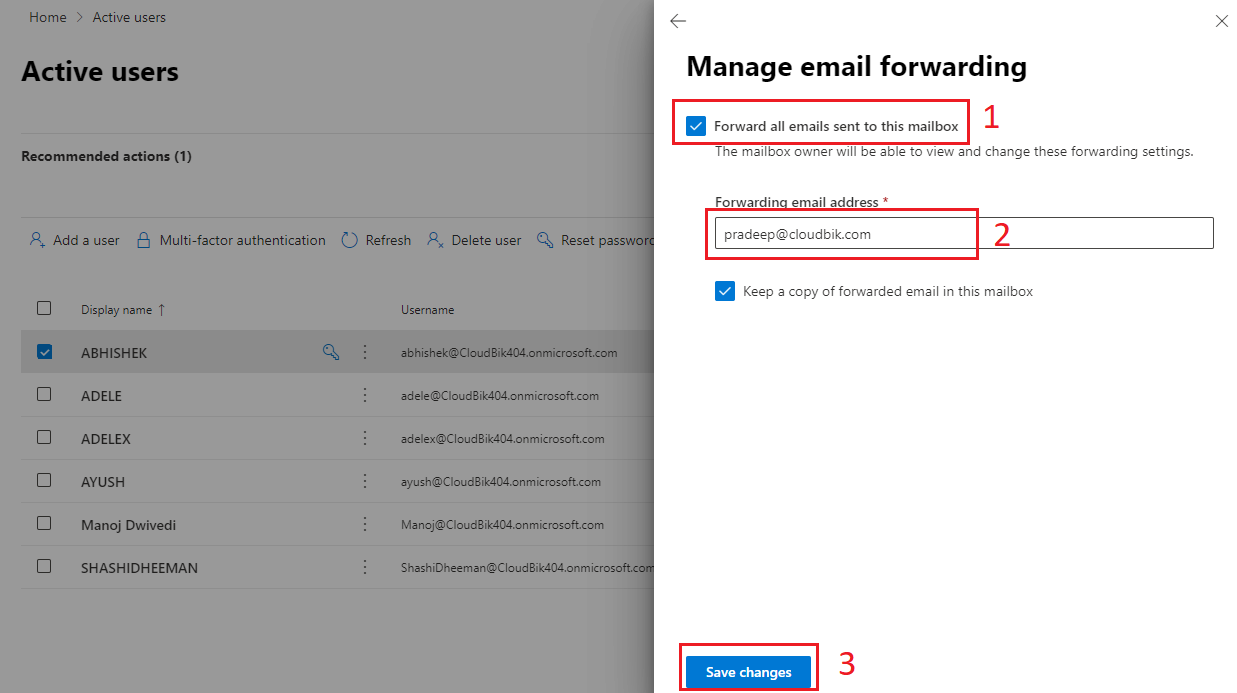
Once you click on the save changes, it will keep the changes and you can see a screen showing the dialog box “Mailbox email forwarding info updated.”.
You can successfully set up email forwarding in Office 365 user account through the above steps. The above tutorial showed you the office 365 email forwarding complete setup step by step with screenshots so that you can quickly learn and do it yourself.
Note: You can add only a single email address in the above field. You will need a distribution list if you want to add multiple email addresses. Read below for further steps.
Setup email forwarding to multiple email addresses.
You need to create a distribution list if you want to forward your emails to multiple email addresses. You can add as many email addresses as you wish to forward your incoming emails in the distribution list.
Steps to create a distribution list and add internal organization members
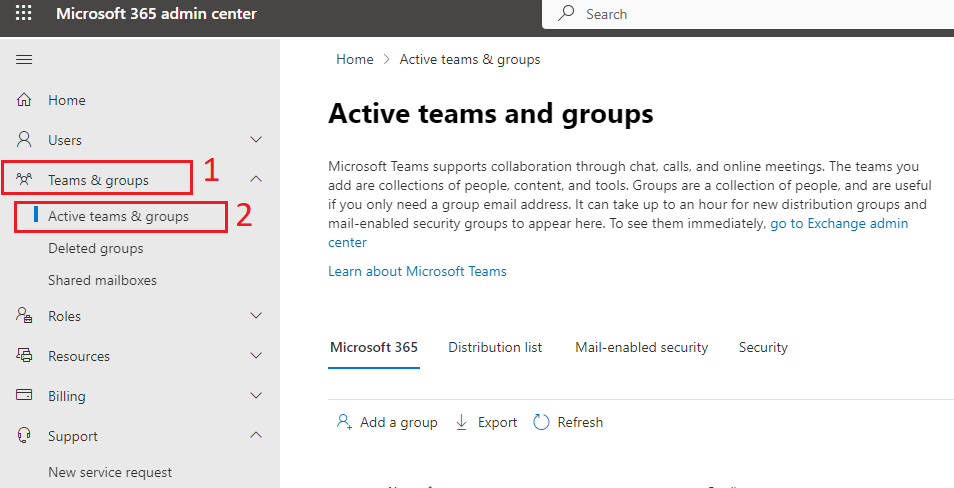
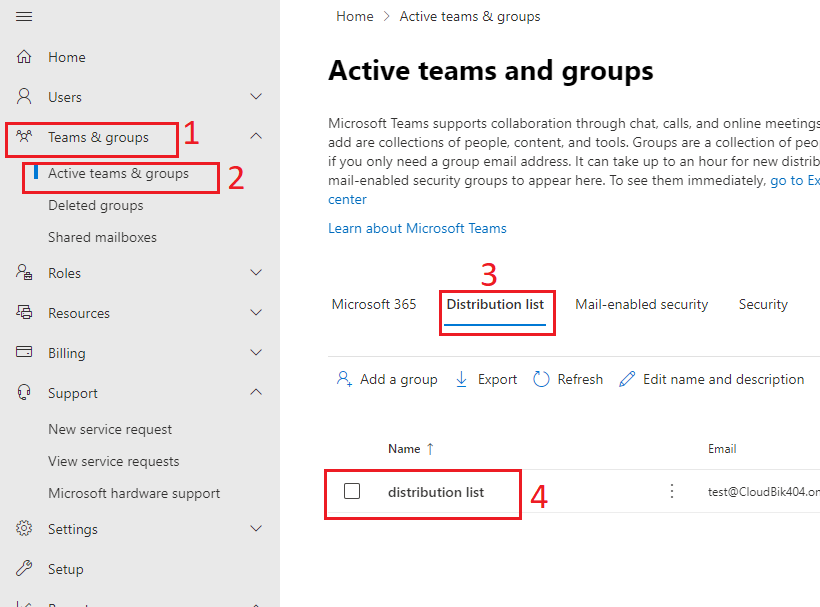
- Go to Microsoft 365 admin center, click on the teams and group, then choose Active teams and groups from the drop-down options.
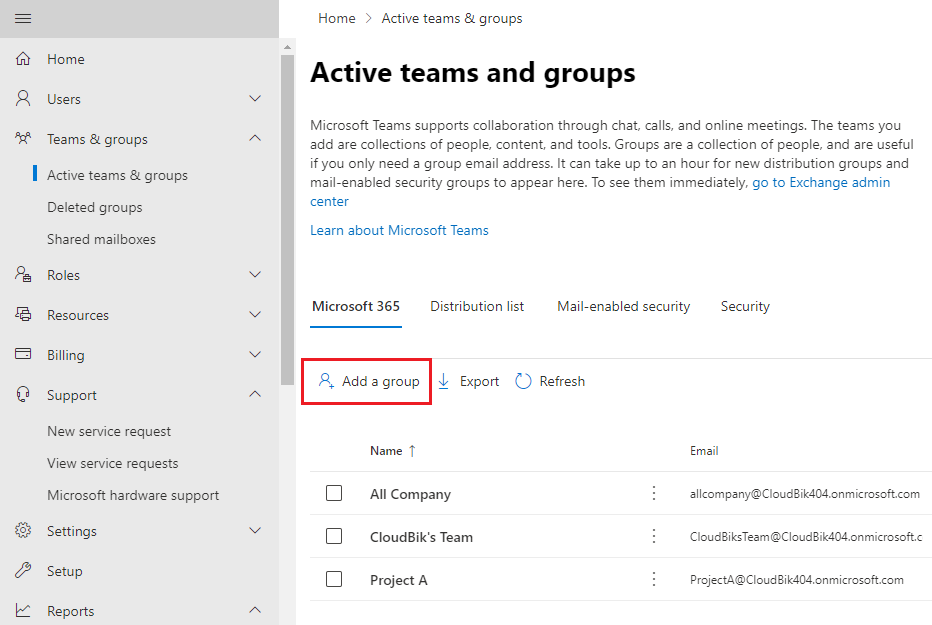
- Active teams and groups window will open. Click on Add a group to create the distribution list.
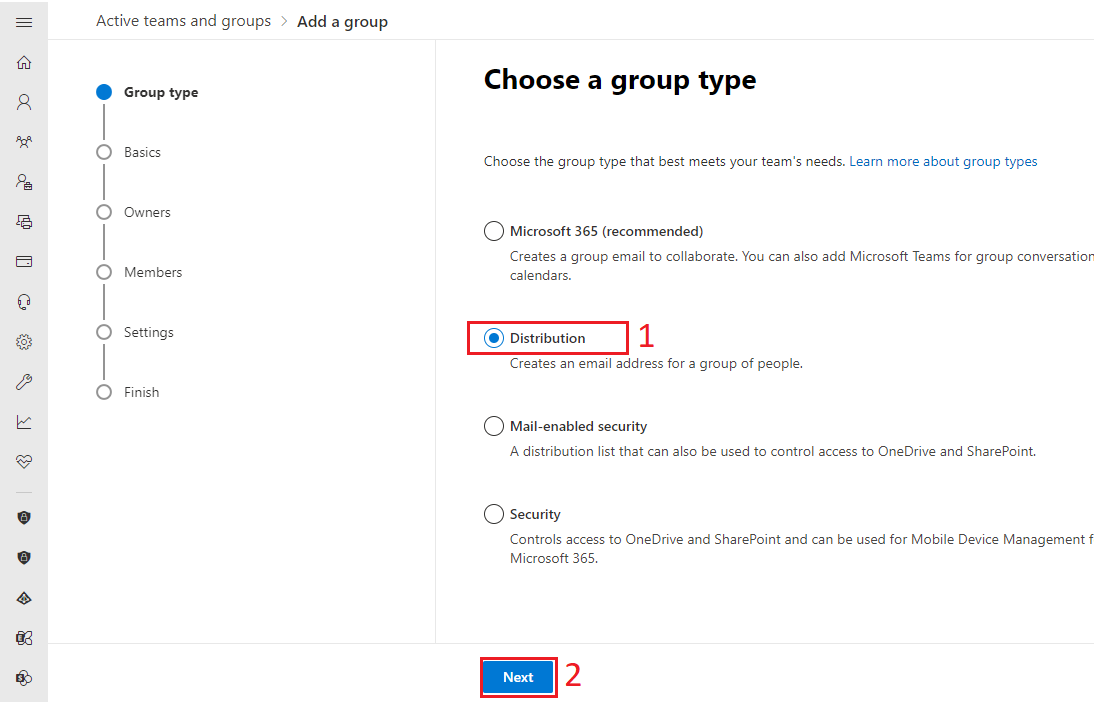
- A new window will open “Choose a group type.“. Click on the distribution option and then next.
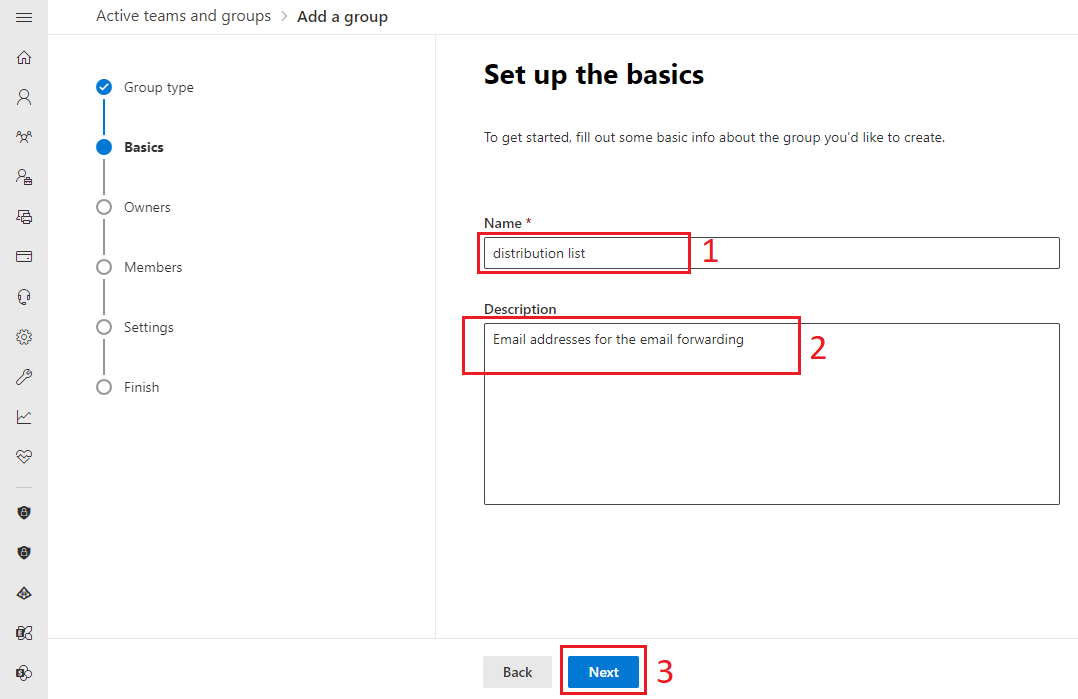
- In the next window, type the name and description of the group.
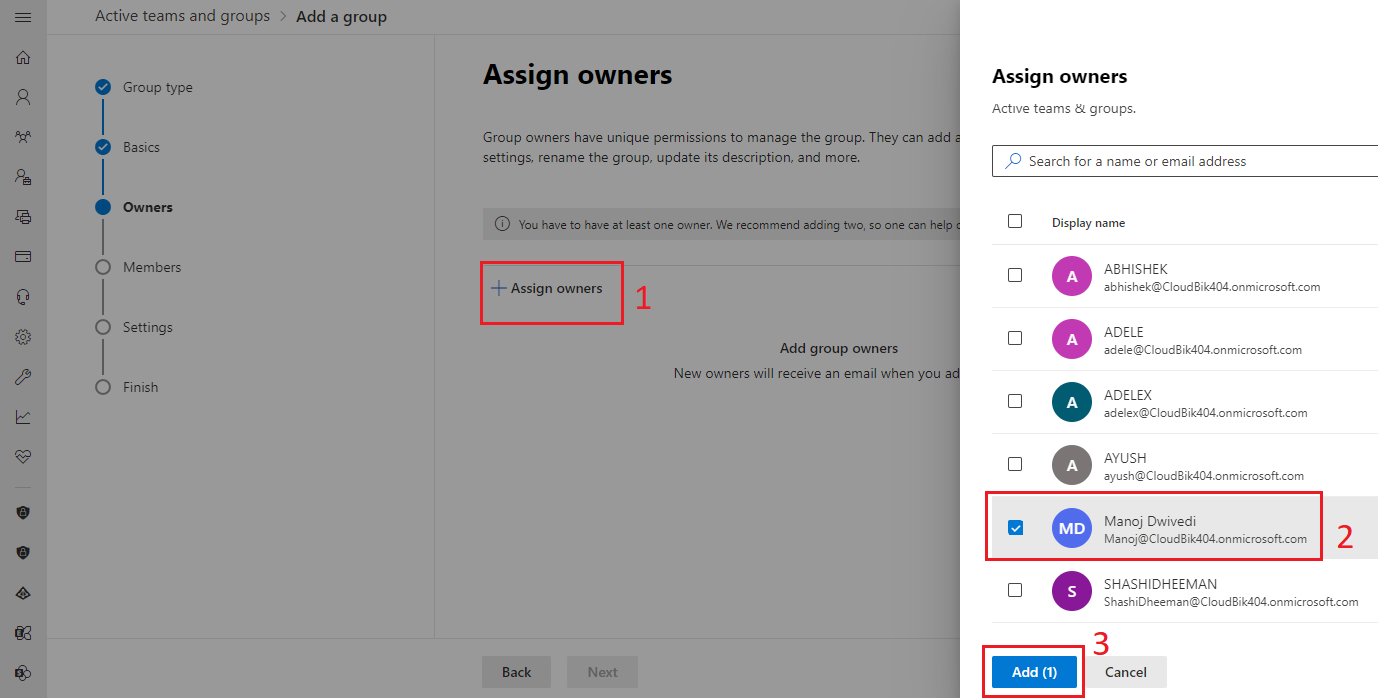
- Now in the next window, you need to assign group owners. You can add single or multiple group owners. Click on the Assign Owners to set the group owners. Choose the owner from the list on the right and click the Add
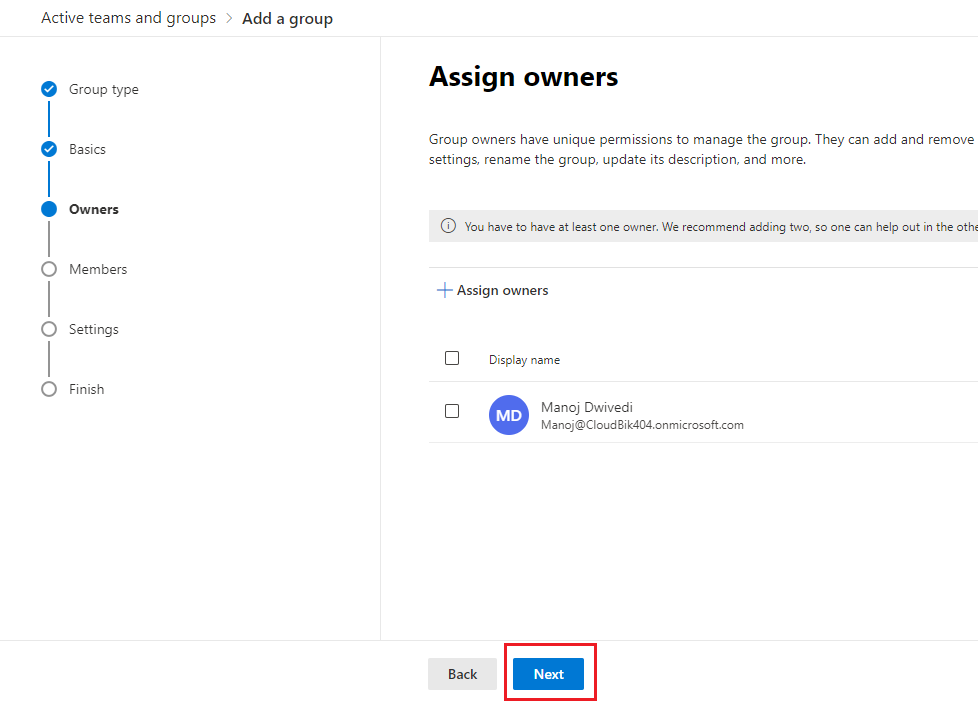
- Now you will see the assigned owner in the list. Click next to proceed further.
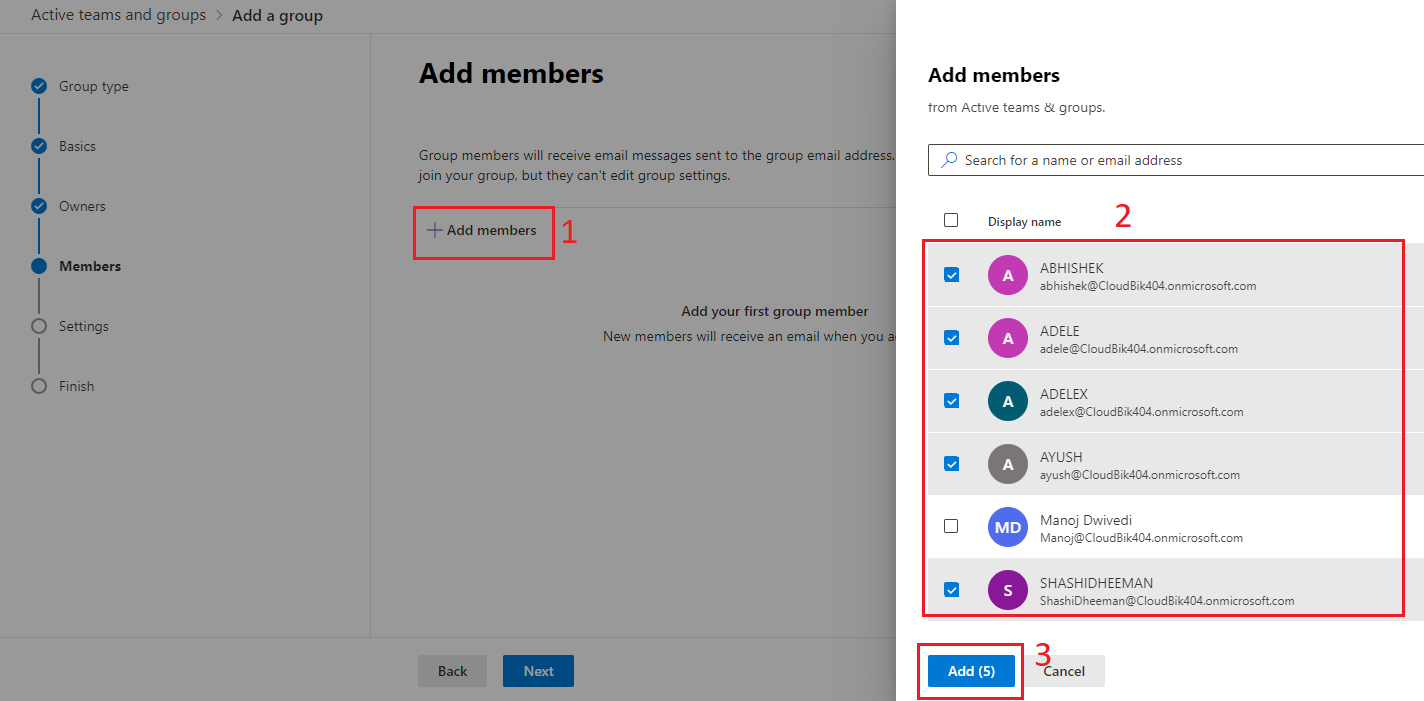
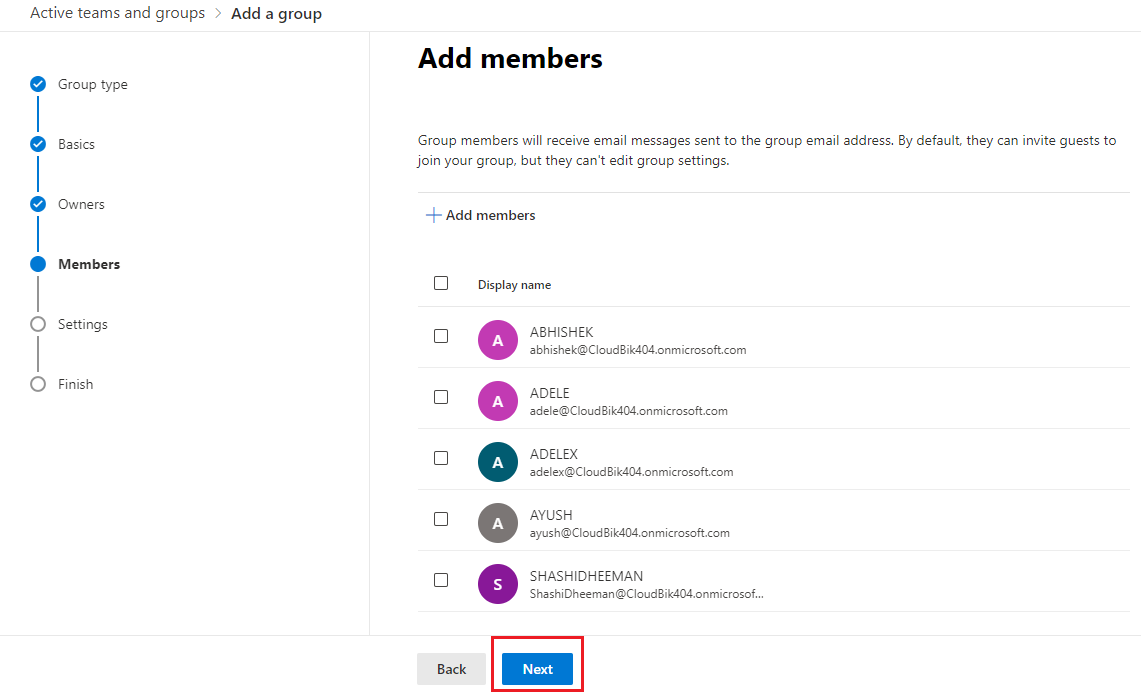
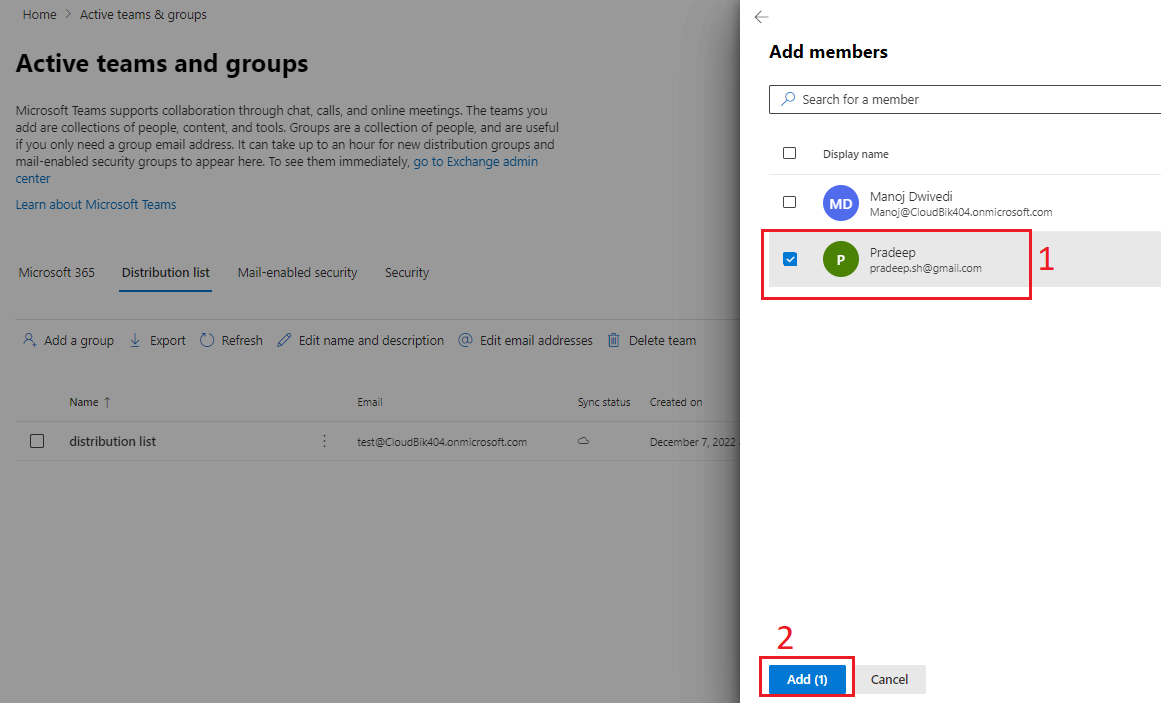
- Now add members window will open. Click on the add members button to add the members to which you want to forward emails. A window will open on the right side, showing the users list. Choose the members and click on Add button.
- Now it will show you a list of all the added members. Click next to move further.
- In the next step, enter the group email address and click next to proceed further.
Note: If you want to allow people outside your organization to send emails to this Distribution group then you can click on the option showing under Communication. Otherwise, leave it unchecked.

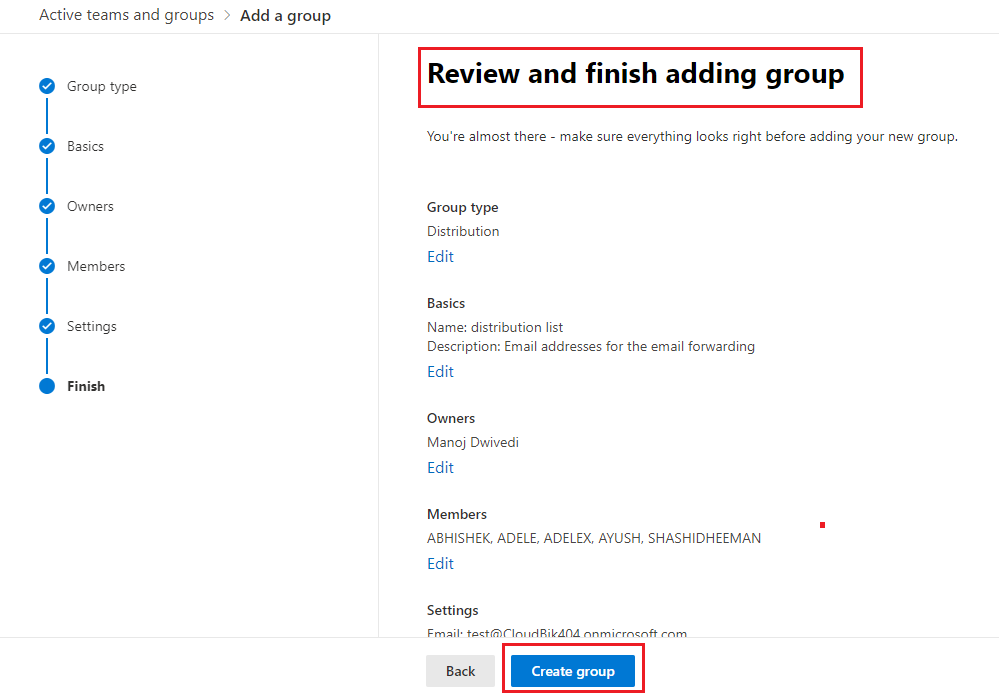
- Now review your details and click on create group button to add the group.
Steps to add external email addresses
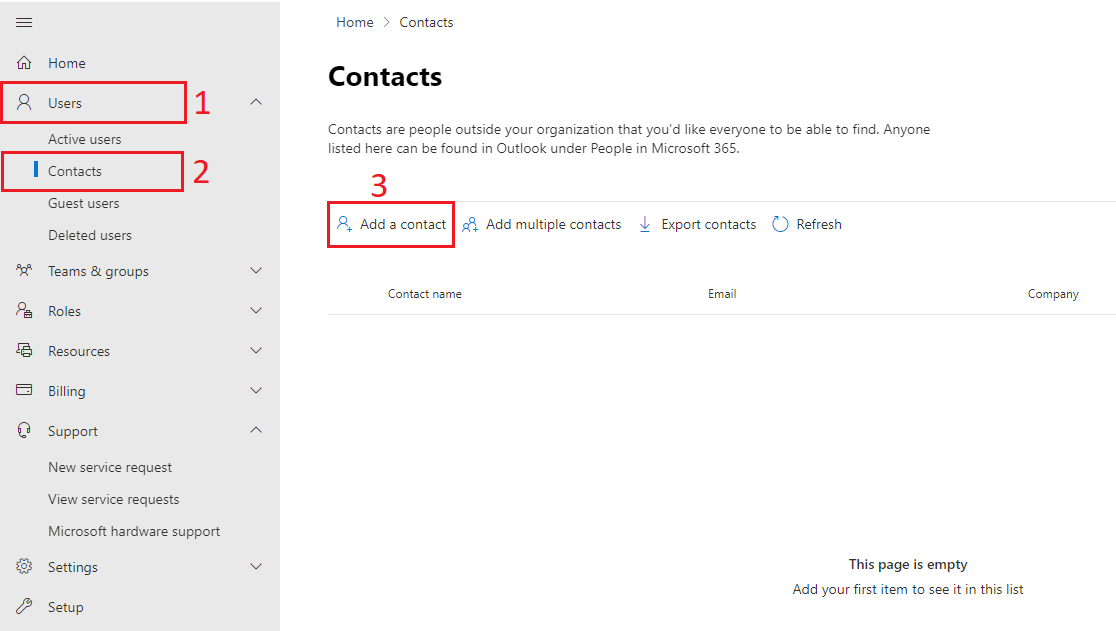
- To add external email addresses in the distribution list, you need to create a contact for that email address. In Microsoft 365 admin center, click on Users, then Contacts from the list. Now click on Add a contact to add contact for email forwarding in Office 365.
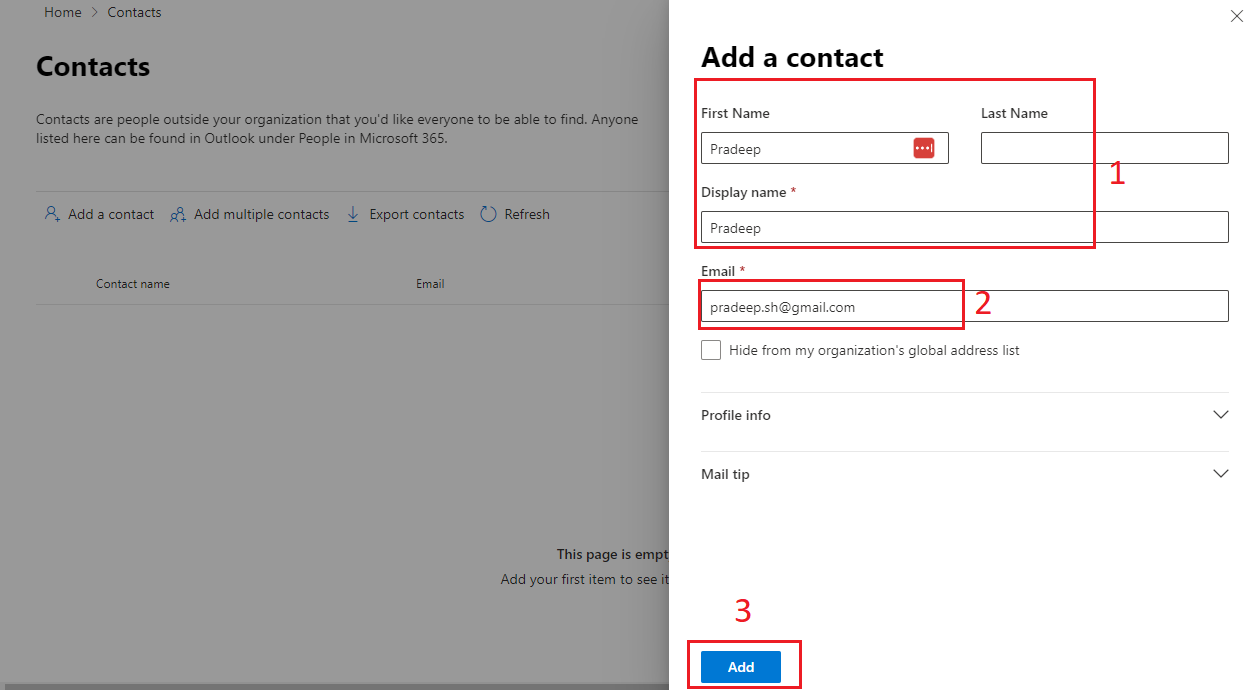
- A new window will open asking for the contact details. Enter the details of the contact and click on Add
- Once you have added the contact, go to the distribution list to add this contact. For that, click on Teams & Groups 🠮 Active Teams & Groups 🠮 Distribution list 🠮 click on the list you created earlier.
- Now click on the members, scroll down and click on view all and manage members to view the member list and add a new member.

- It will show you a list of the added members. Now click on the add members to add a new member

- Now It will show the list of the contacts and the remaining members. Click on the member and then choose the Add
- Now add the email address of the distribution list in the manage email forwarding tab to forward emails to all members in the distribution list. Please refer to the steps above for this.
I hope these steps helped you set up email forwarding in Office 365 user accounts to single or multiple internal and external email addresses. Office 365 email forwarding is very beneficial and timesaving when you want to automatically forward your incoming emails instead of manually forwarding them.
Conclusion:
This guide shows a step-by-step procedure for setting up email forwarding in Office 365 user accounts. Whether you want to forward emails to external, internal, or multiple email addresses, this guide covers all Office 365 email forwarding topics. I hope you learned from this guide. Visit us for more informational articles.

