
This article is all about setting-up multi-factor authentication for Microsoft 365 mailboxes. Check this step-by-step guide to ensure how to bulk enable/disable MFA (Multi-factor Authentication) for Office 365 users. Enabling MFA helps better secure email accounts and Microsoft 365 access. Before moving on to methods we will discuss what Multi-factor Authentication is and why it is used for.
Contents
What is Multi-factor Authentication (MFA)?
Multi-factor Authentication (MFA) also known as two-factor authentication (2FA) is a security enhancement that helps us to add a layer of protection to the sign-in process. Enabling Multi-factor authentication prevents stealing your information from hackers/criminals. Microsoft supports multi-factor authentication in its products and services including Office 365.
Why MFA or two-factor Authentication is used?
By setting up Multi-factor Authentication MFA, we can add an additional layer of security to your Microsoft 365 account sign-in. When we enable MFA for our Office 365 accounts and try to log in then, first we need to enter our password and, also type a dynamically generated verification code sent to the registered number. Remember one thing before enabling MFA you must be a Global admin to manage MFA.
Easy Steps to Bulk Enable MFA for Office 365 Users
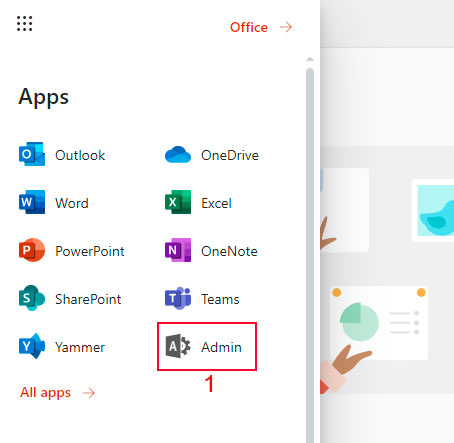
- Log in to your Office 365 Control Panel. Select Office 365 Admin Center from the left pane.
- From the Users > Active user’s page > Select Multi-factor authentication.
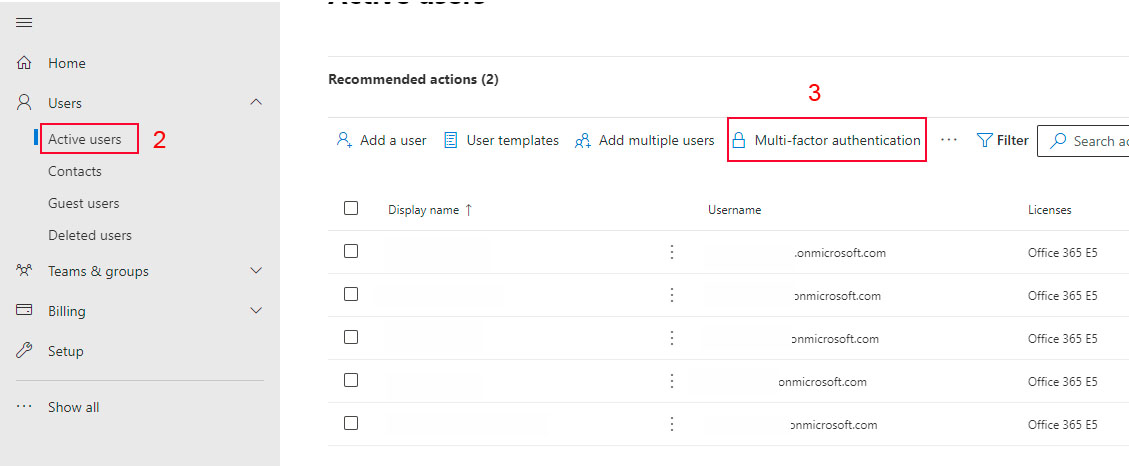
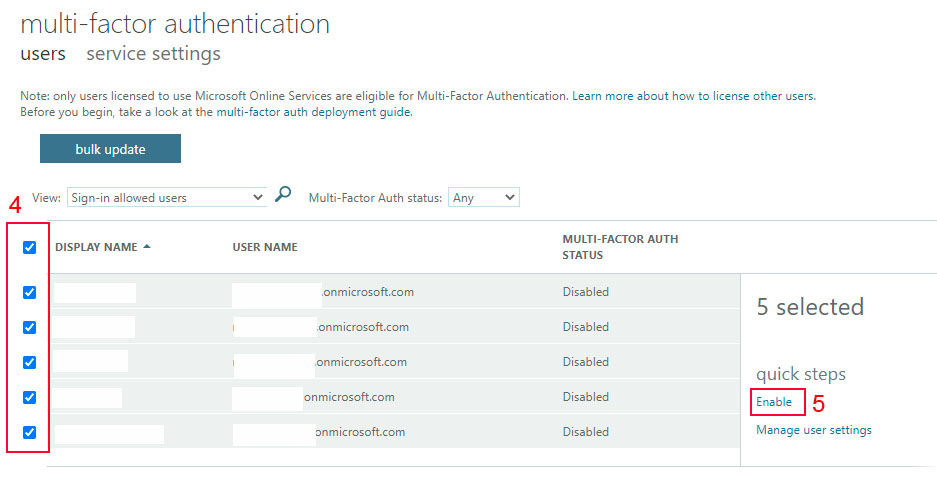
- Select the check box next to the users you need to enable multi-factor authentication for. Under quick steps, click on Enable link. That’s it.
Note: Once you turn on MFA for your Office 365 users and make them forced to use MFA then also enforce those users.
Steps to enforce multi-factor authentication for a user:
- Log in to your Office 365 Control Panel. Select Office 365 Admin Center from the left pane.
- From the Active user’s page > Select Multi-factor authentication.
- Select the check box next to the user you need to enforce multi-factor authentication. Under quick steps, click on Enforce.
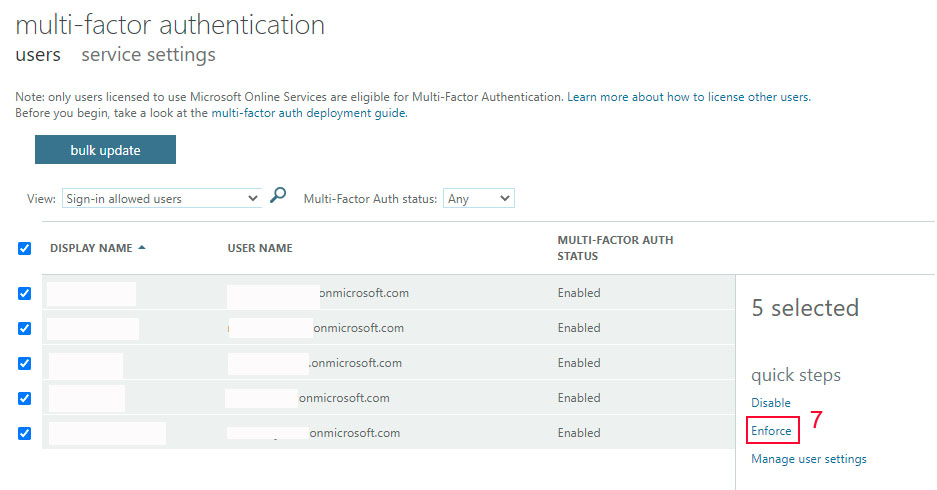
- When you are prompted, select enforce multi-factor authentication, then close.
Thus, the selected users are now required to configure and use multi-factor authentication for their accounts.
Turn-Off MFA (Multi-factor Authentication) in Bulk
If you have previously turned on MFA for Office 365 users and now want to turn it off then follow the given below steps.
- In the Microsoft 365 admin center, select Users from the left pane and click on Active users.
- On the Active user’s page > Select Multi-factor authentication.
- On the multi-factor authentication page, select required users or all users and set their Multi-Factor Authentication status to Disabled.

Wrapping up: This article describes how to set up multi-factor authentication (MFA) for Office 365 users. We also covered related queries like how to enforce or disable multi-factor authentication. If you like this article then don’t forget to like and share it with your friends.
Related Posts:
- How to enable or disable security defaults in office 365?
- How to create a new app password in Office 365?

