In today’s fast-growing digital world communication between teams is the key to success and it can be achieved through Office 365. Microsoft 365 comes with multiple features and one of the best features is Shared Mailbox. By using a shared mailbox multiple users can access a particular mailbox such as a customer supports email, departmental inbox, sales inbox, etc. instead of forwarding different users can access their required mailbox. Plus, the shared mailbox can be converted into the user’s mailbox again if required. In this article, we will discuss how to convert mailbox to shared mailbox in Office 365. Please follow the step-by-step instructions given in this article. First, we will see some of the limitations of the Shared Mailbox.
Contents
There are fewer things that every user needs to know about shared mailbox before the conversion process. Shared Mailbox comes with some barriers. Let’s know them one by one.
- To access shared mailbox users, need an active Office 365 license.
- Shared Mailbox comes with size limits. Every mailbox has an individual size of 50GB.
- Nobody can access directly into the shared mailbox. First, they have to log in to their own account.
- There is the possibility of data loss because users have the option of deleting the email.
Shared Mailbox is very helpful when it’s come to team-based projects where employees must unite to carry out the work effectively and communication is held with the external environment through the same email account.
There are three methods for converting a user’s mailbox to a shared mailbox. Let’s learn about all of the three methods.
Users can transform to a shared mailbox directly with this method.
- Open Microsoft Admin Center.
- Now choose Users then Active users. All the users will be shown. Choose any user, open mail tab and click on convert to shared mailbox in the right-side window.
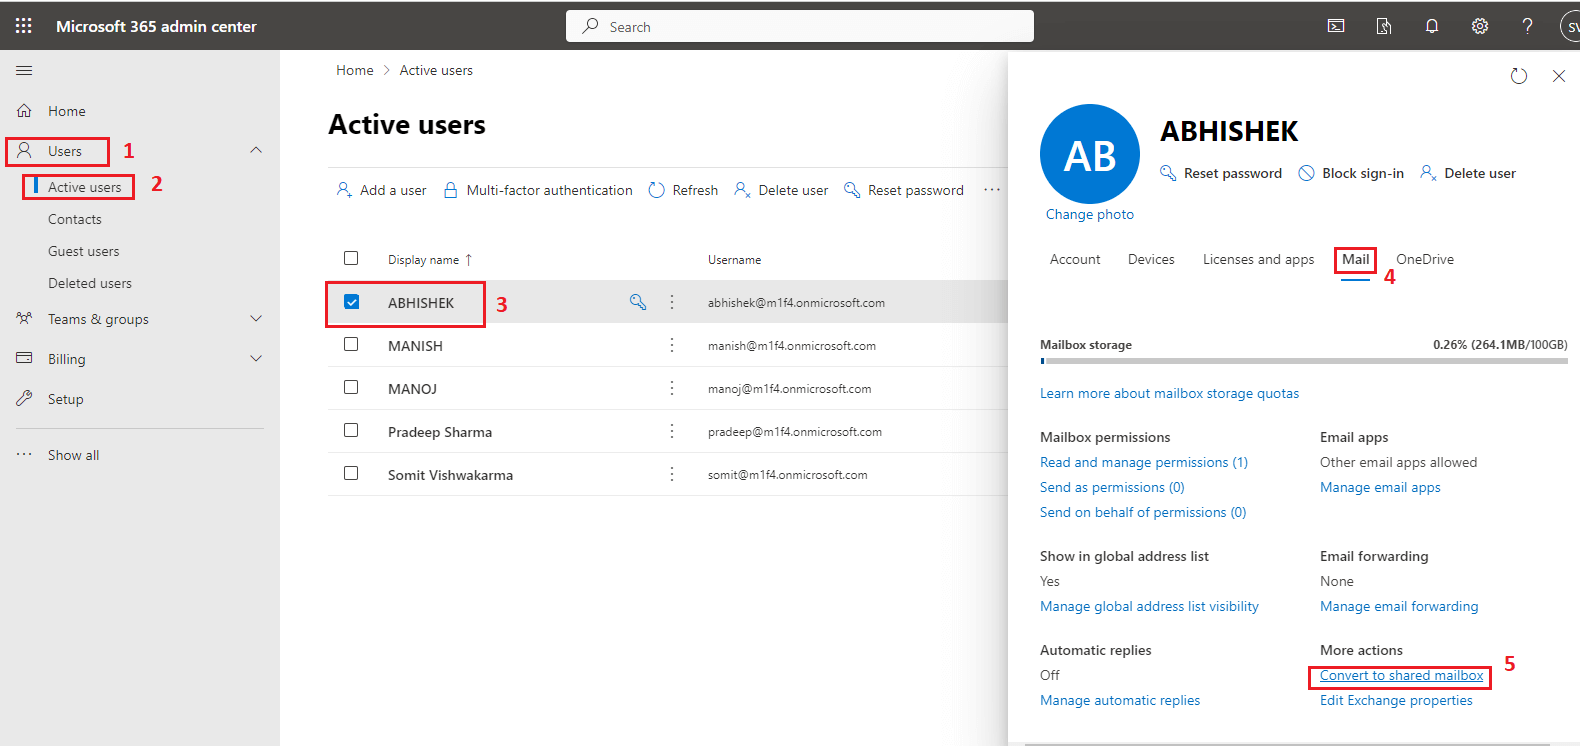
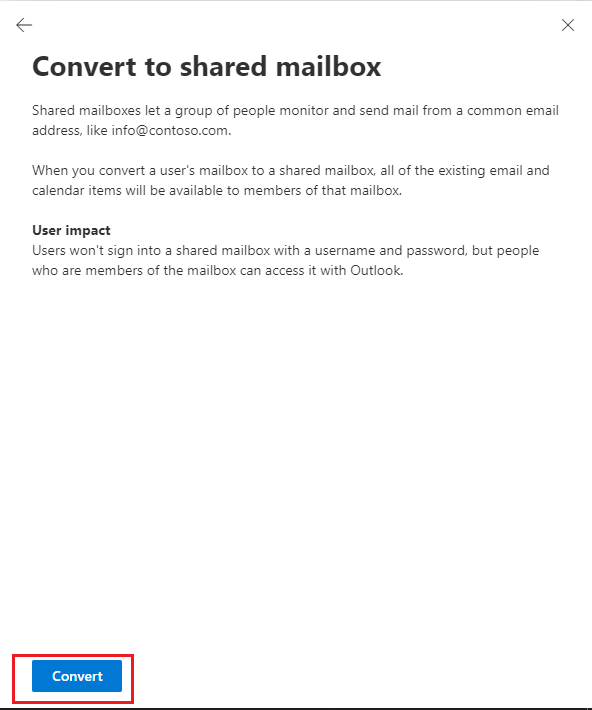
- Click on convert to provide your confirmation.
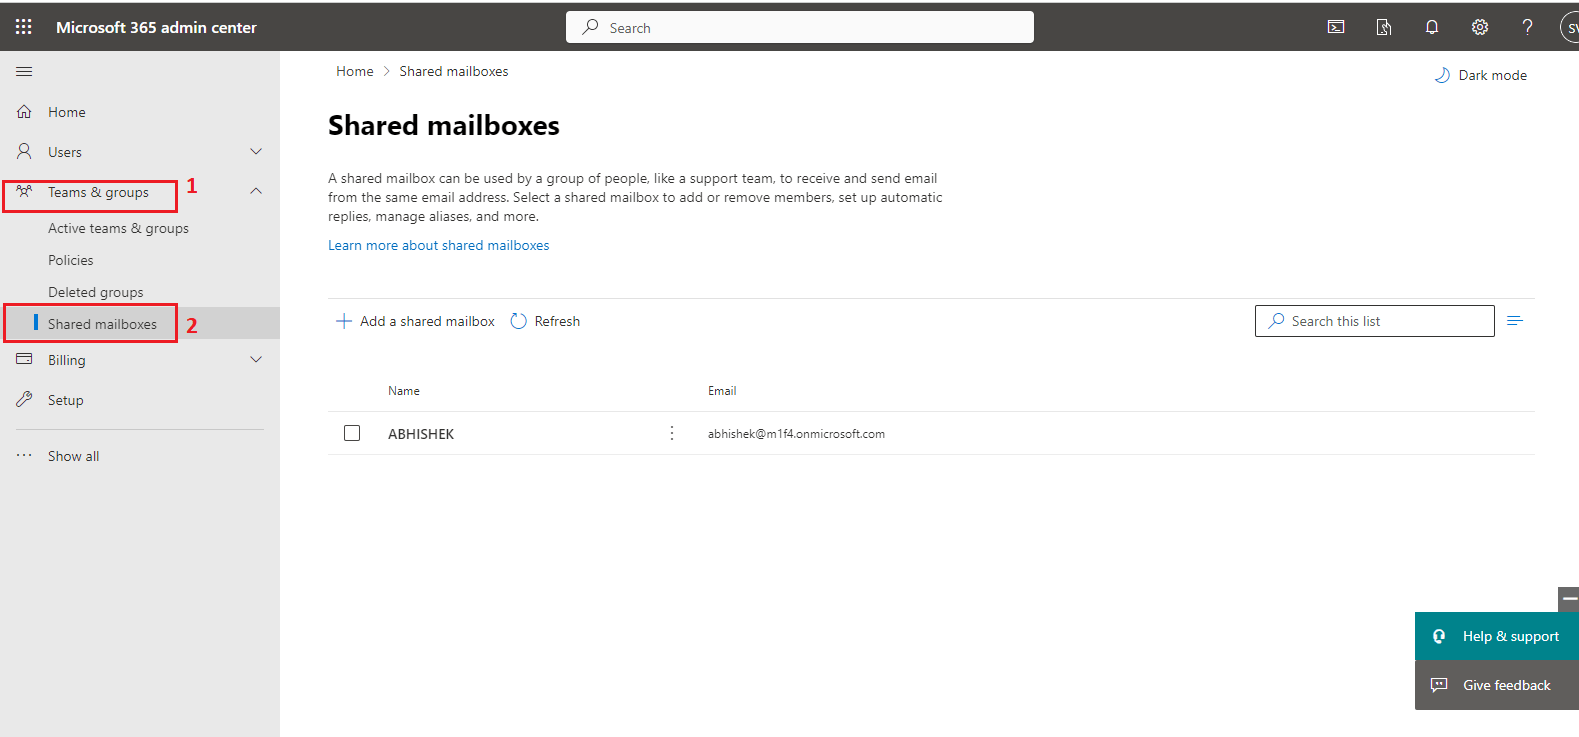
Users can view their shared mailbox under Teams & Groups.
Users can convert their regular mailboxes to shared mailboxes by using Exchange Admin Center.
- Open Exchange Admin Center.
- Click on Recipients then mailbox. Choose any mailbox and Click on Others tab and select Convert to Shared Mailbox.
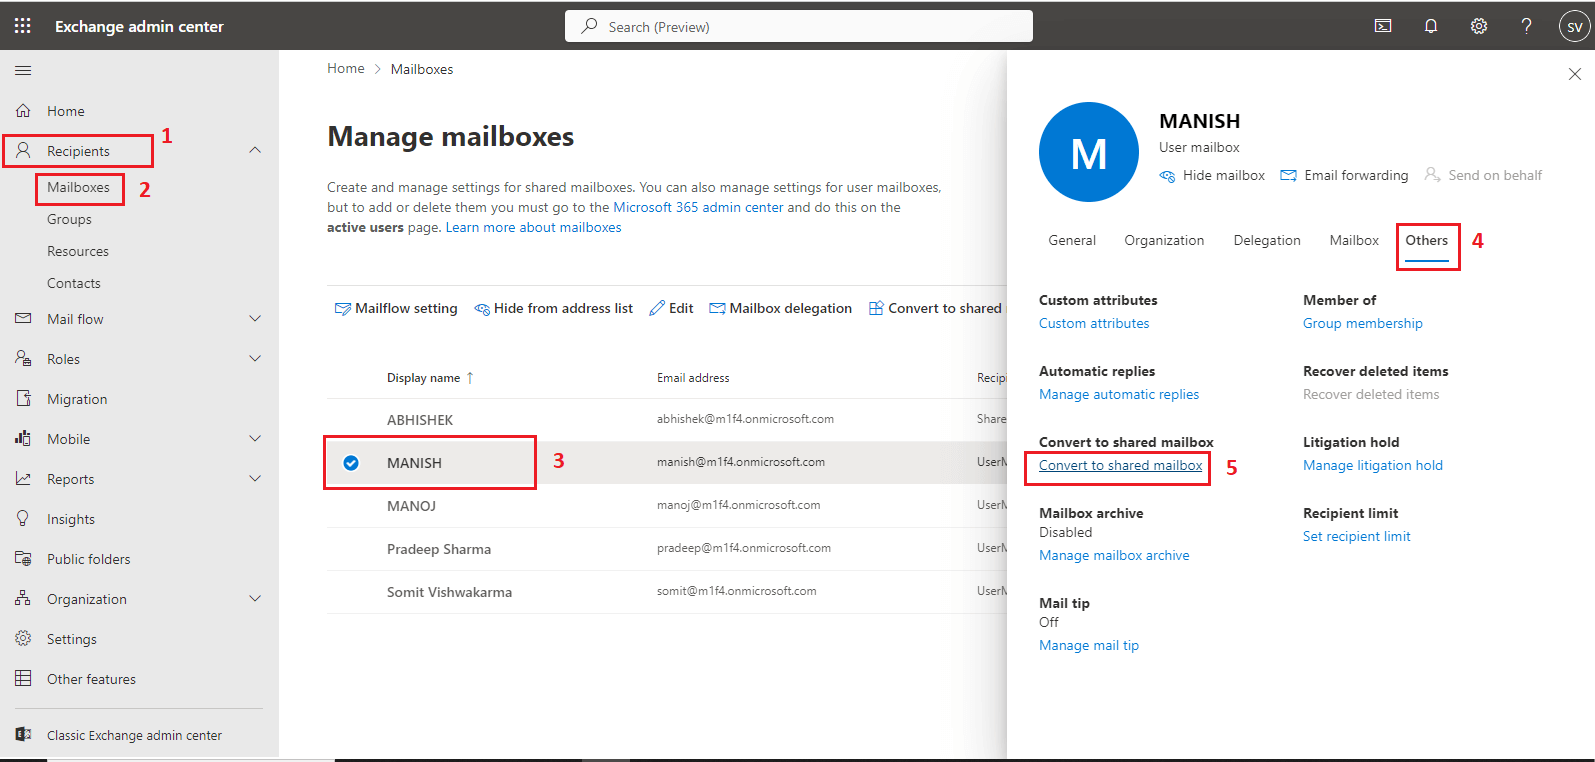
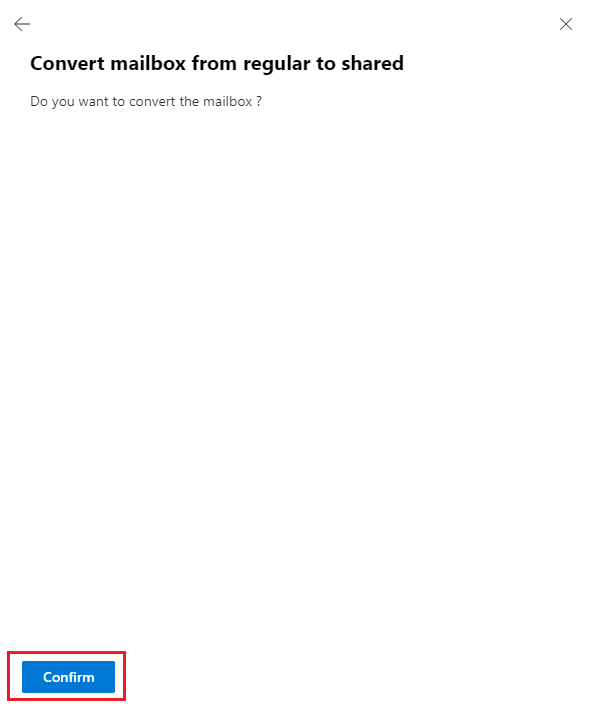
- Now confirm the conversion.
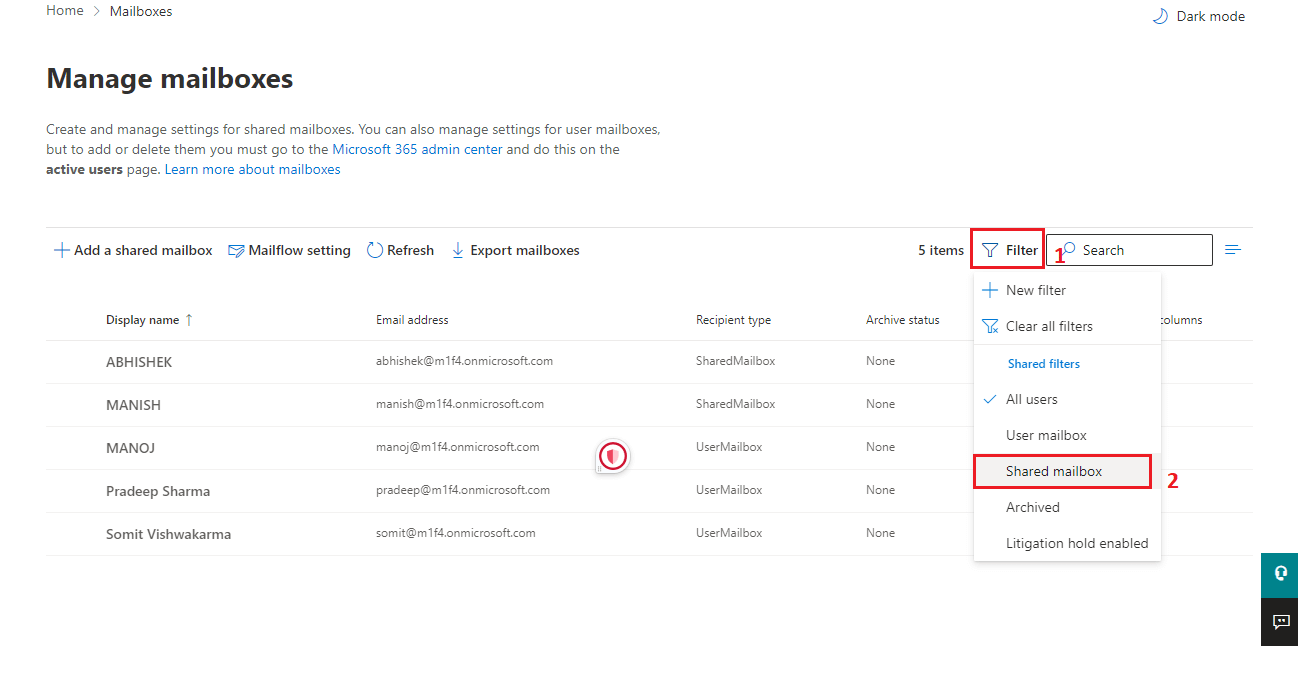
Shared Mailbox is recorded in the same user’s mailbox. If users want to check it quickly then click on Filter > Select Shared Mailboxes.
PowerShell is another way for the conversion. All you have to do is to run a single command to convert the mailbox to a shared mailbox. Before starting the process make sure you have installed the Exchange Online Module in PowerShell.
For converting the regular mailbox to a shared mailbox, we will use Set Mailbox cmdlet. All you have to know is the name of the mailbox and the email address.
Connect-ExchangeOnline
- Convert the mailbox to shared.
Set-Mailbox -Identity [email protected] -Type Shared
For verifying if the email was successfully converted or not, we use the different commands mentioned below:
Get-Mailbox -Identity [email protected] | Select Name, RecipientTypeDetails
Conclusion
In this article, you have learned about how to transform a user mailbox into a shared mailbox with different methods. Converting a regular mailbox to shared mailbox is easy but you should follow the steps carefully. Shared Mailbox does not require any license but only provides 50 Gb of mailbox size.If you faced any issues while converting the mailbox you can comment down. We will be happy to solve all the problems.
Also Read: Convert Shared Mailbox to User/Regular Mailbox Office 365

