As we all know Shared mailbox can be accessed by multiple peoples who has been provided access. We can always convert Share Mailbox to user mailbox or regular mailbox. It can be needed if you have accidentally converted regular mailbox to Shared or you do not need it anymore. A regular user mailbox requires license. If you have converted your shared mailbox to regular user mailbox then you need to assign license to that mailbox to access it.
In this blog, we will guide you through the process of converting a shared mailbox to a user regular mailbox in Office 365 using Exchange Admin Center and Windows PowerShell. First we will see some differences between Shared Mailbox and Regular Mailbox.
Contents
Below are some differences between the both of two:
- No license is required up to 50 Gb storage.
- It Can be accessed by multiple users.
- Permission required to access shared mailbox
User Mailbox
- License is required.
- Log in with user credentials.
- Mailbox size depends upon subscription plan.
Above are some differences between Shared mailbox and user mailbox. Now we will see the process of conversion to regular mailbox from Shared.
There are two ways through which users can convert Shared mailbox to regular. One is through Exchange Admin Center and other is using Windows PowerShell. We will share the process using both methods one by one.
Using Exchange Admin Center
To convert shared mailbox to user mailbox in Office 365 follow the steps below.
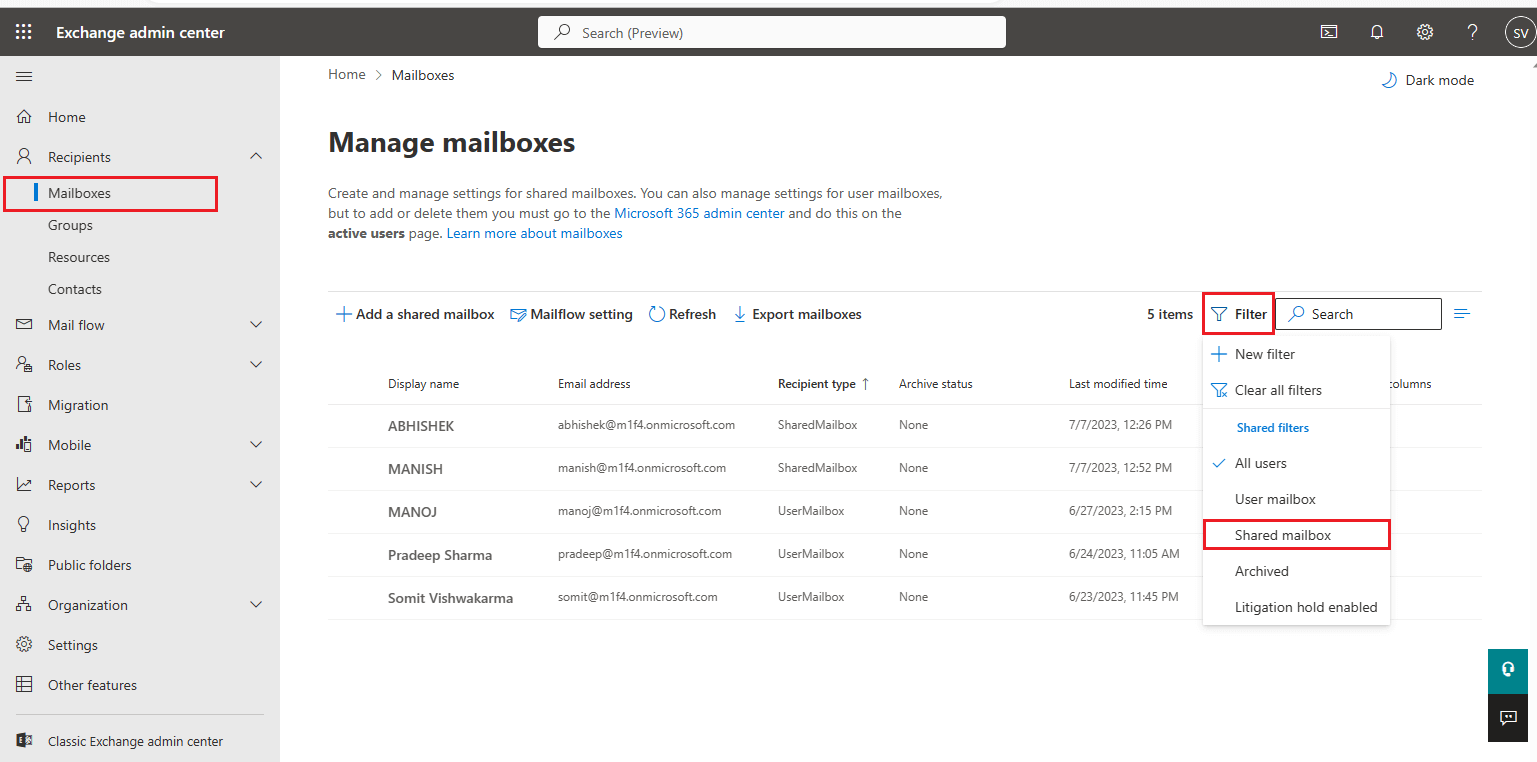
- Go to Exchange admin center.
- Click on the Recipients then mailbox in the left sidebar. All mailboxes will be shown on the screen.
- Click on the filter Tab and choose Shared Mailbox. It will filter out the mailboxes and only show you the Shared Mailbox. Or you can search the mailbox by the name.
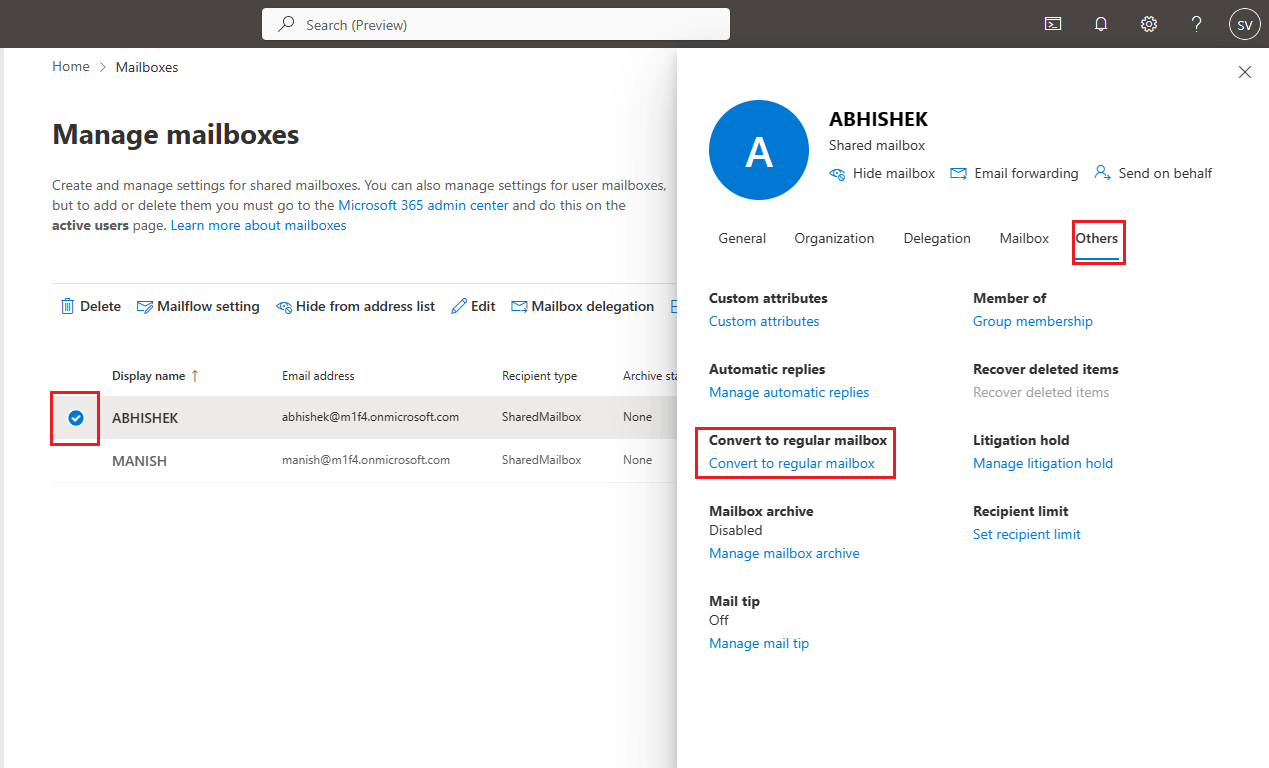
- Choose the mailbox that you want to convert to user mailbox from shared mailbox. A window will open on the right side with mailbox information, choose the others tab and click on the Convert to regular mailbox.
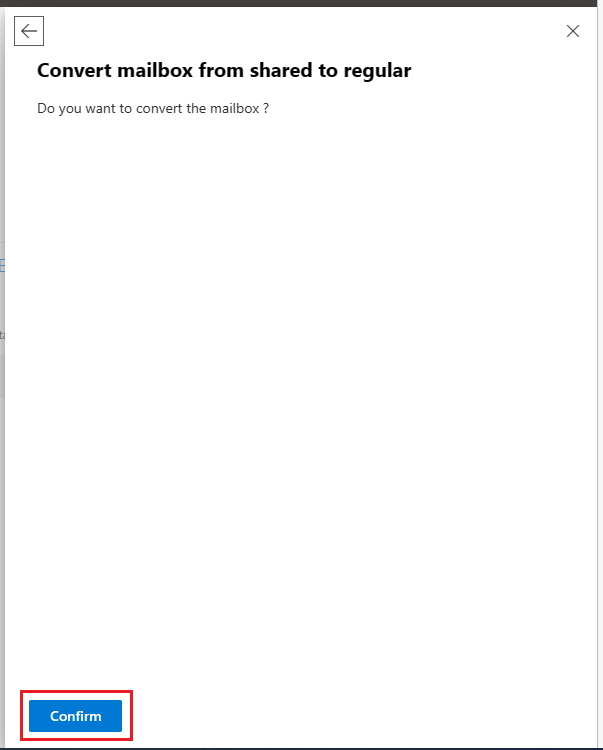
- A new window will open asking for the confirmation to convert mailbox from shared to regular. Click on the Confirm button to proceed.
- Once confirmed, it will show you status for the completion of conversion.

- Once converted assign the license and reset the password to access the mailbox.
Above steps explained how to convert shared mailbox to user mailbox using Exchange Admin Center.
Follow the below steps to perform the conversion from Shared to regular mailbox.
- Open Windows PowerShell and connect to Exchange Online.
- Type the below command and run it.
Set-Mailbox –Identity “[email protected]” -Type Regular
Note: Use shared mailbox address in place of [email protected]. Also it will not provide you with any success message but if it fails it will show you the error.
- Run the below command to check if the mailbox is converted successfully or not.
Get-Mailbox -Identity “[email protected]” | Select Name, RecipientTypeDetails
Once converted, provide an appropriate license and reset password to access the mailbox. With this simple procedure one can easily convert shared mailbox to user regular mailbox.
Conclusion:
We hope this article on converting shared mailboxes to regular mailboxes has been informative and helpful to you. With this article, you can now ensure that every team member has their own dedicated mailbox. By converting shared mailbox to user mailbox, you can improve collaboration and ensure that messages are directed to the right individuals promptly. This not only saves time but also eliminates confusion and enables better tracking of conversations.
Read More: Increase Outlook Attachment Size Limit

